Its time to add those details to complete the scene. One of those details is a means to move the turnouts. At Ackerville the main siding switches are set by the dispatcher everything else is hand thrown.
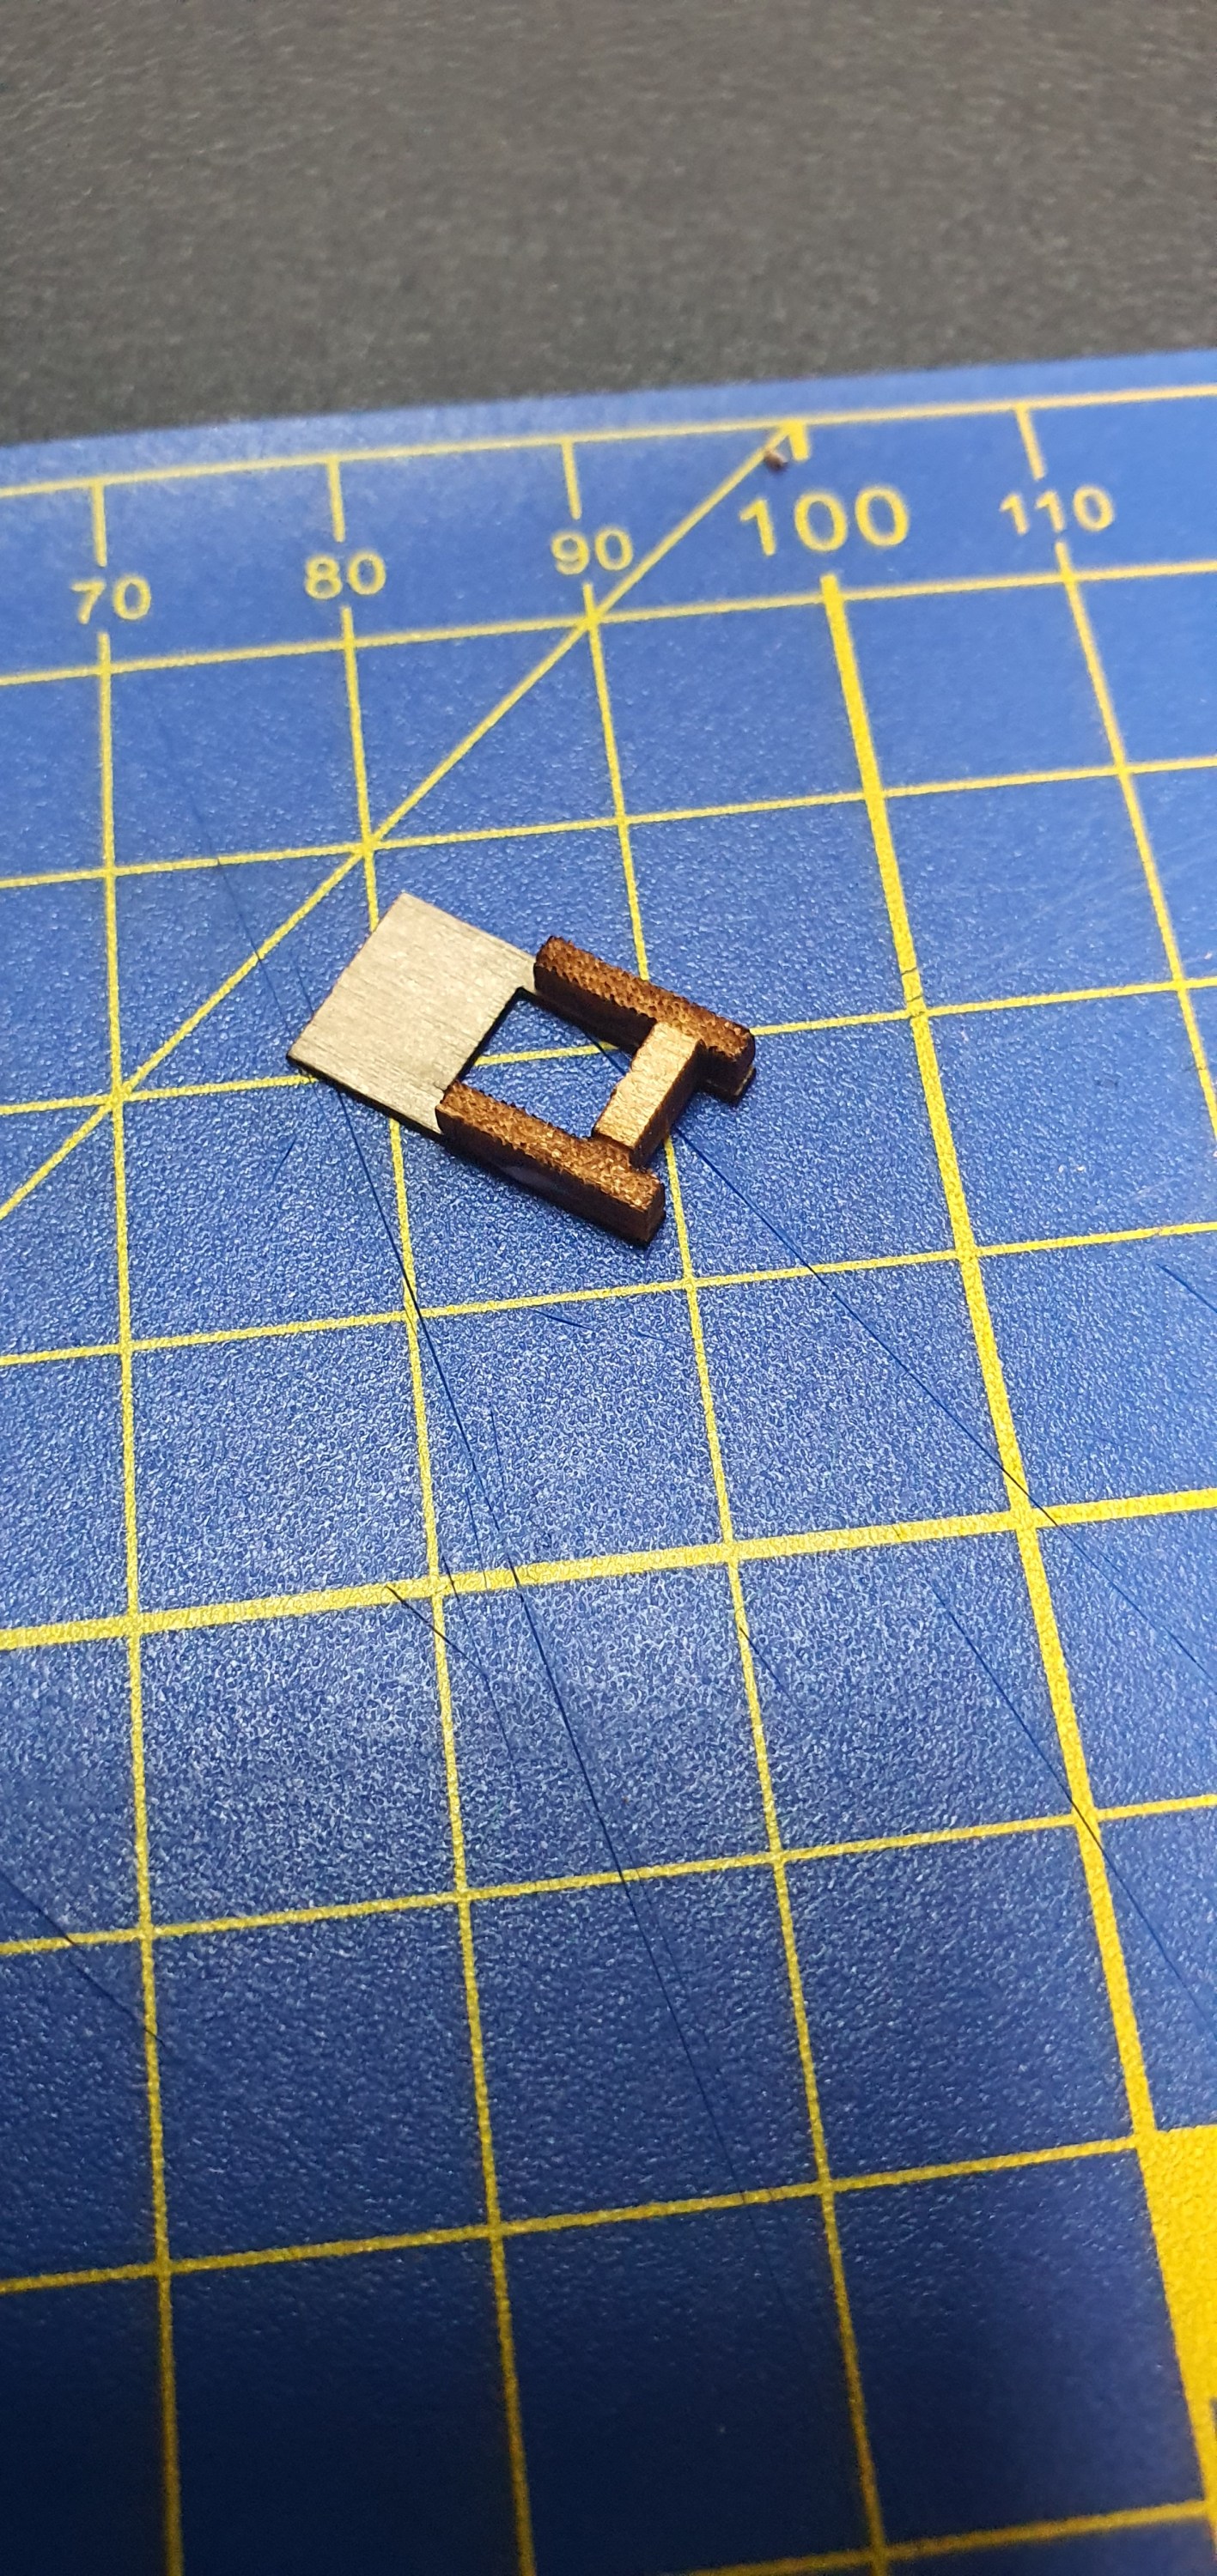
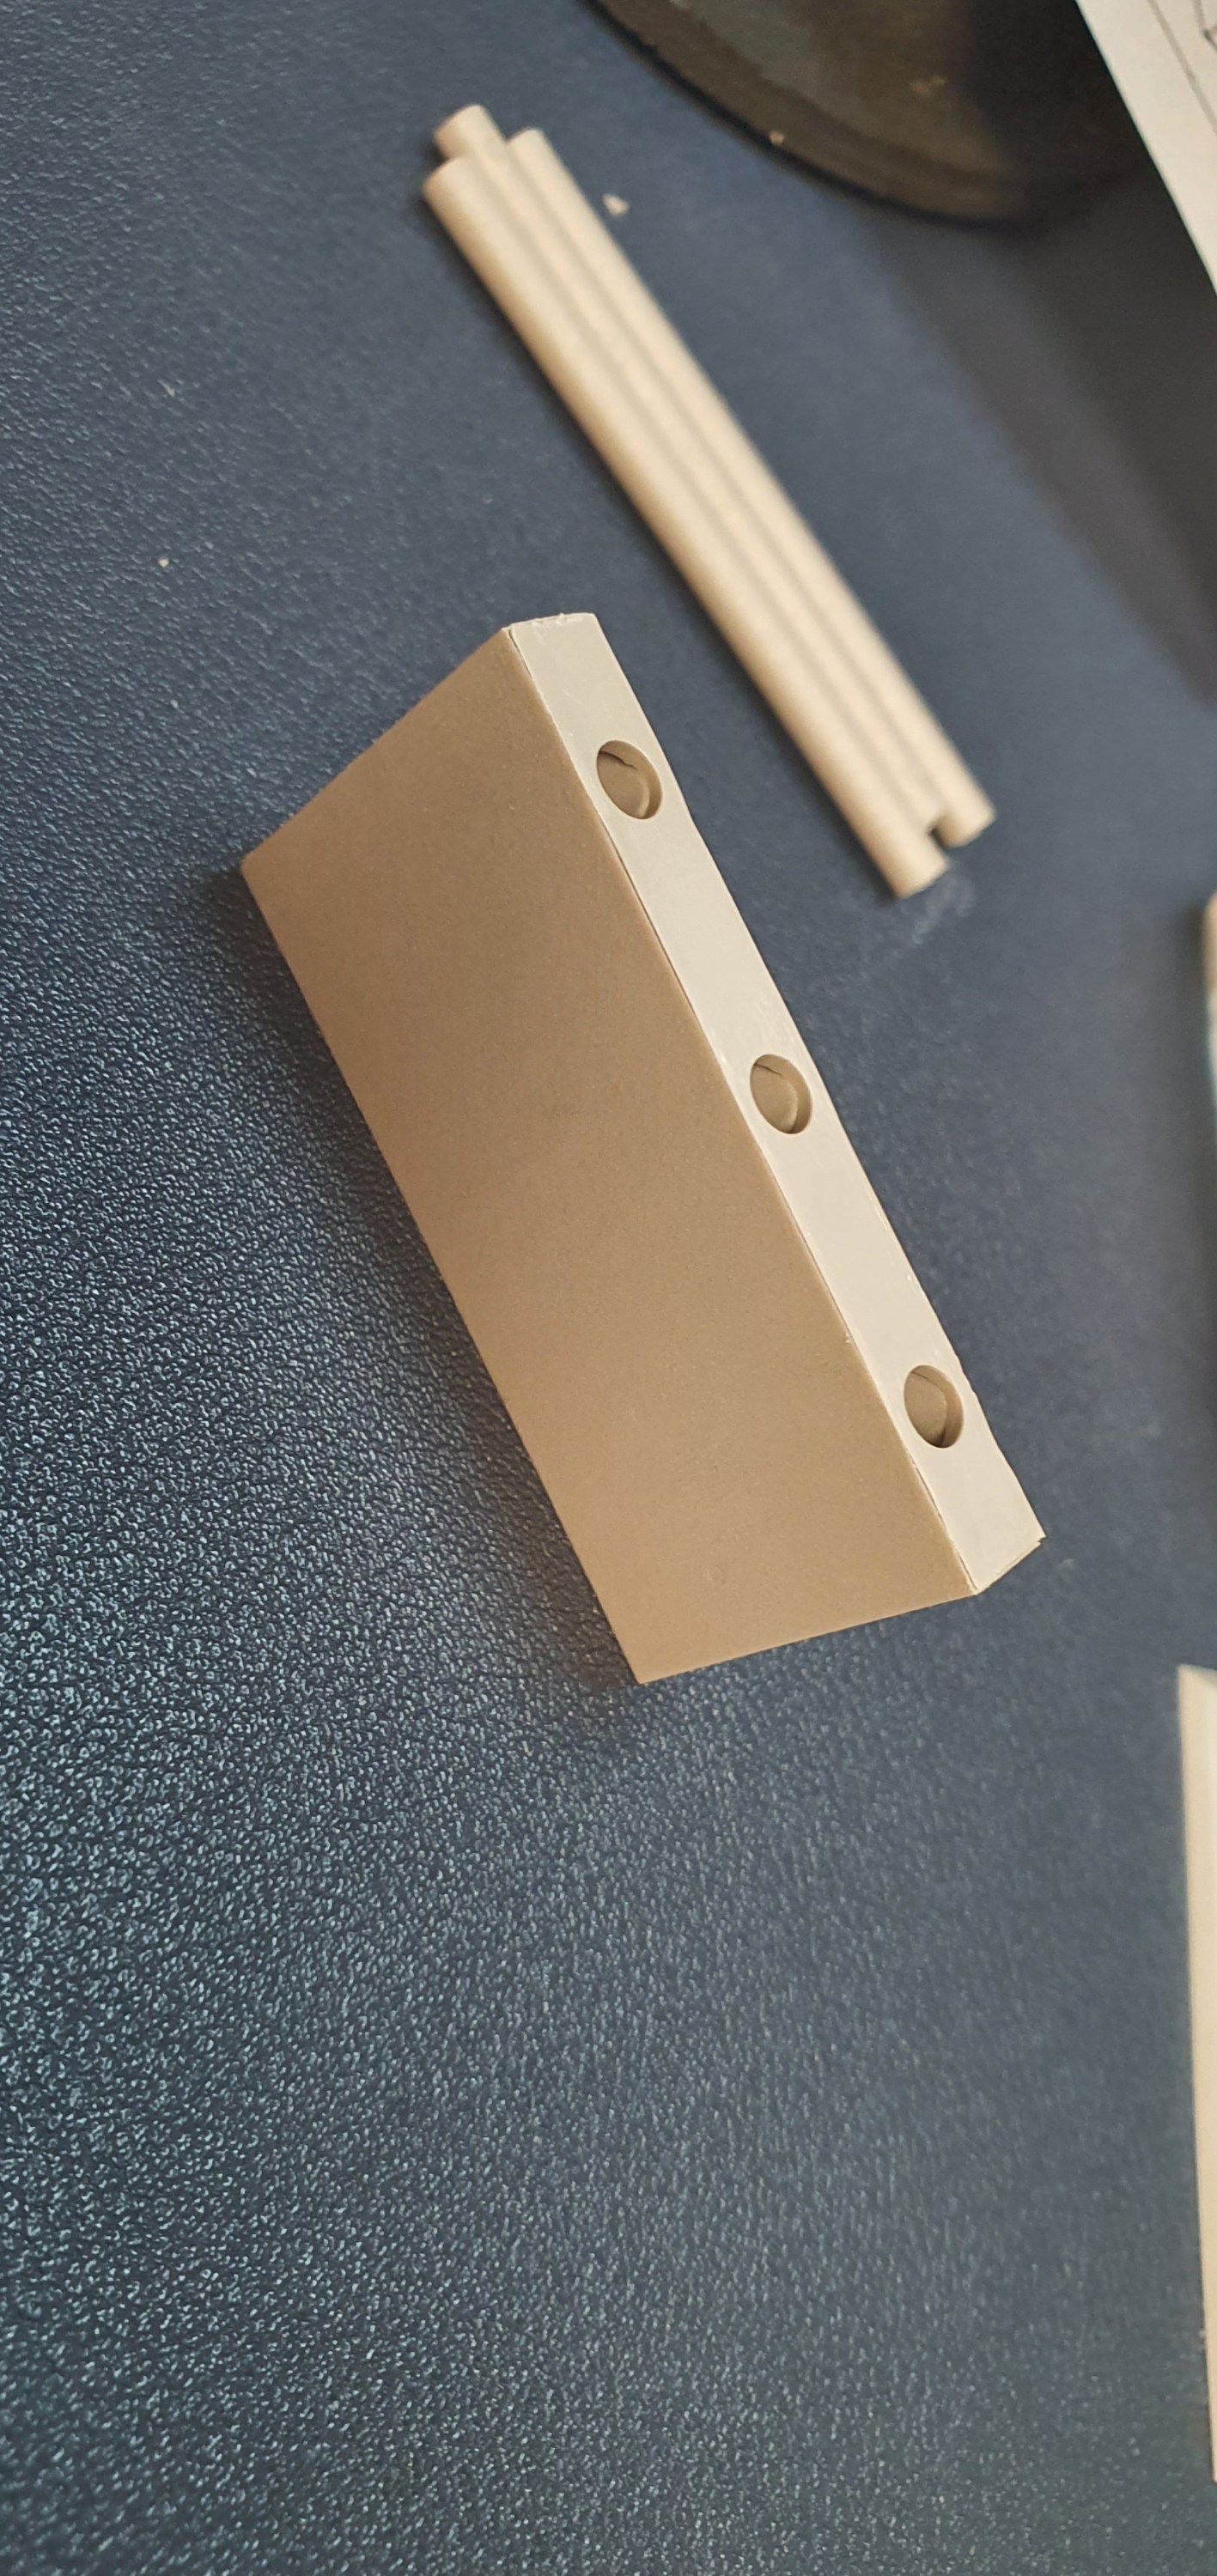
Switch stand base
My switch stands are a Canadian laser wood kit from Osbournes. Each switch stand has 7 parts, it’s a pretty simple kit that’s just a case or wash rinse repeat until you have built them all. All I used to build these was a knife with fresh blade, pva glue and a cut mat.
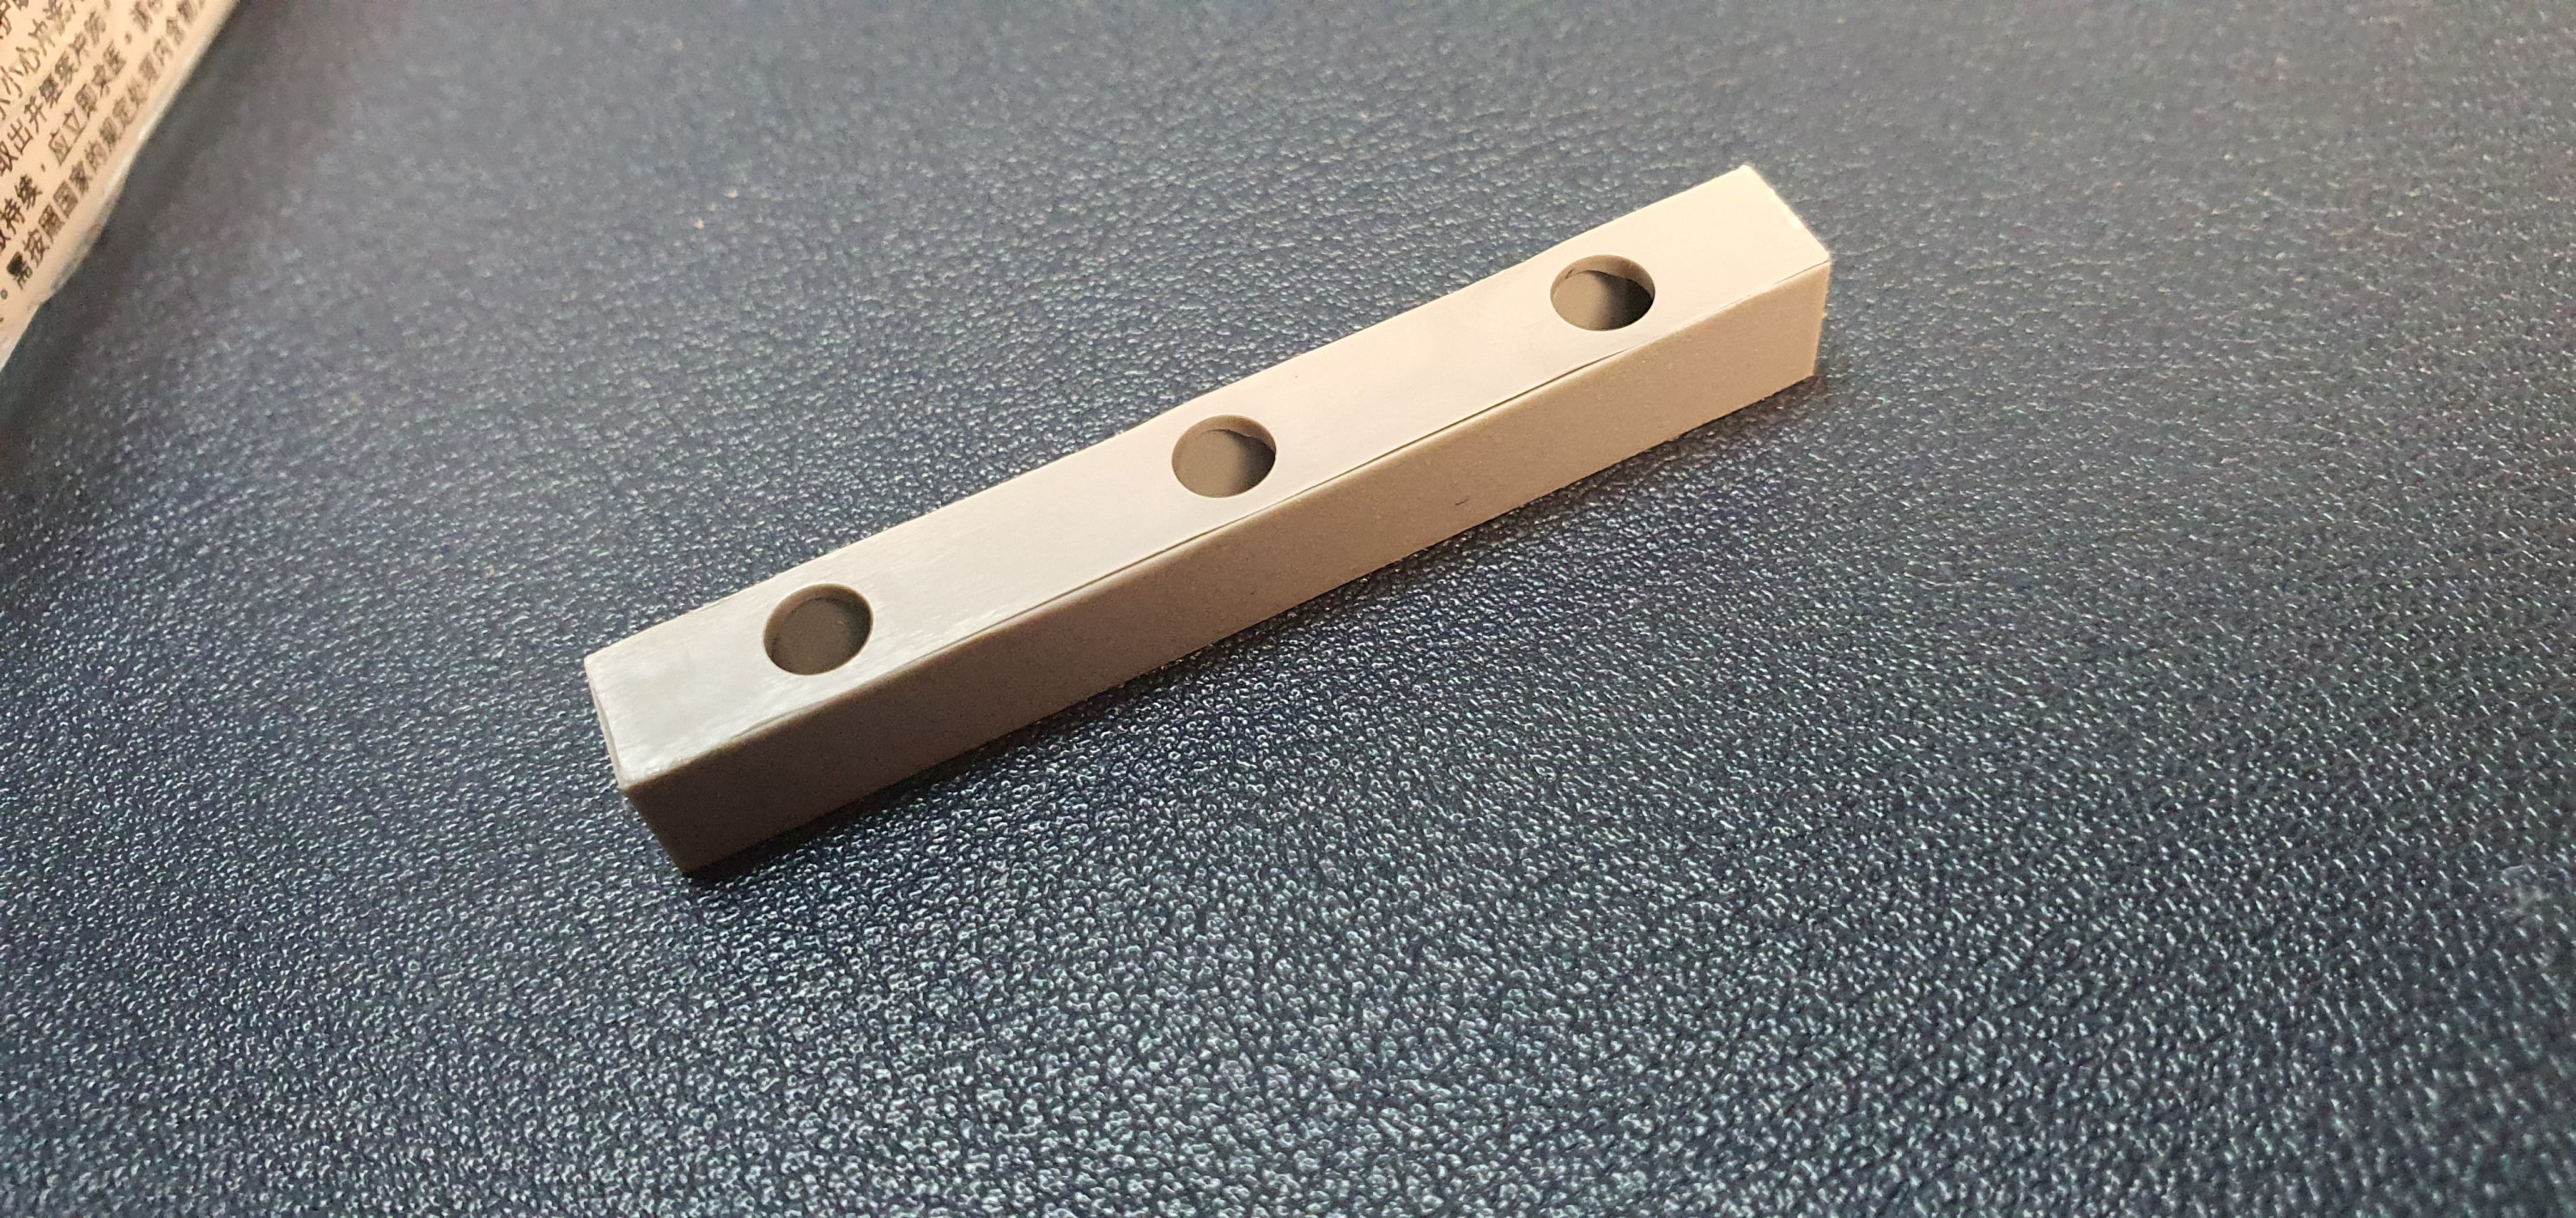
Once the top and bottom are assembled the metal part attaches to the ties.
Well we are Done, the assembled switch stand it’ll get some paint in the next part of this series.
Just a quick post to say thank you to a fellow model railroader for sending more snow to Orkney. I don’t know what the Orkney drug dog thought of this package.
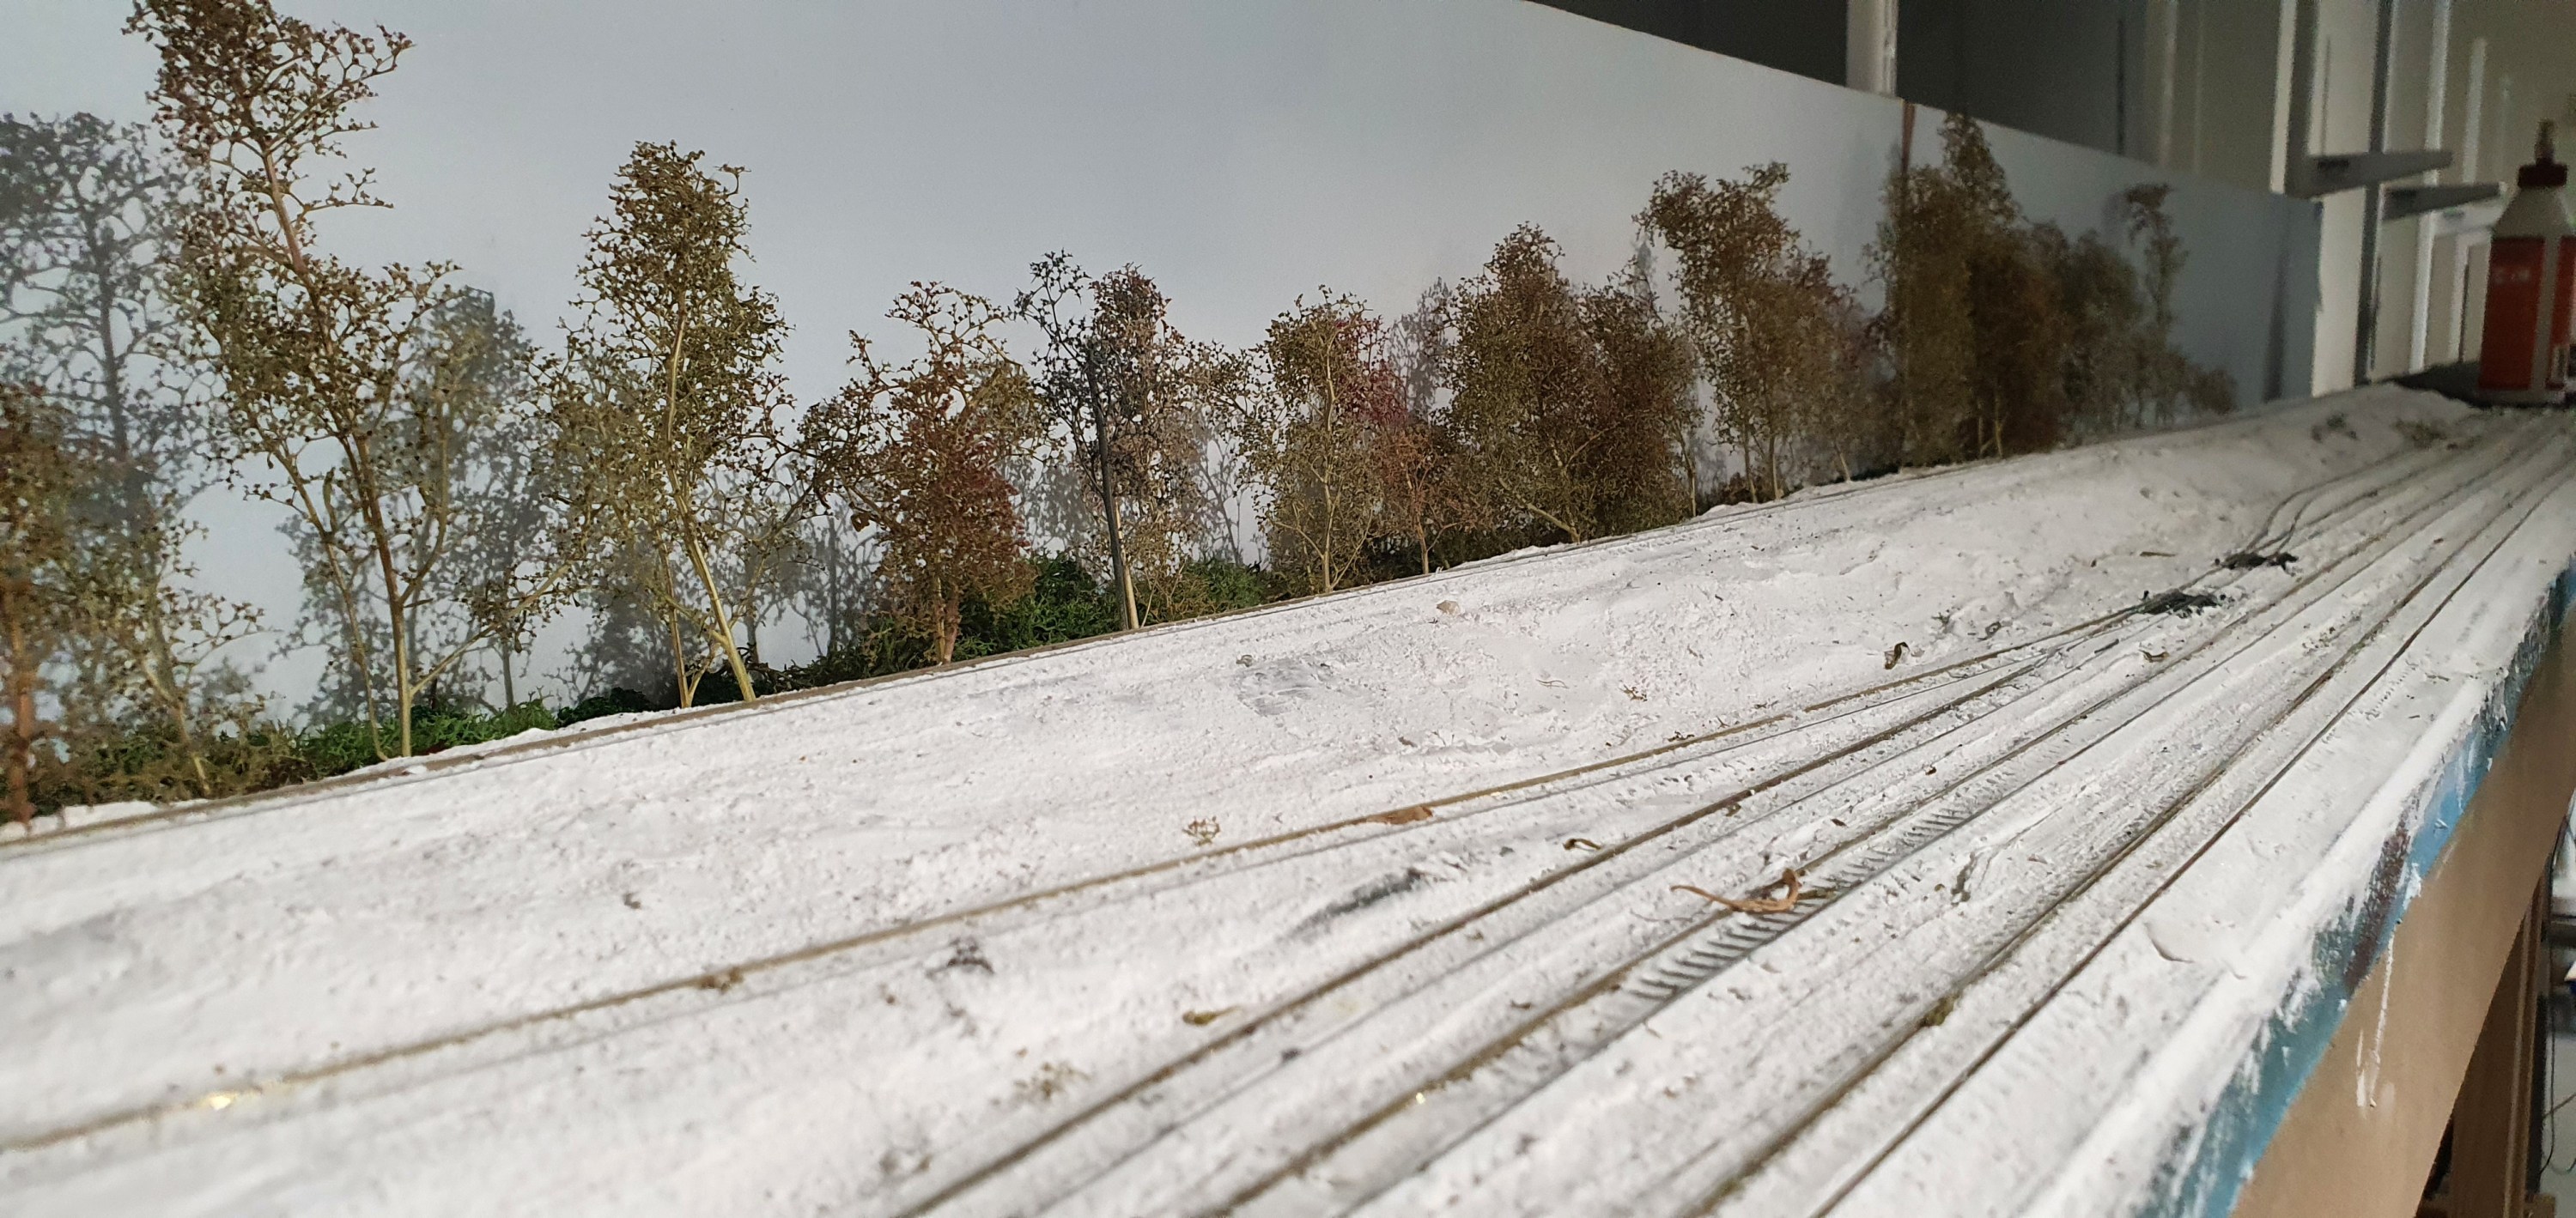
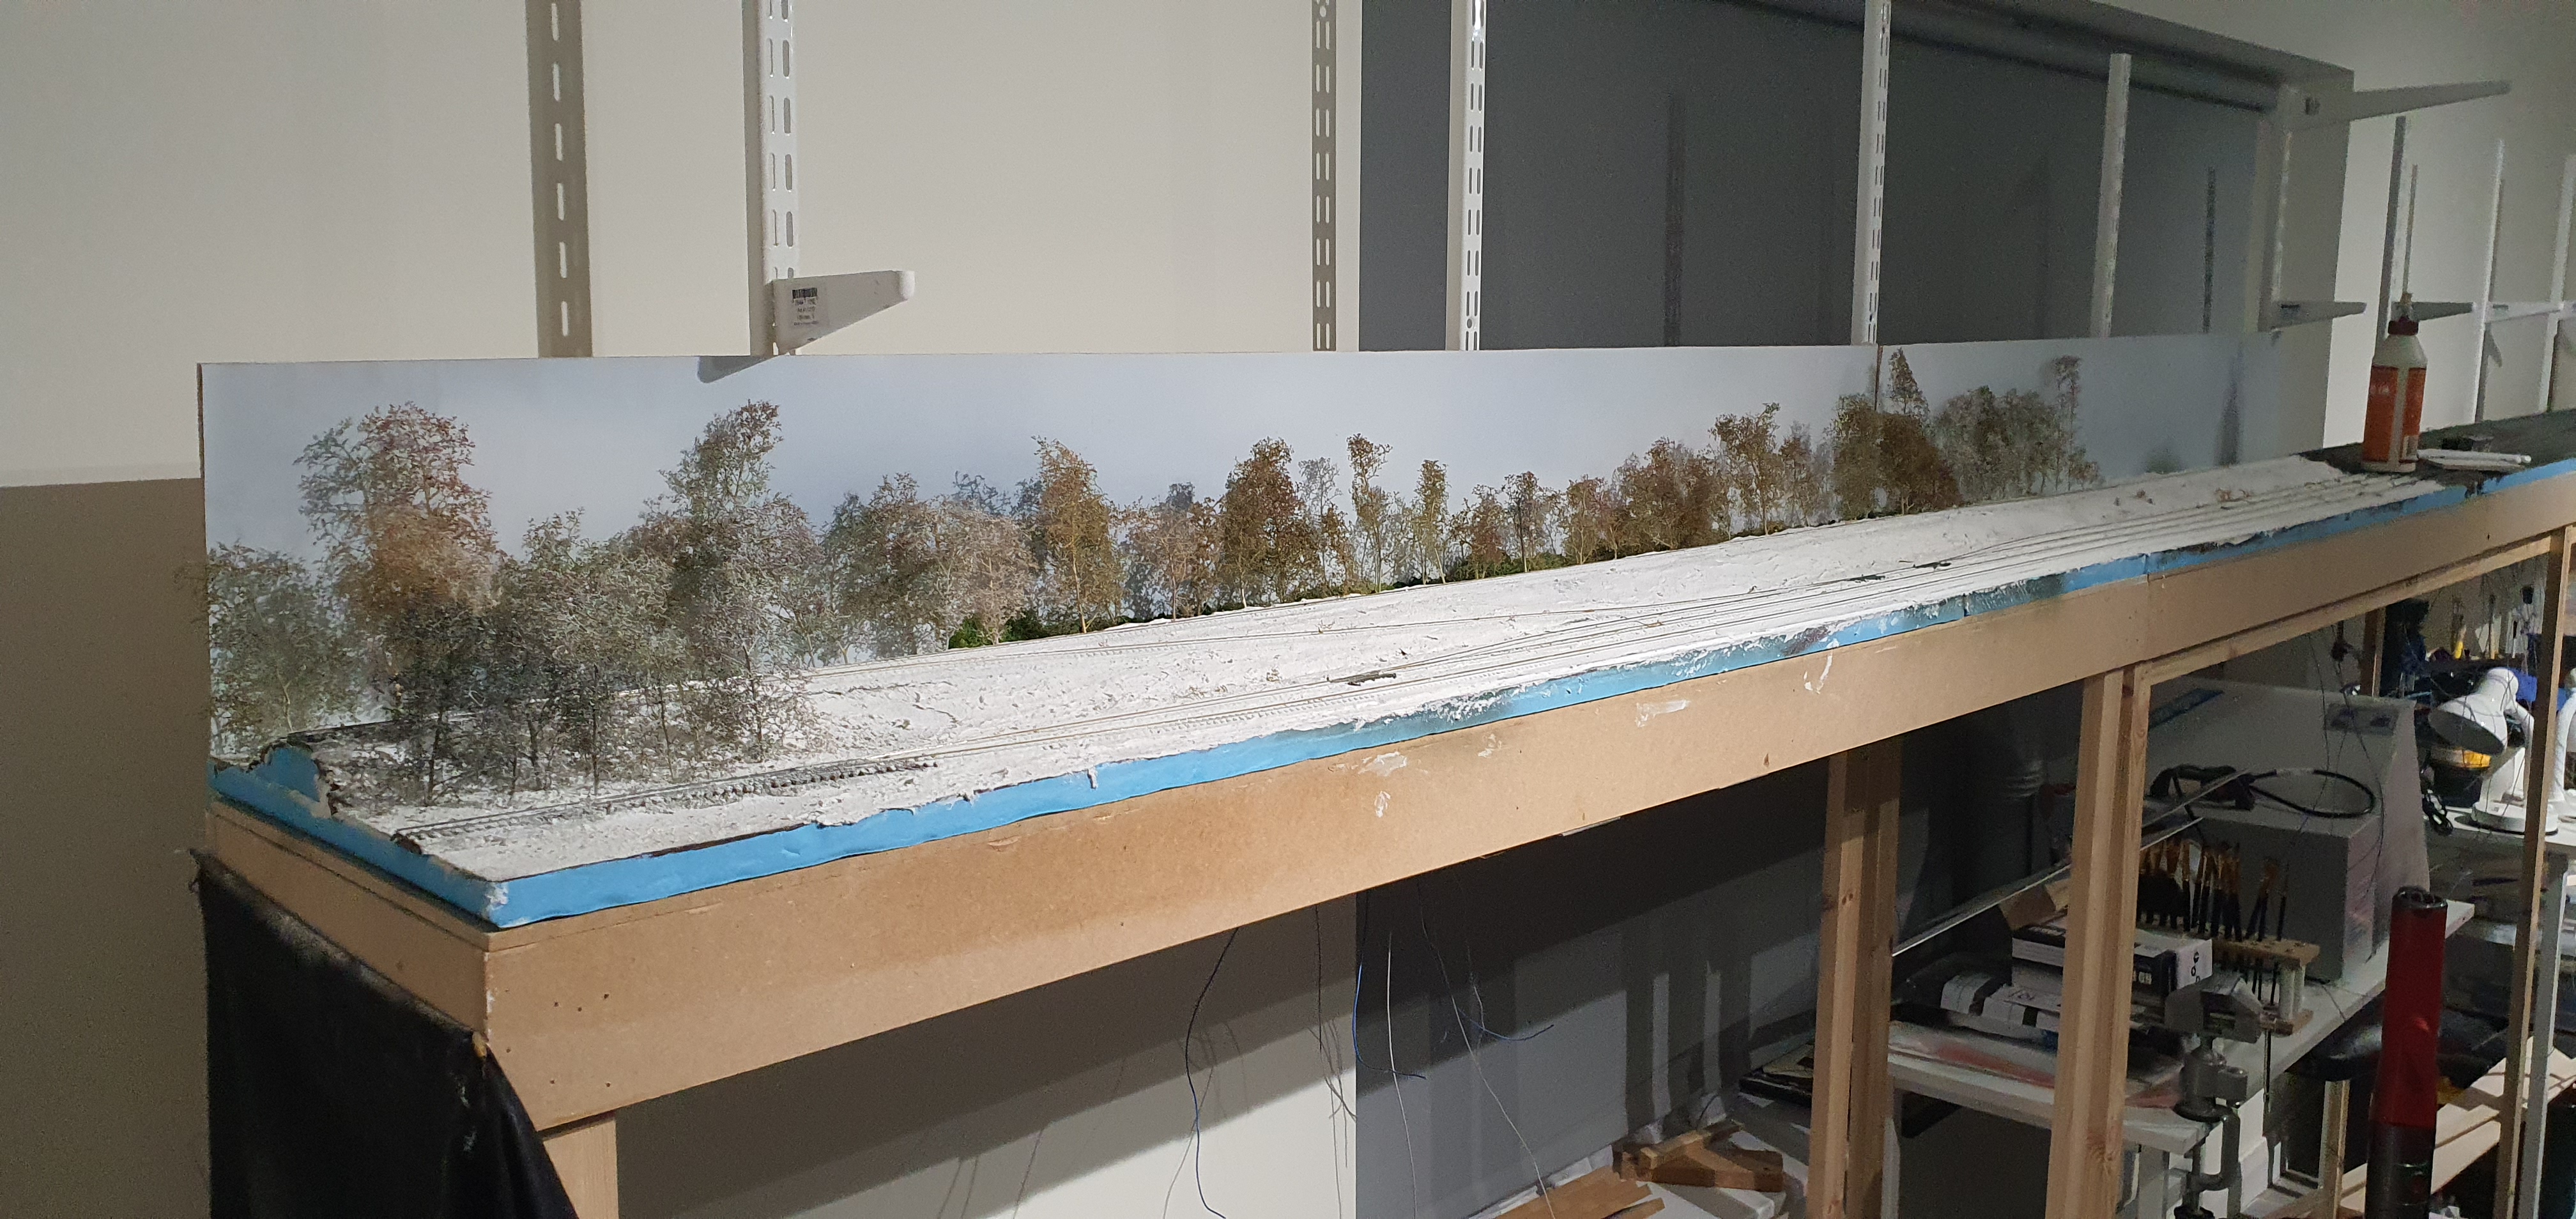
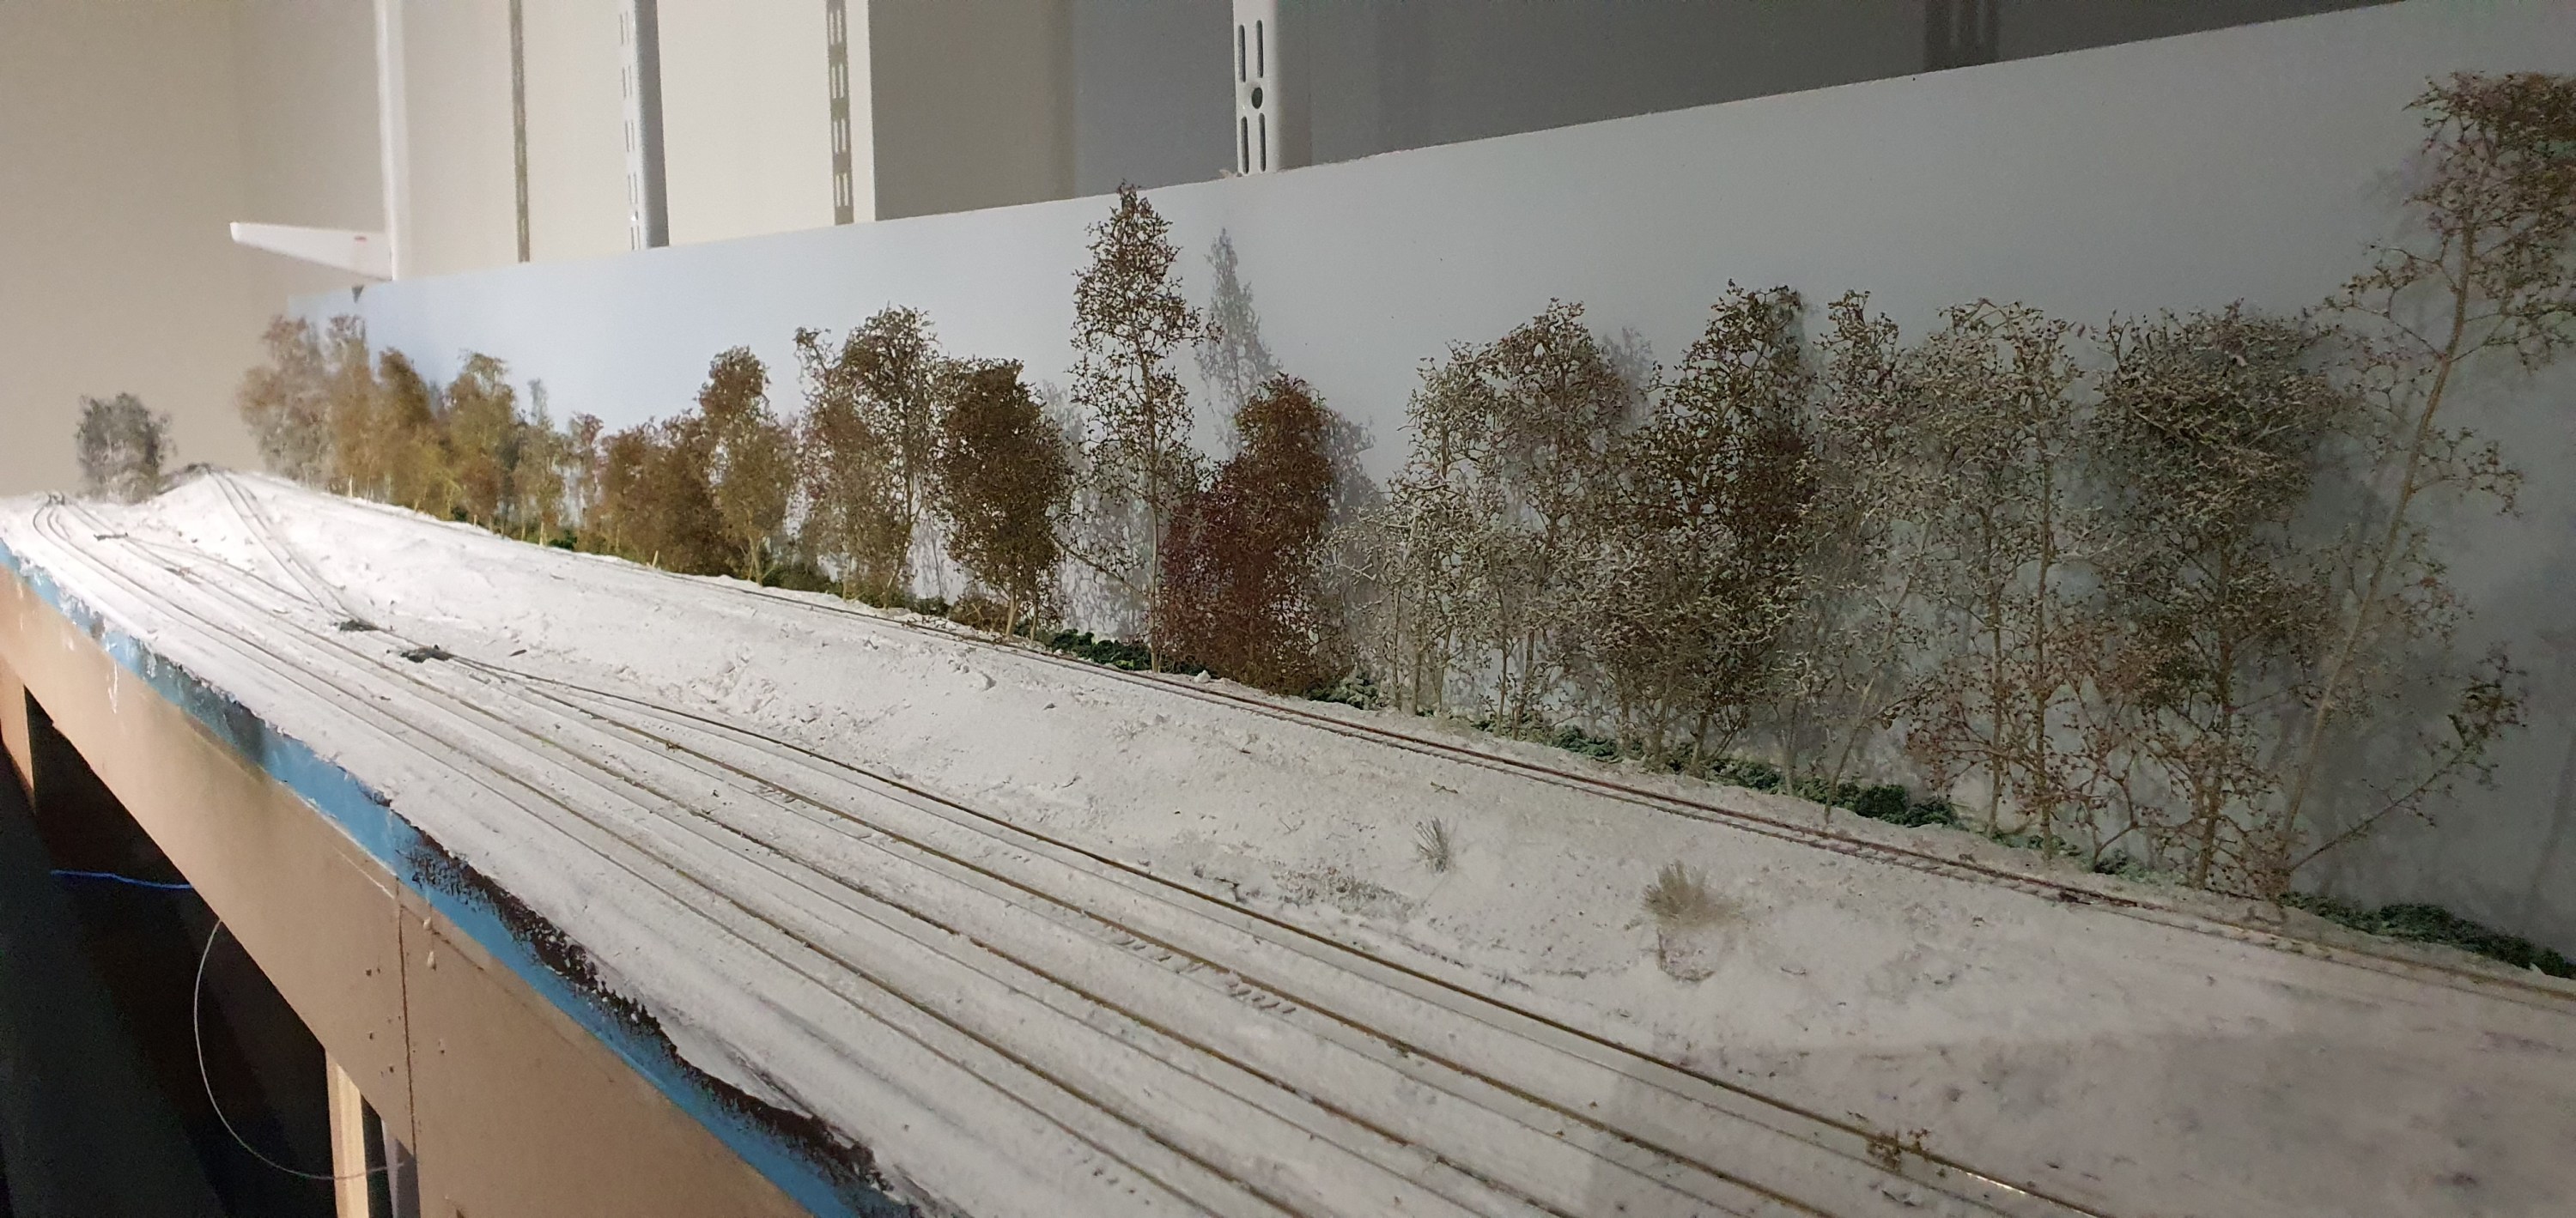
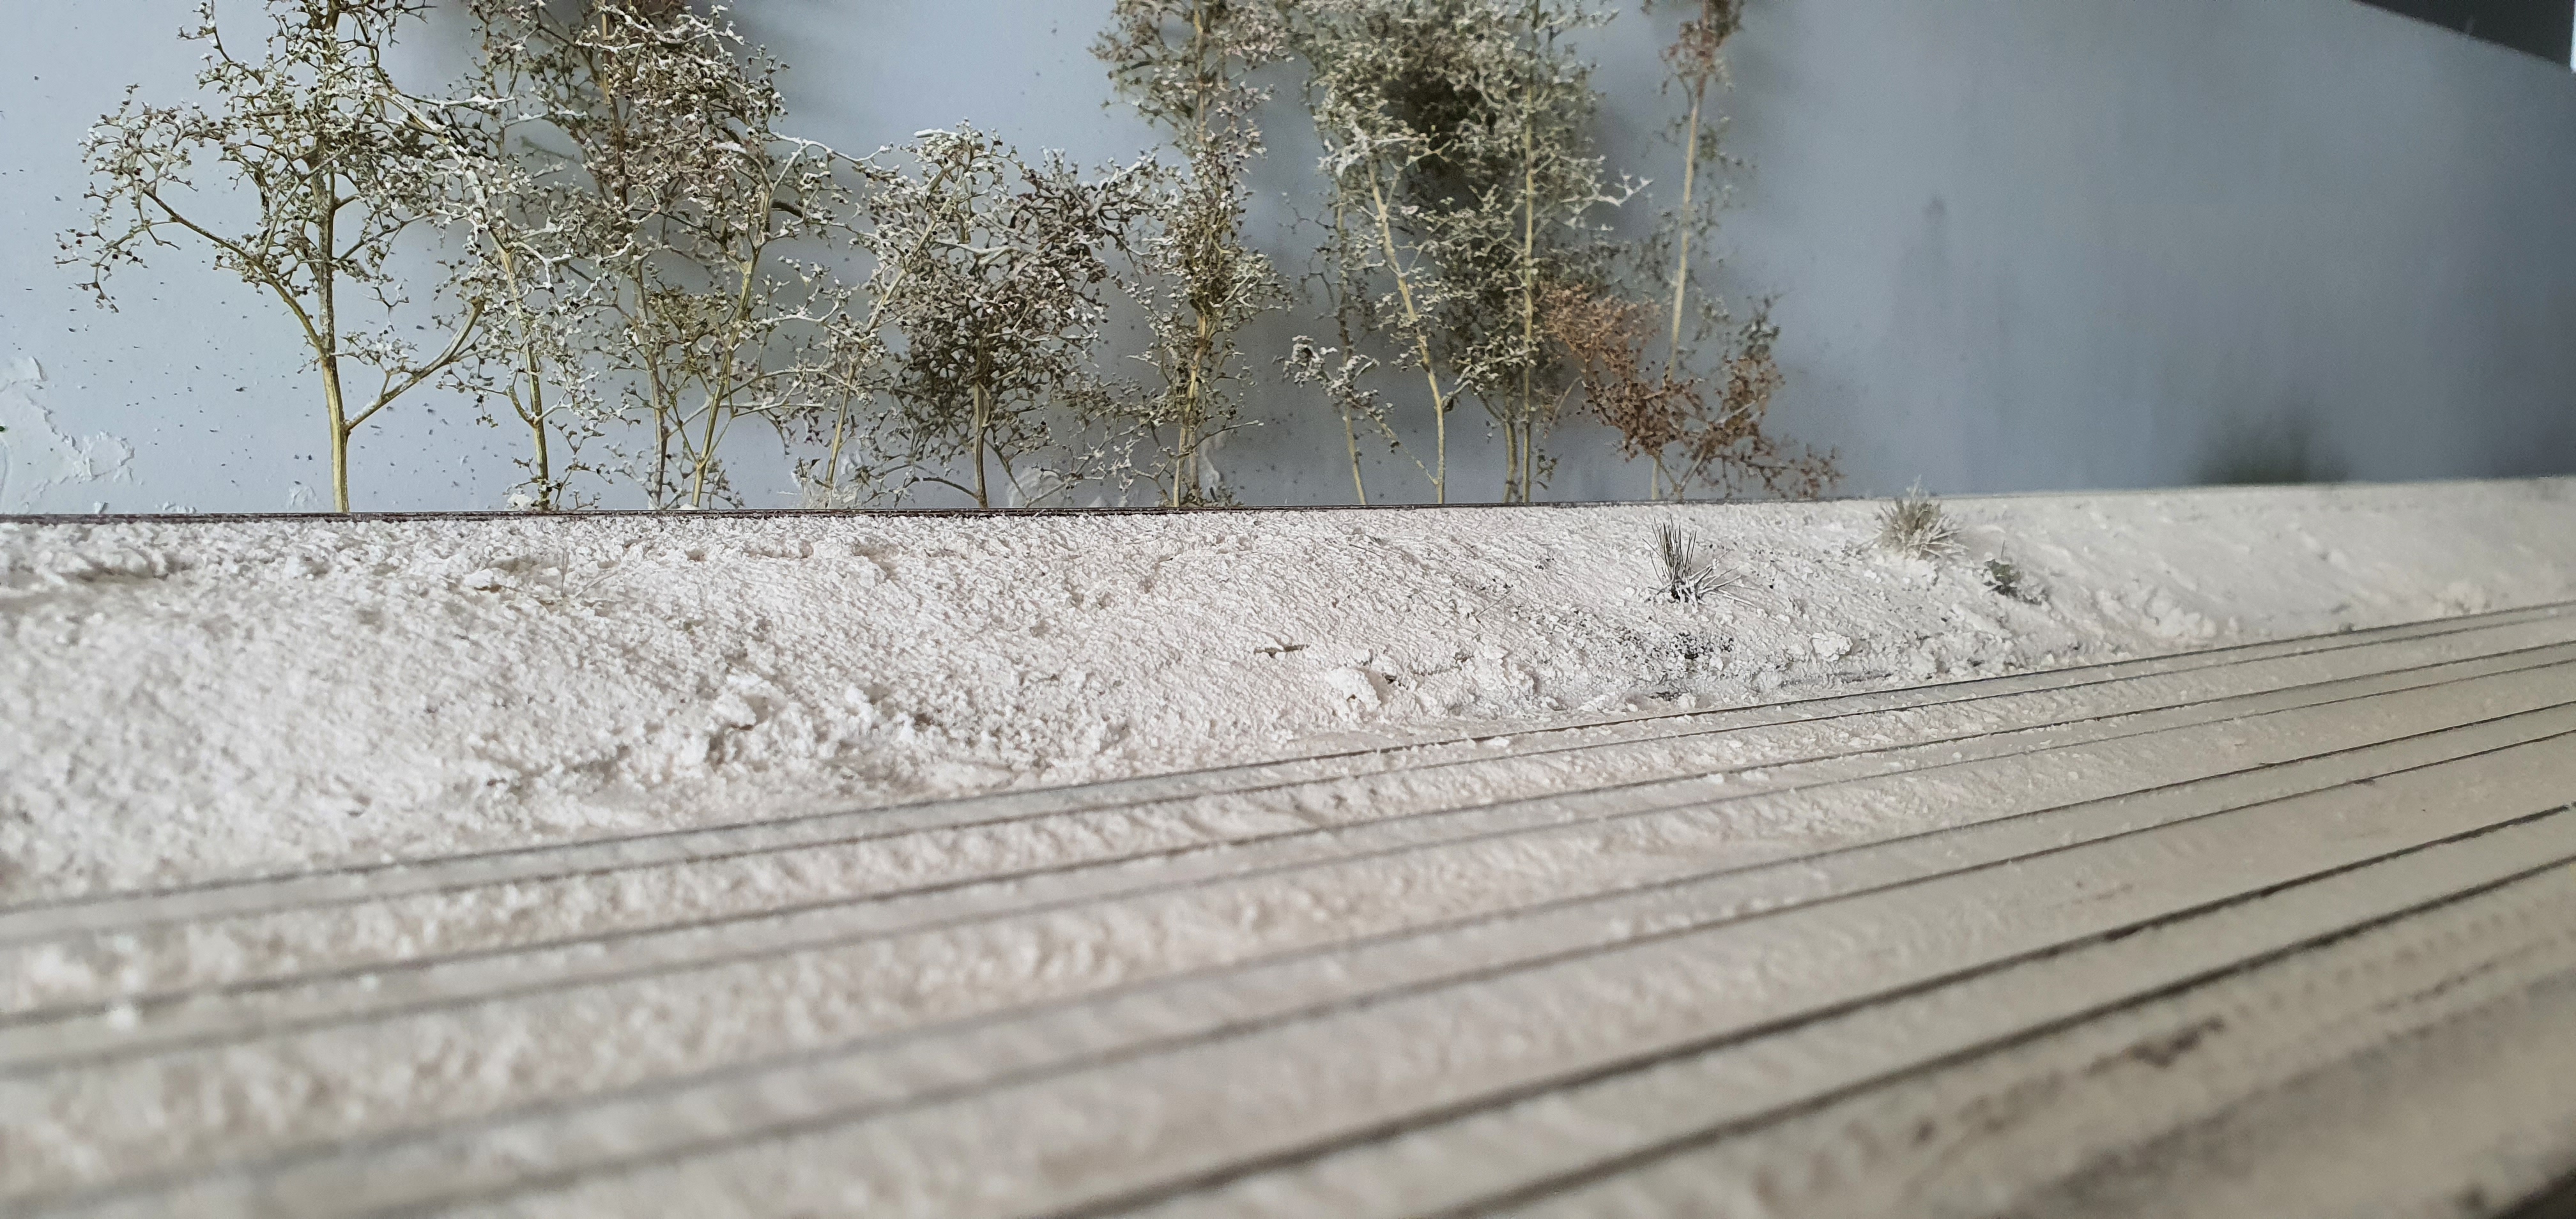
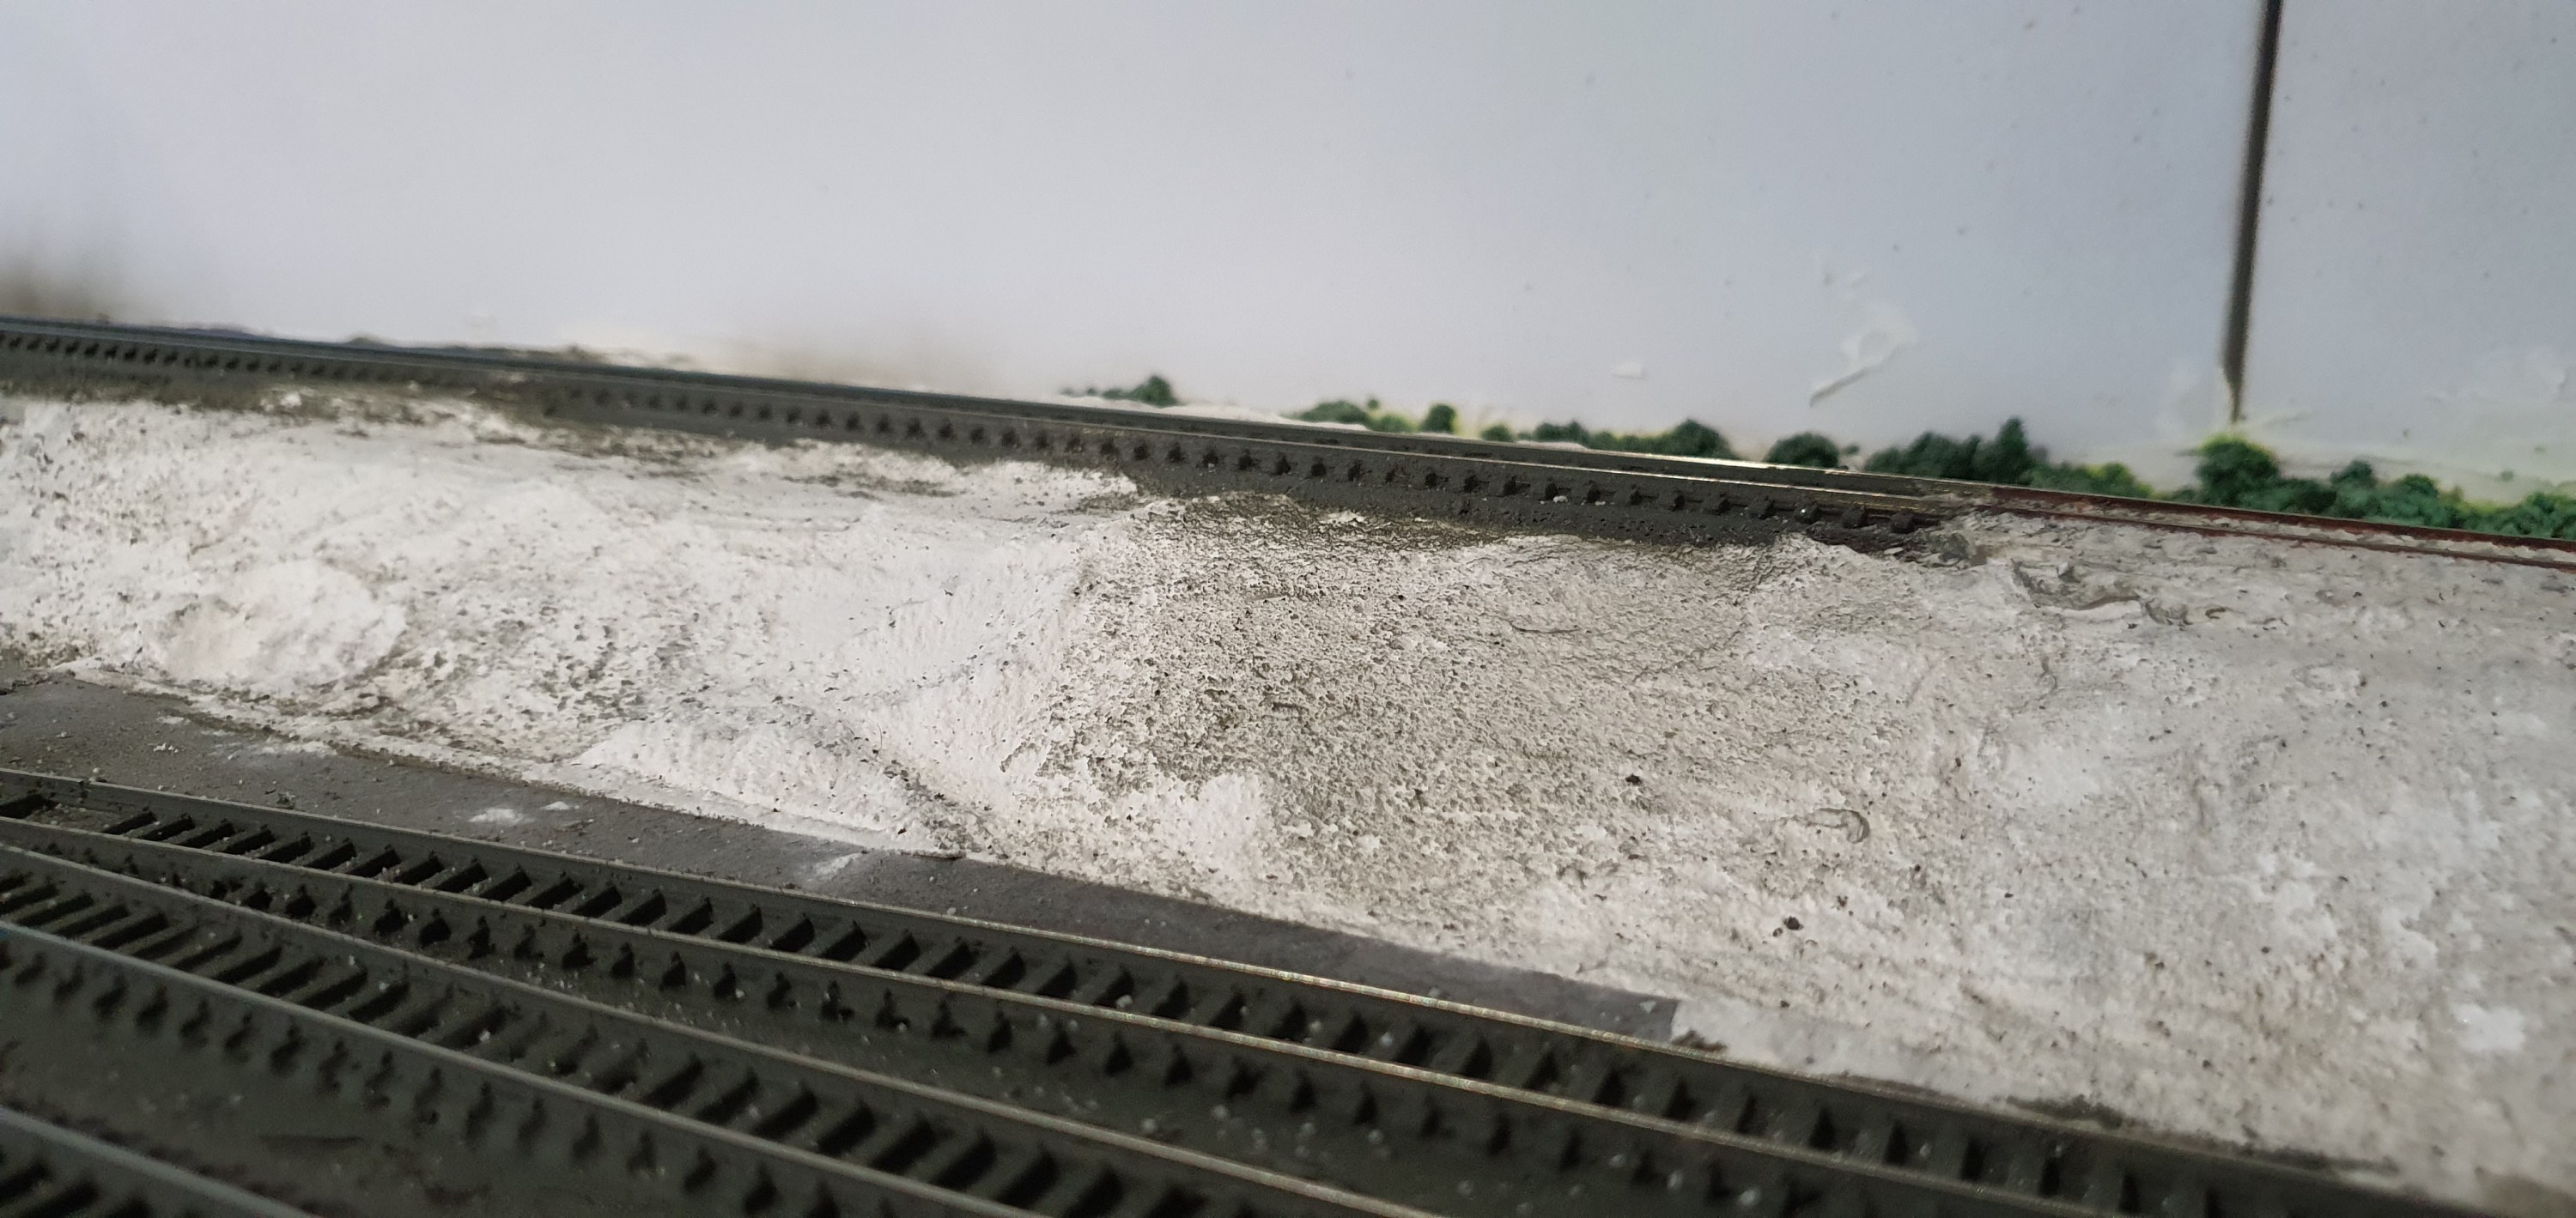
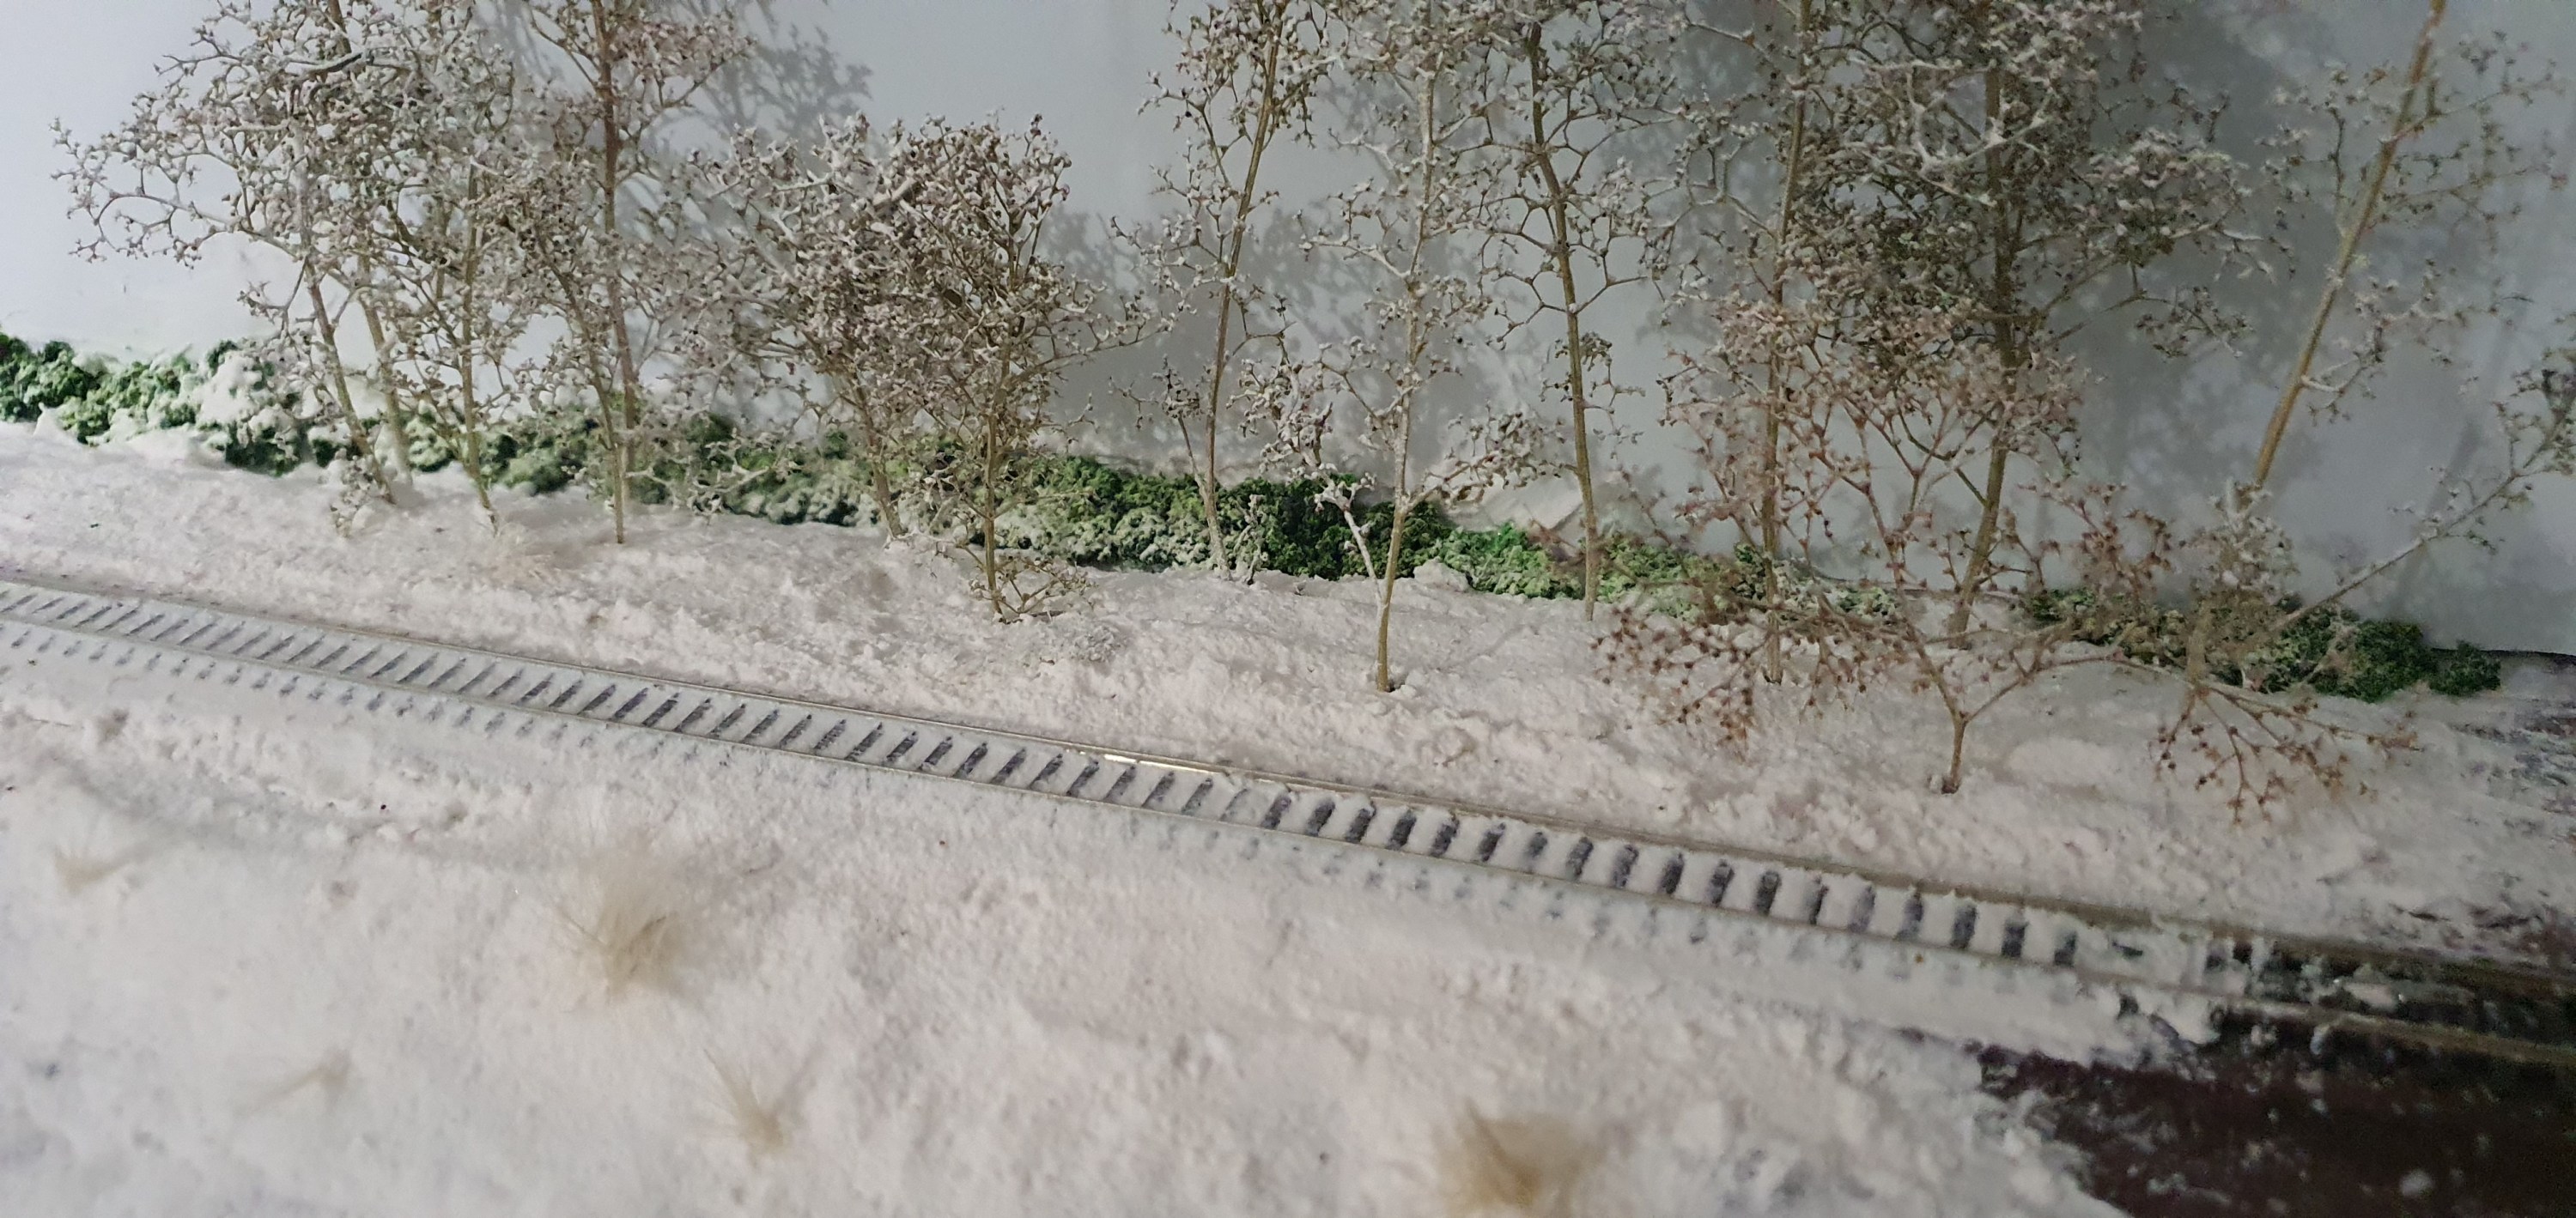
Ok so we have snow down and now to complete the scene along the back scene anyway we need some trees and foliage.
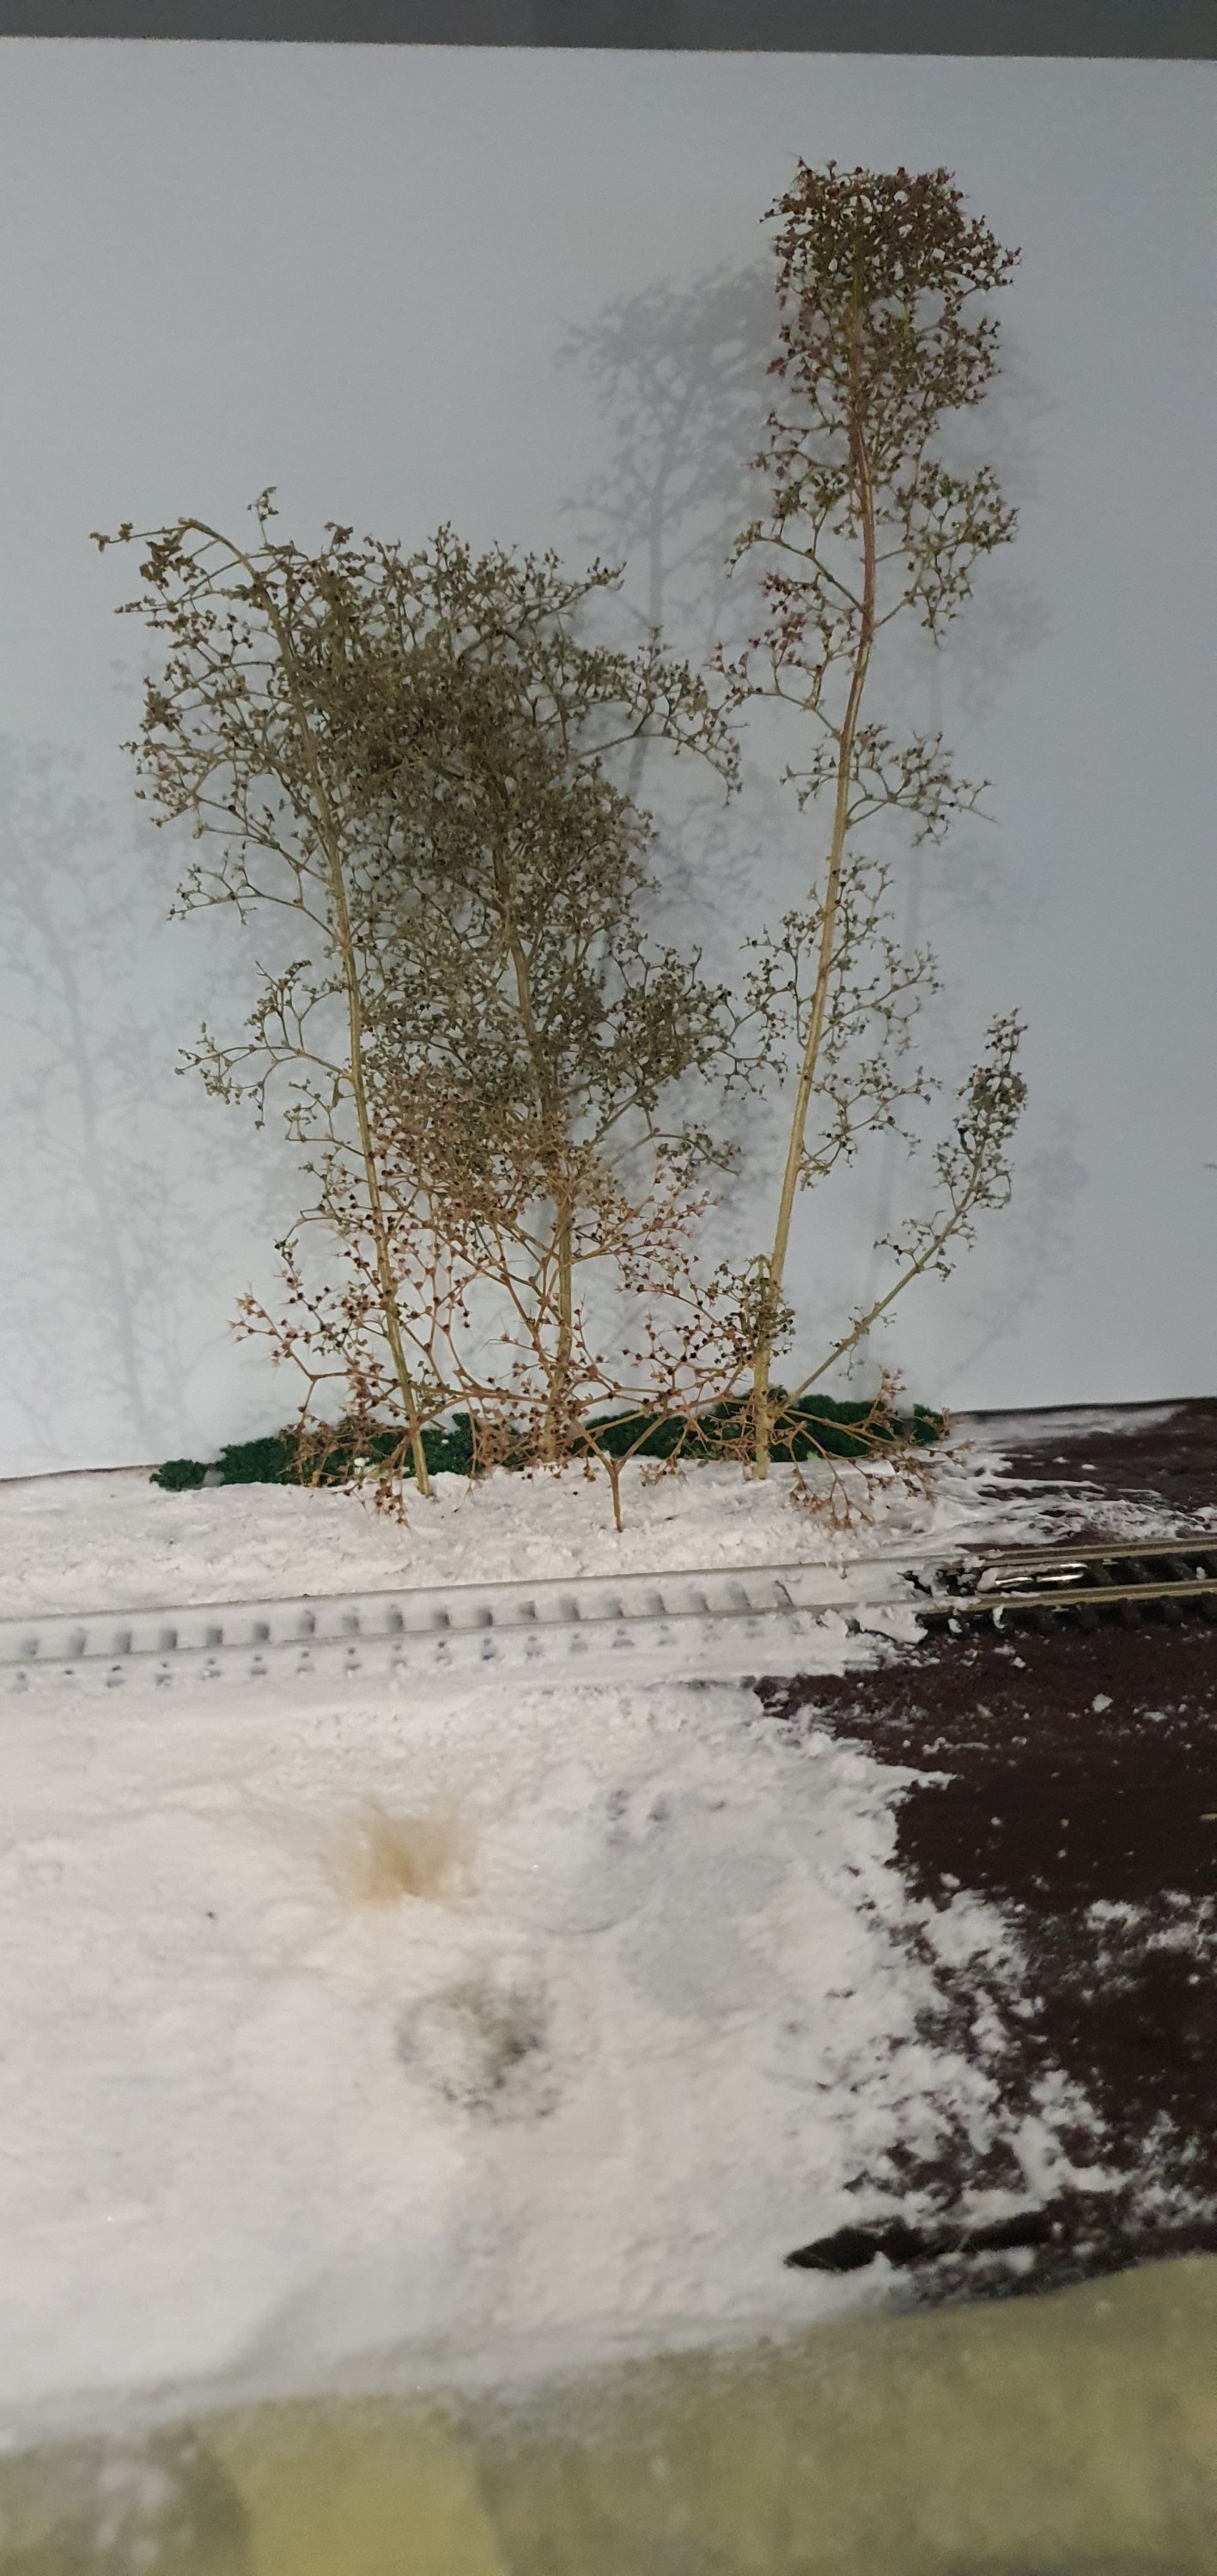
First the foliage goes in its a mix of clump foam and lichen. Lichen is a natural mods product that needs some excess leaf material removing before placing on the layout. This is all held in place with a layer of PVA glue.
In goes a layer of super trees each one trimmed and glued in place. Yes they are tall but so are trees in real life these are all 40-100ft tall trees which is perfect for the prototype location.
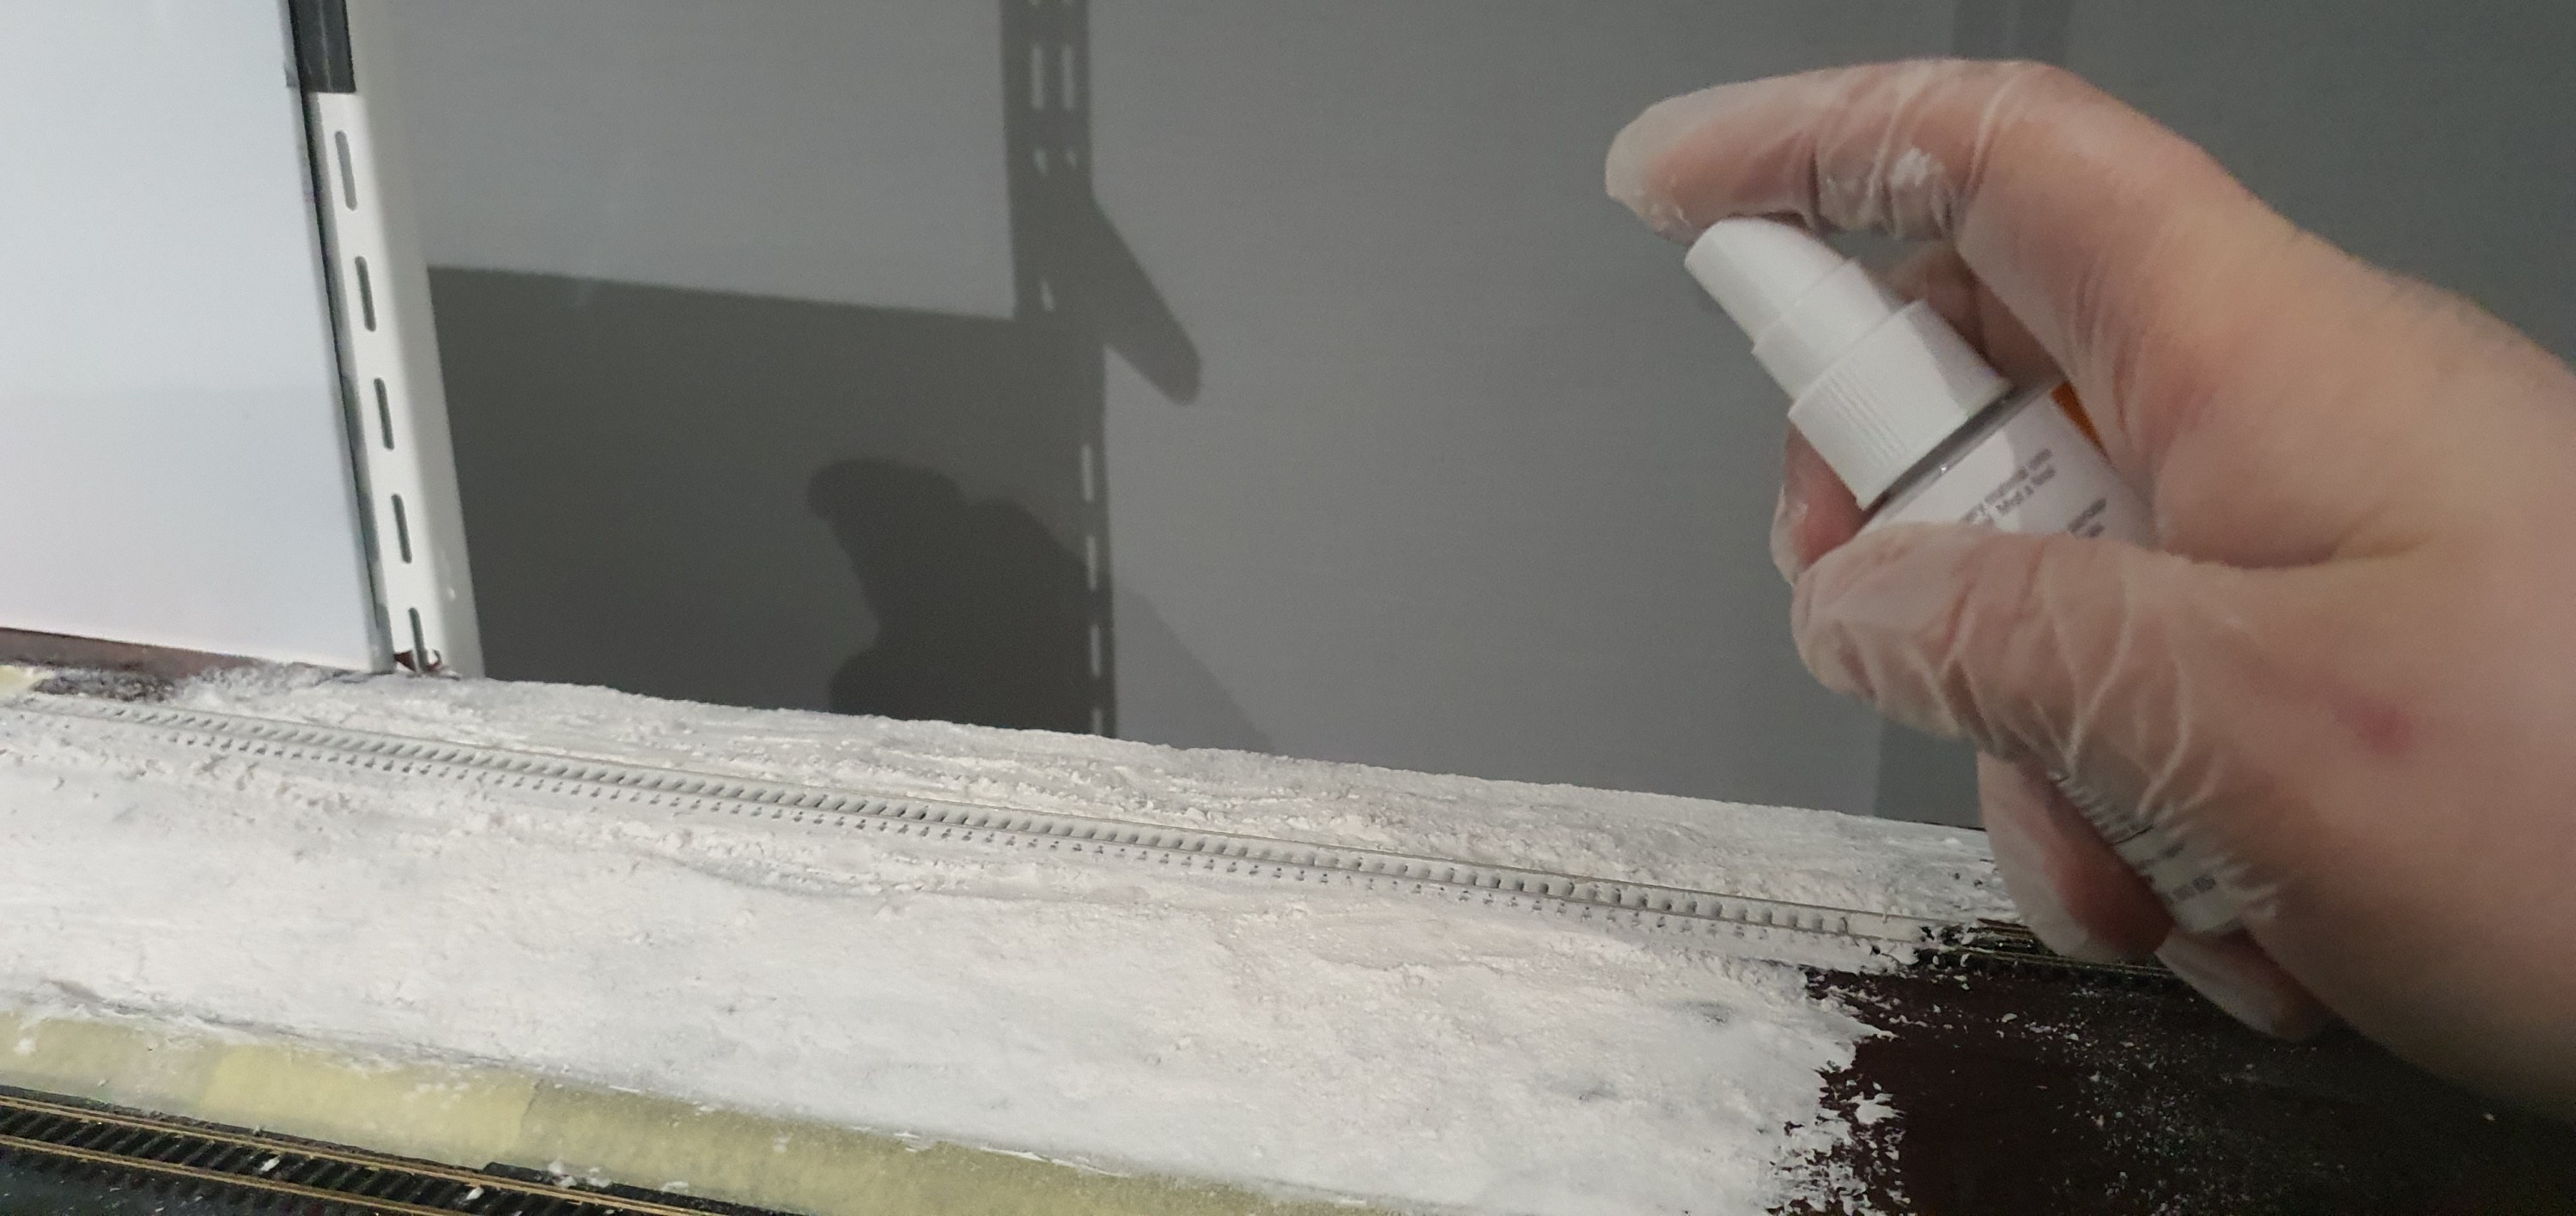
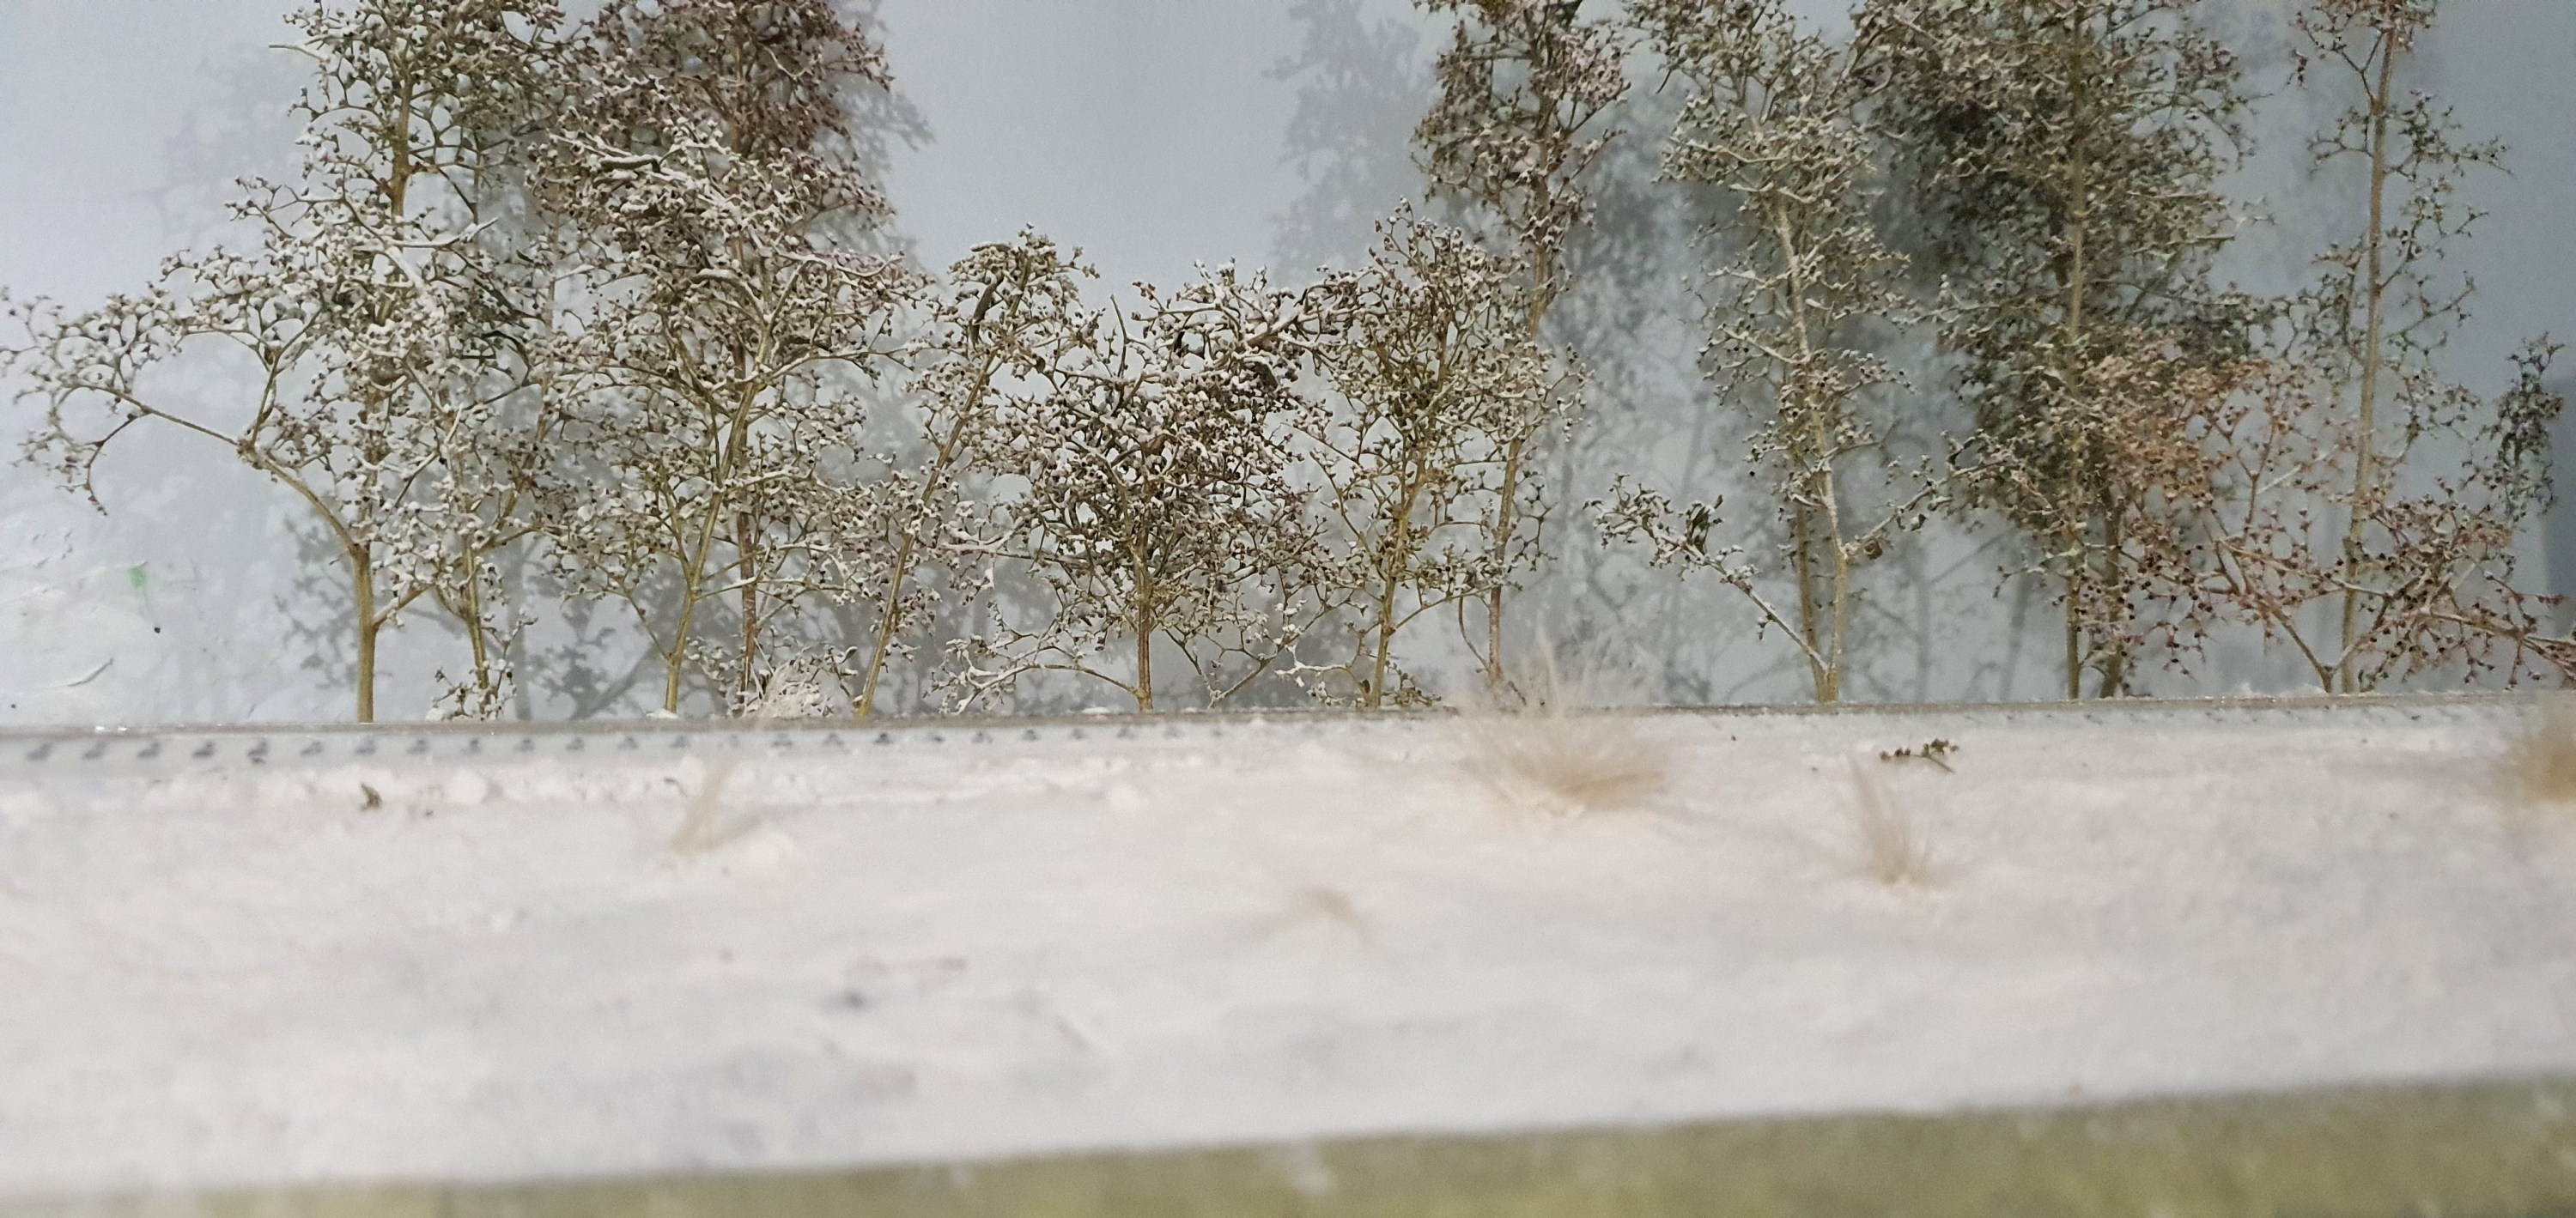
Then its out with the spray glue and another short snow shower in Ackerville and we have winterised trees.
There are still more jobs to do to finish this area, we need dummy turnout motors and some electrical boxes. Switch stands and then we need some ballast on the turnouts and static grass to represent those longer tufts of grass and scrub peaking through the snow.
Tomorrow we will probably tackle the dummy turnout motor first.
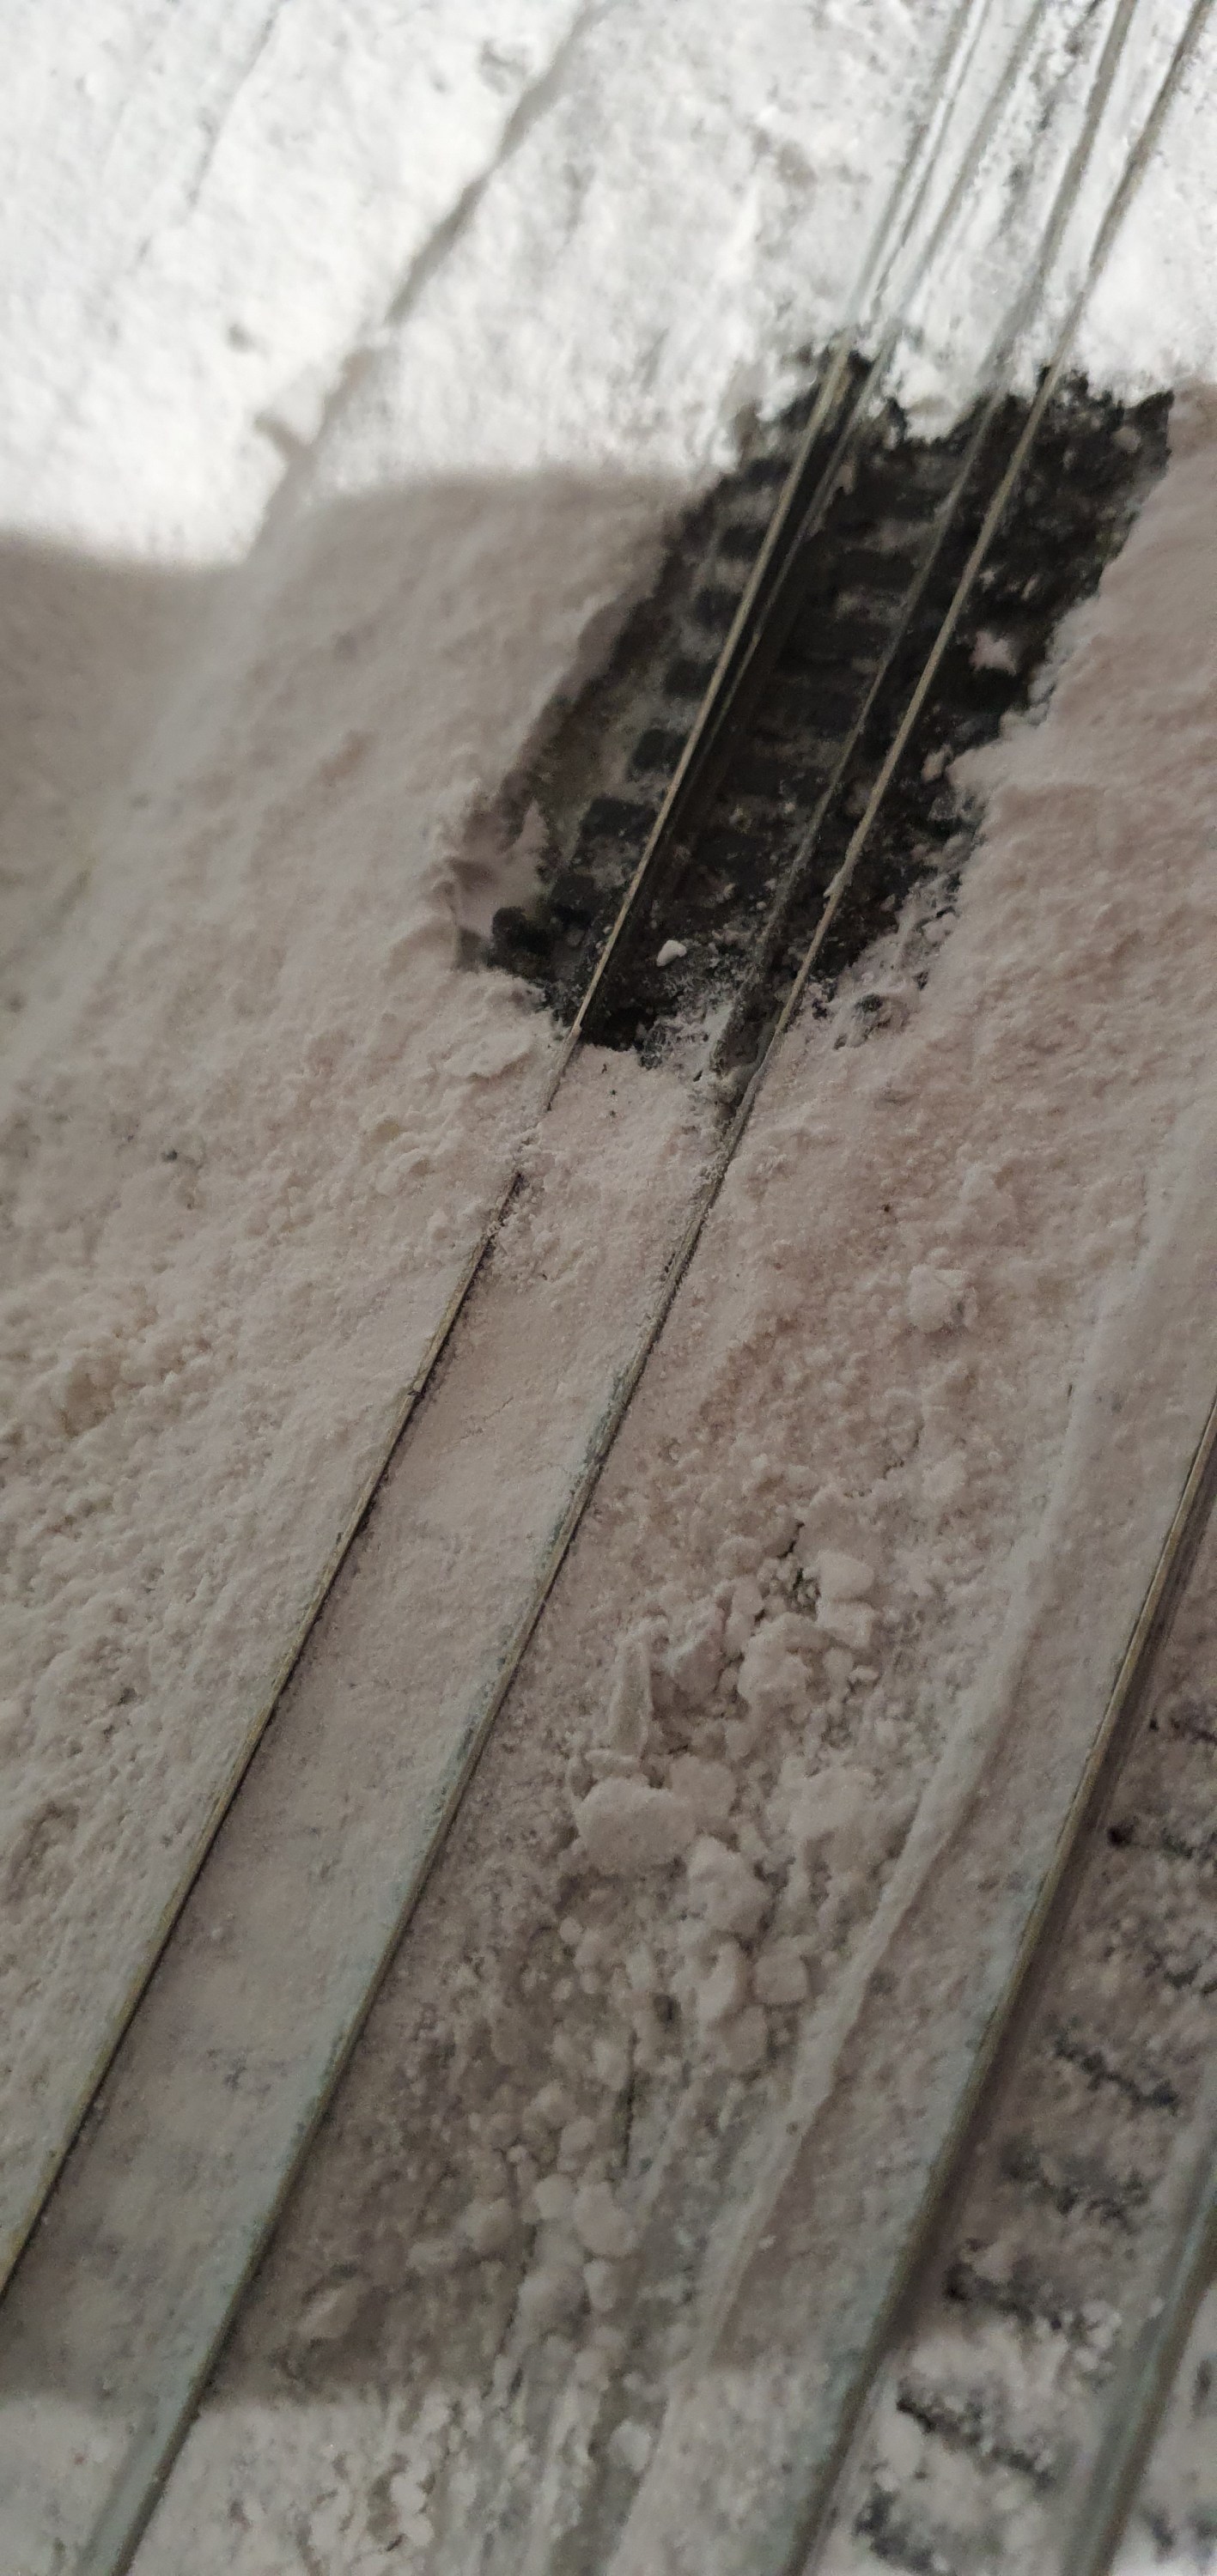
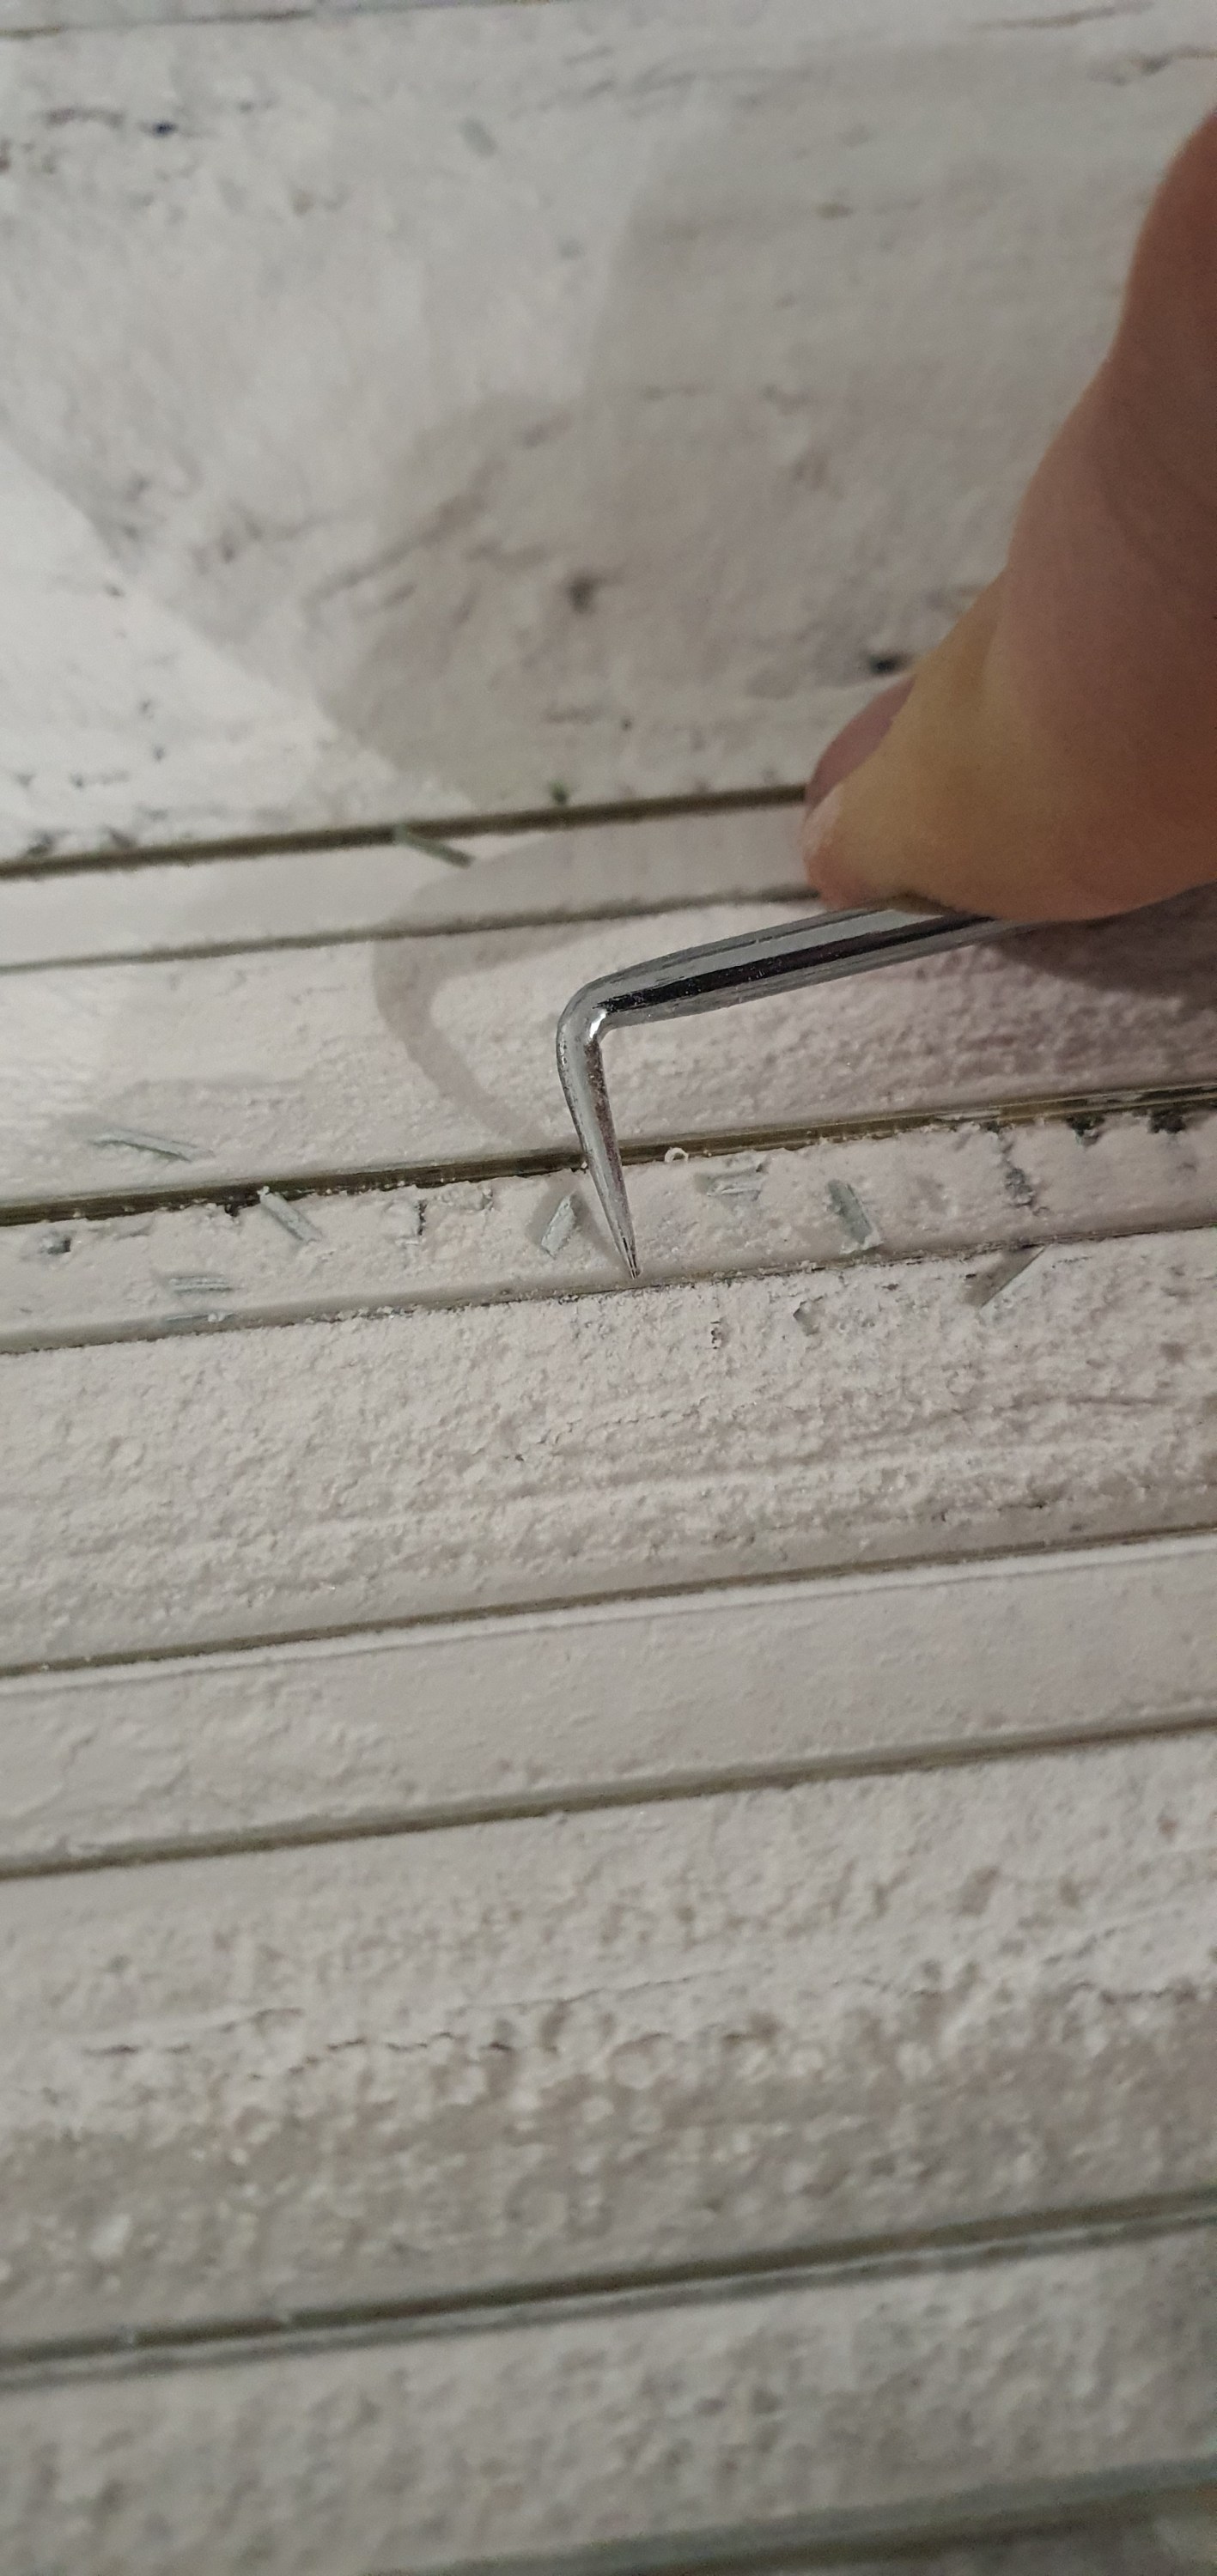
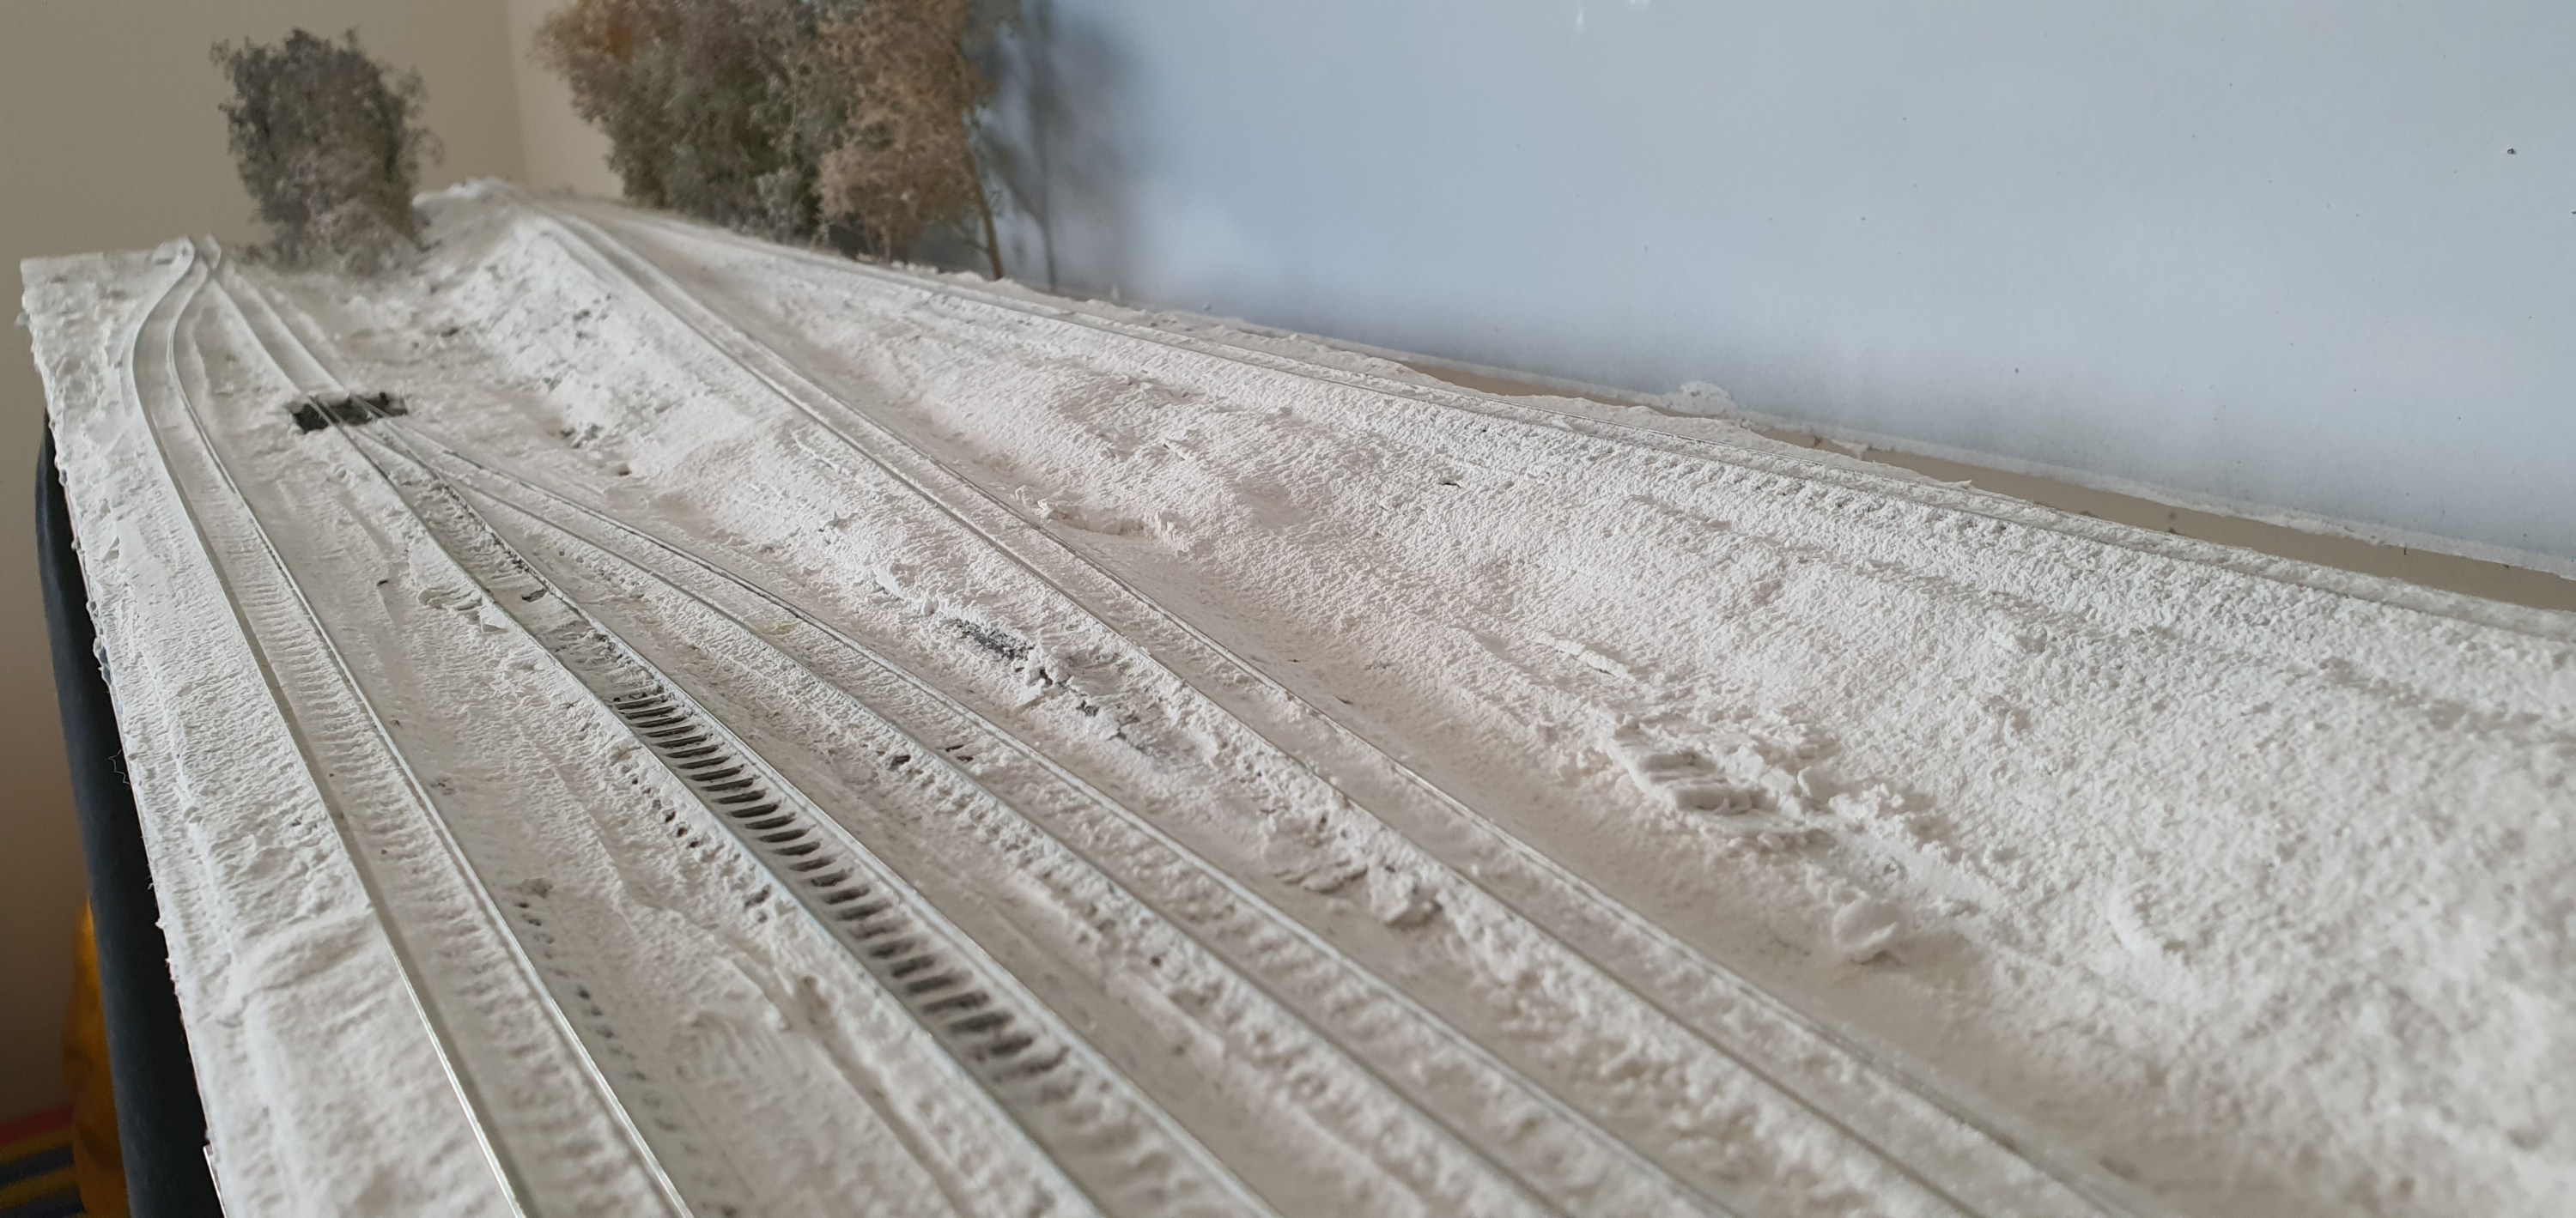
Snow & ice on the real railroad is great for derailing trains and it’s the same for Model Railroads. After the weekends snow I had 3 out of 5 turnouts stuck with snow and lots on the rails. In real life the first train takes the snow away and that’s the look we want.
The rear two tracks have been cleaned of snow from the rails the front two are un touchedOne very gunged up turnout
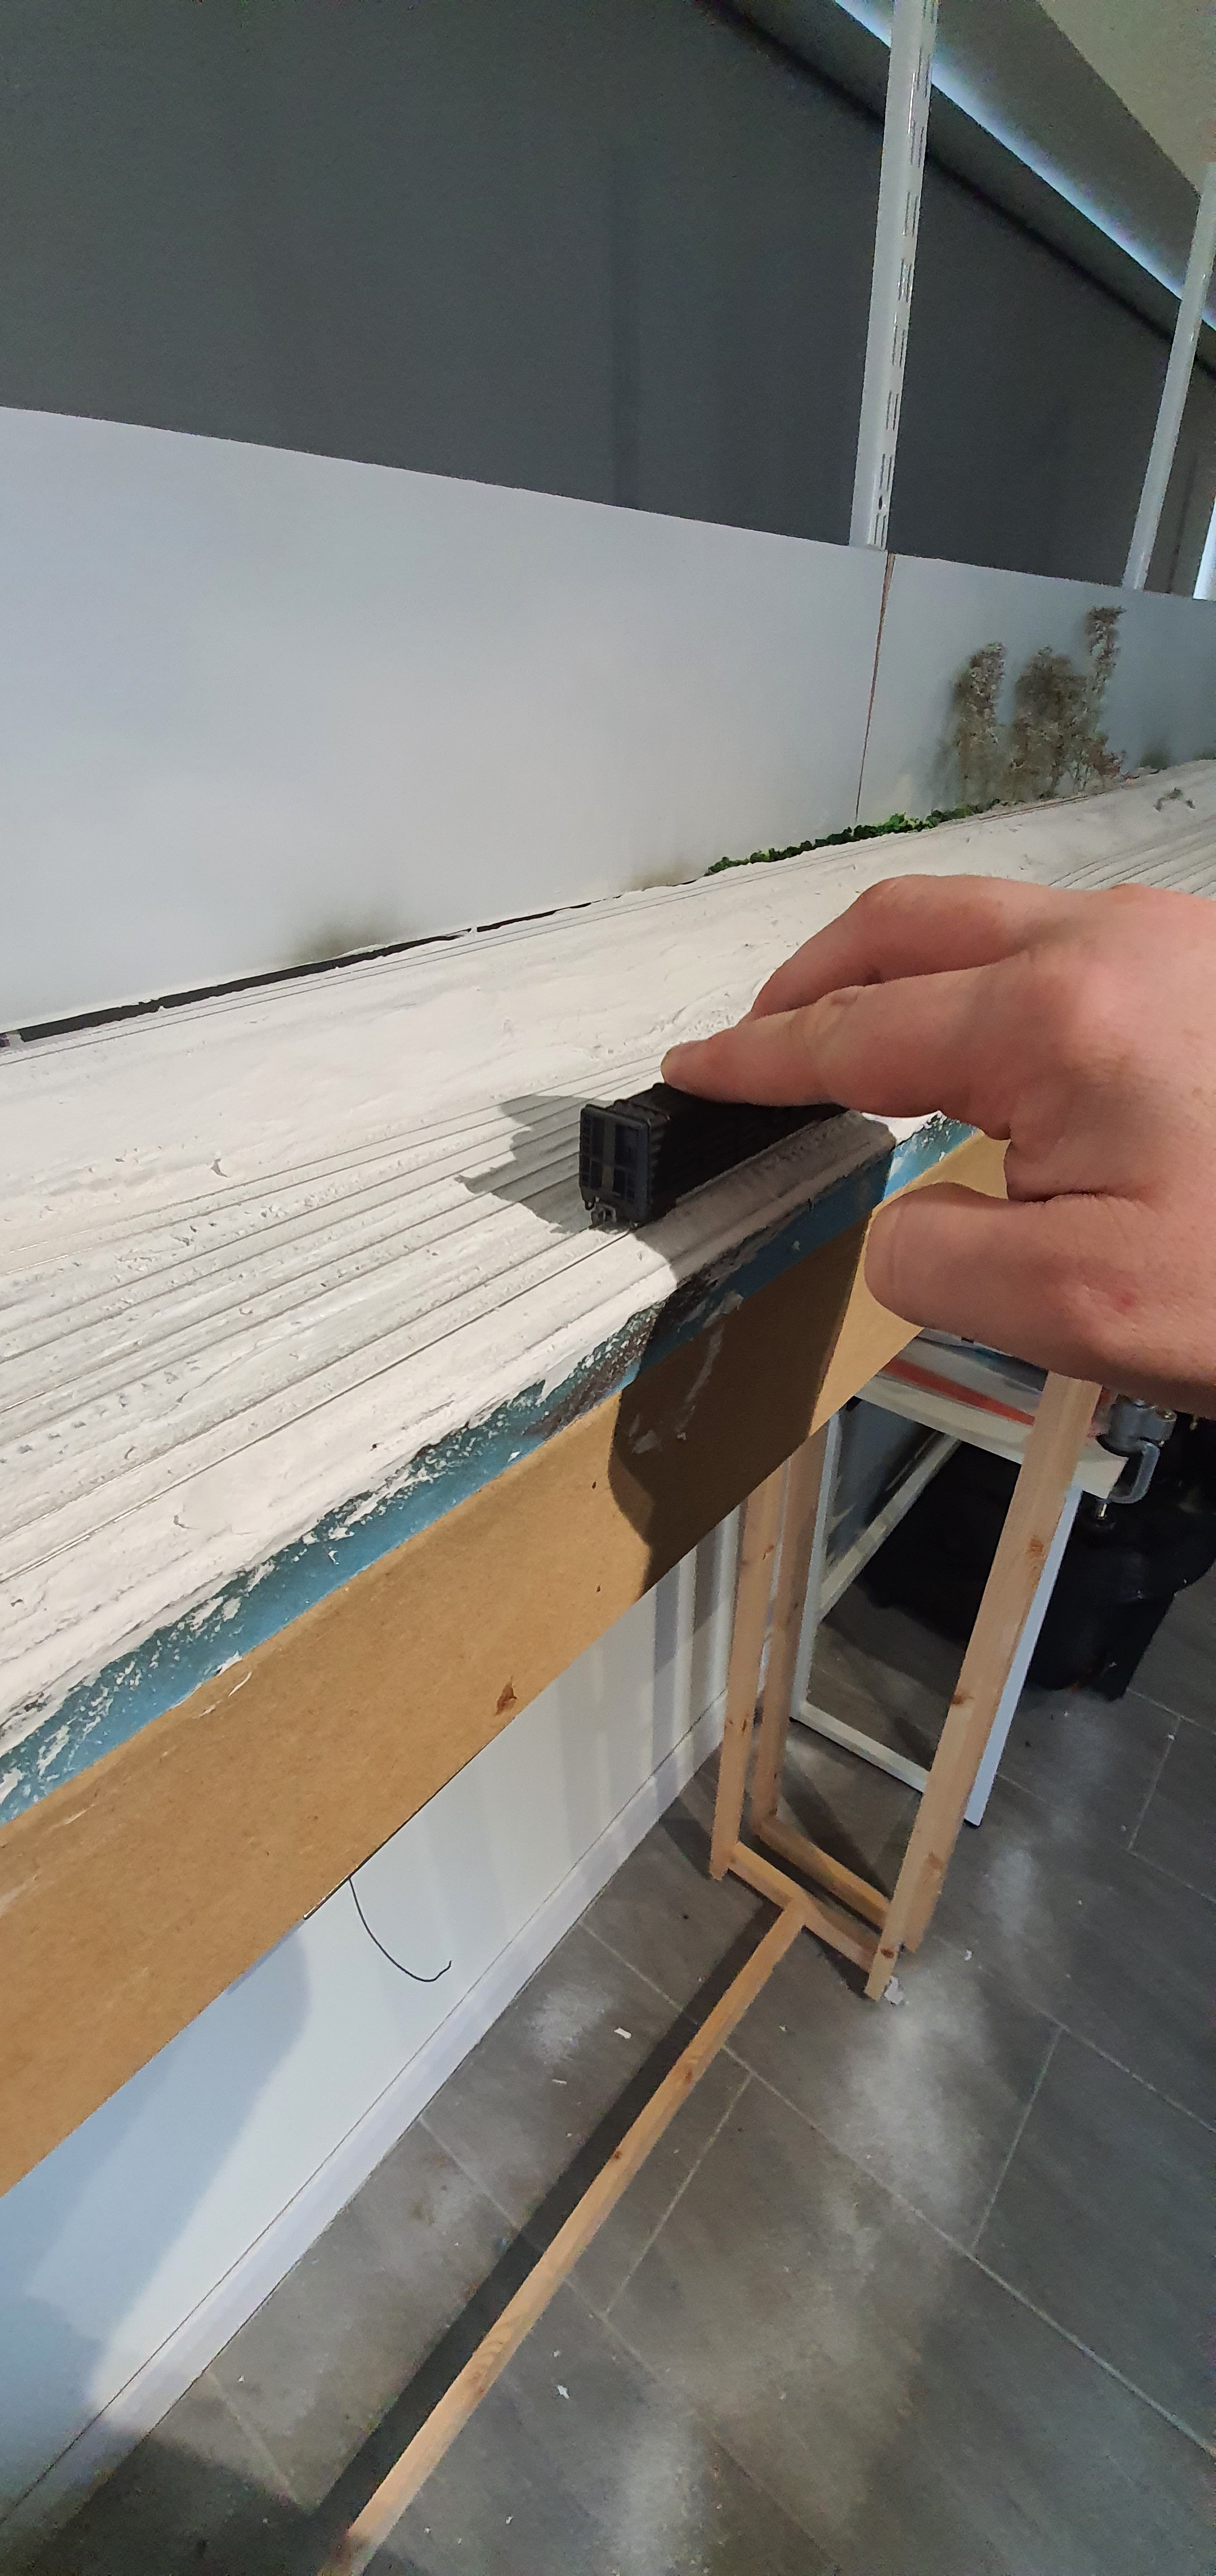
Fortunately I have a pick in my toolbox for just this scenario and so I started to scrape away the snow from the rails and turnouts.
Its got the snow off but also the rail weathering so I’ll need to go back with my small brush and touch that up.
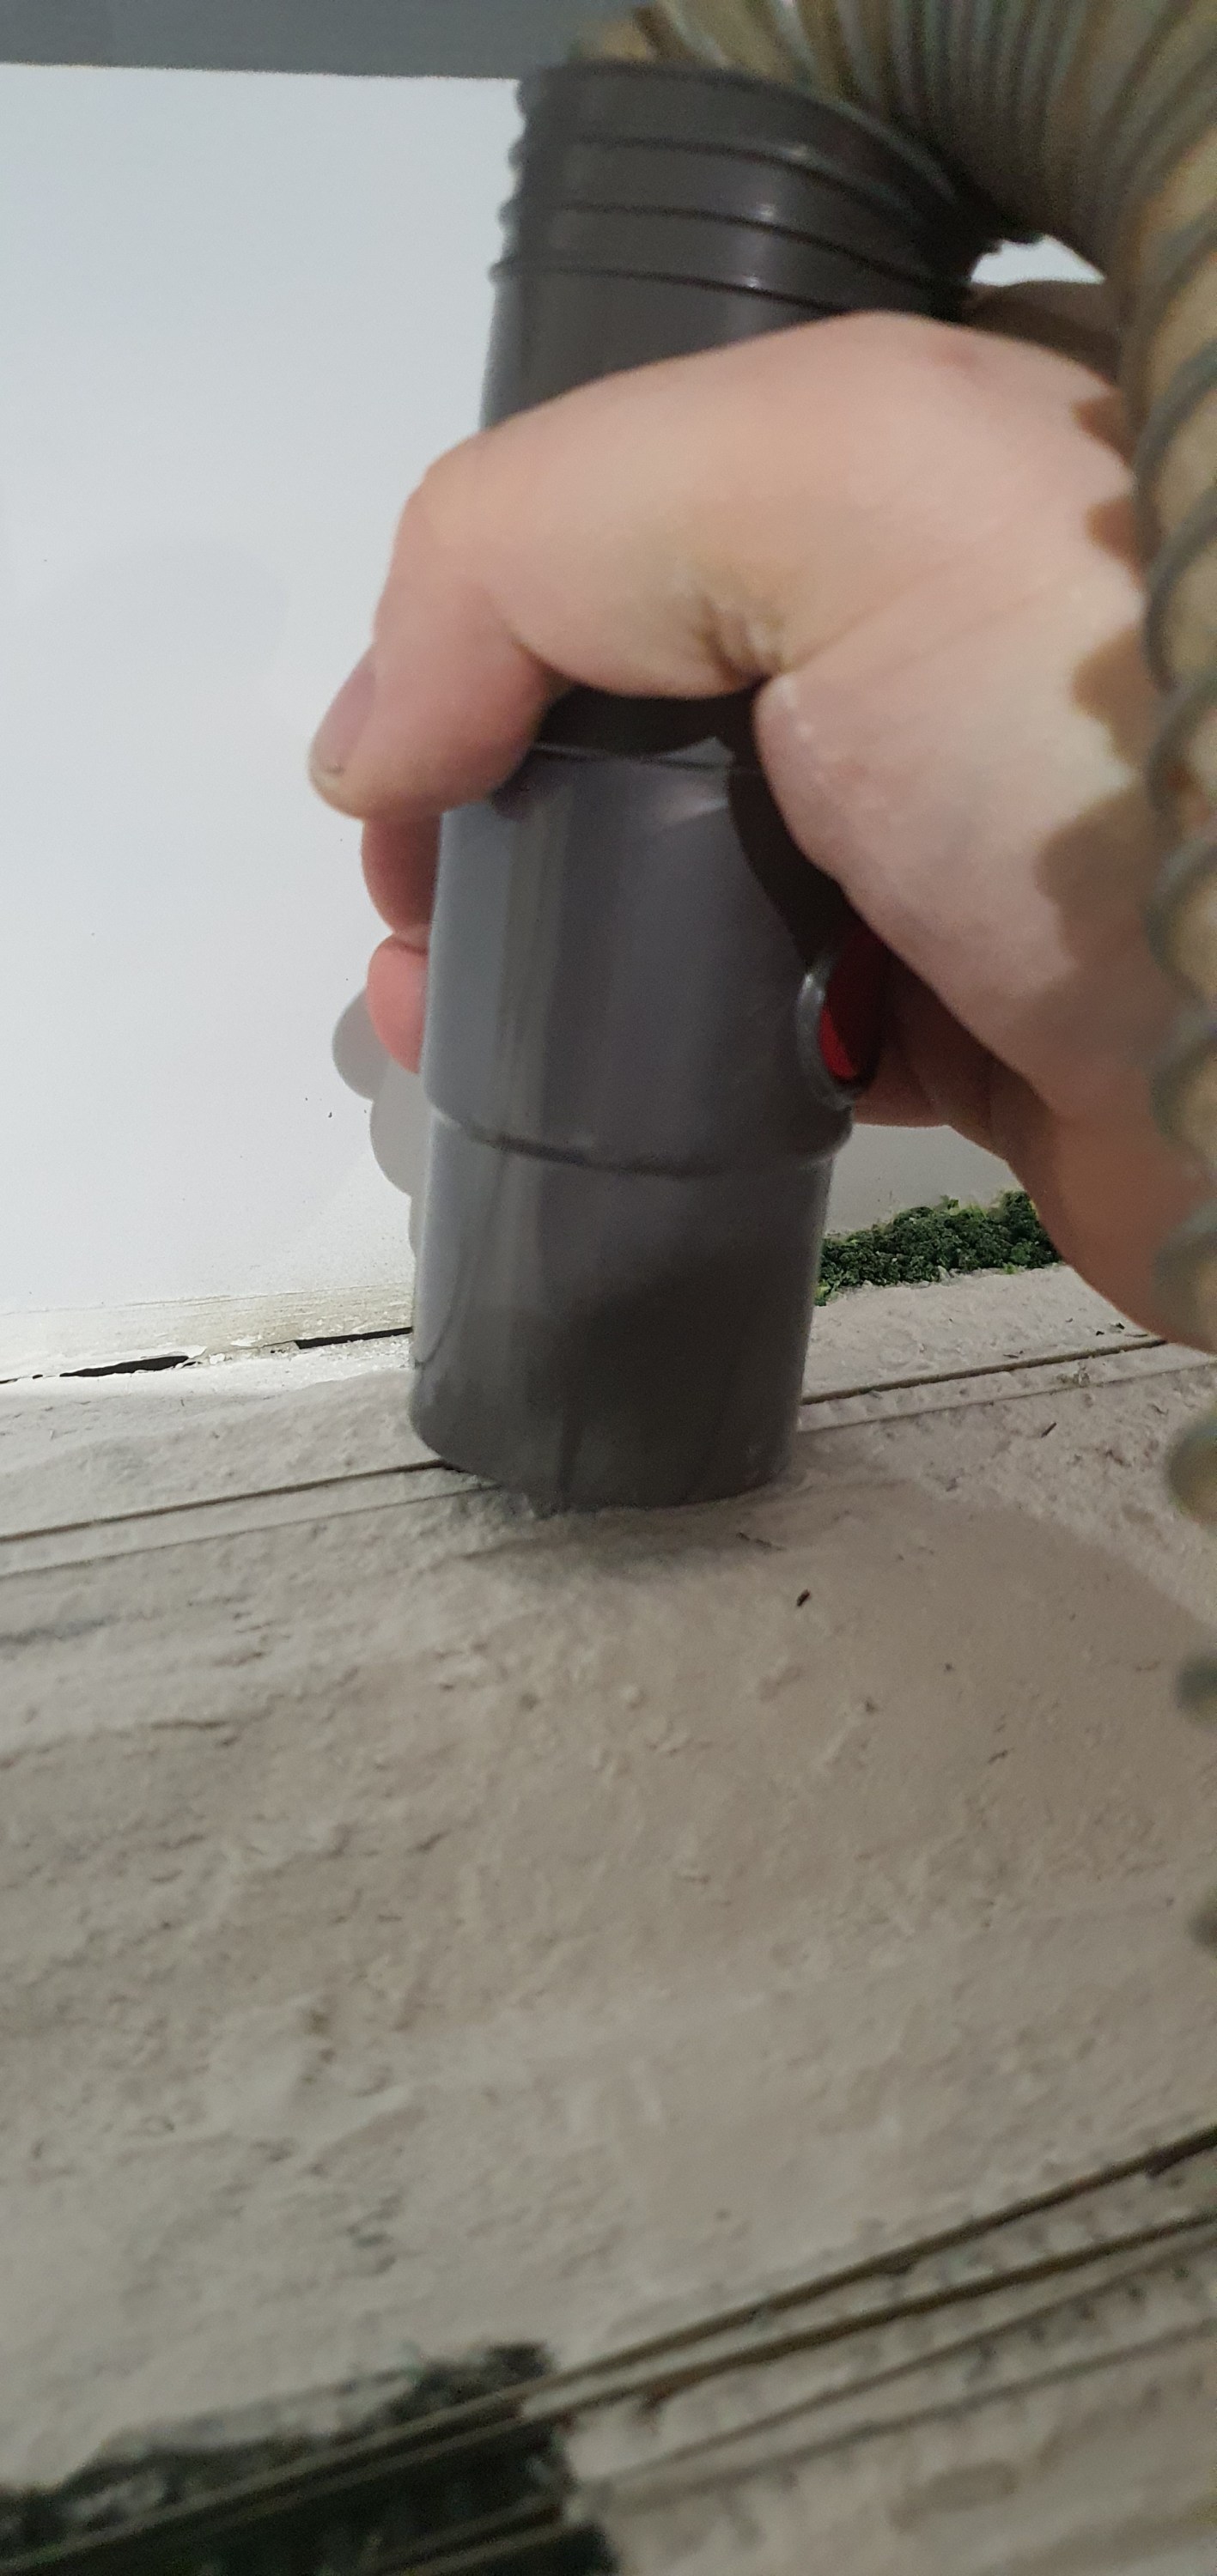
The snow was hoovered up and you can see here how strongly the snow has adhered this time around. Its much better than it was.
BeforeAfter
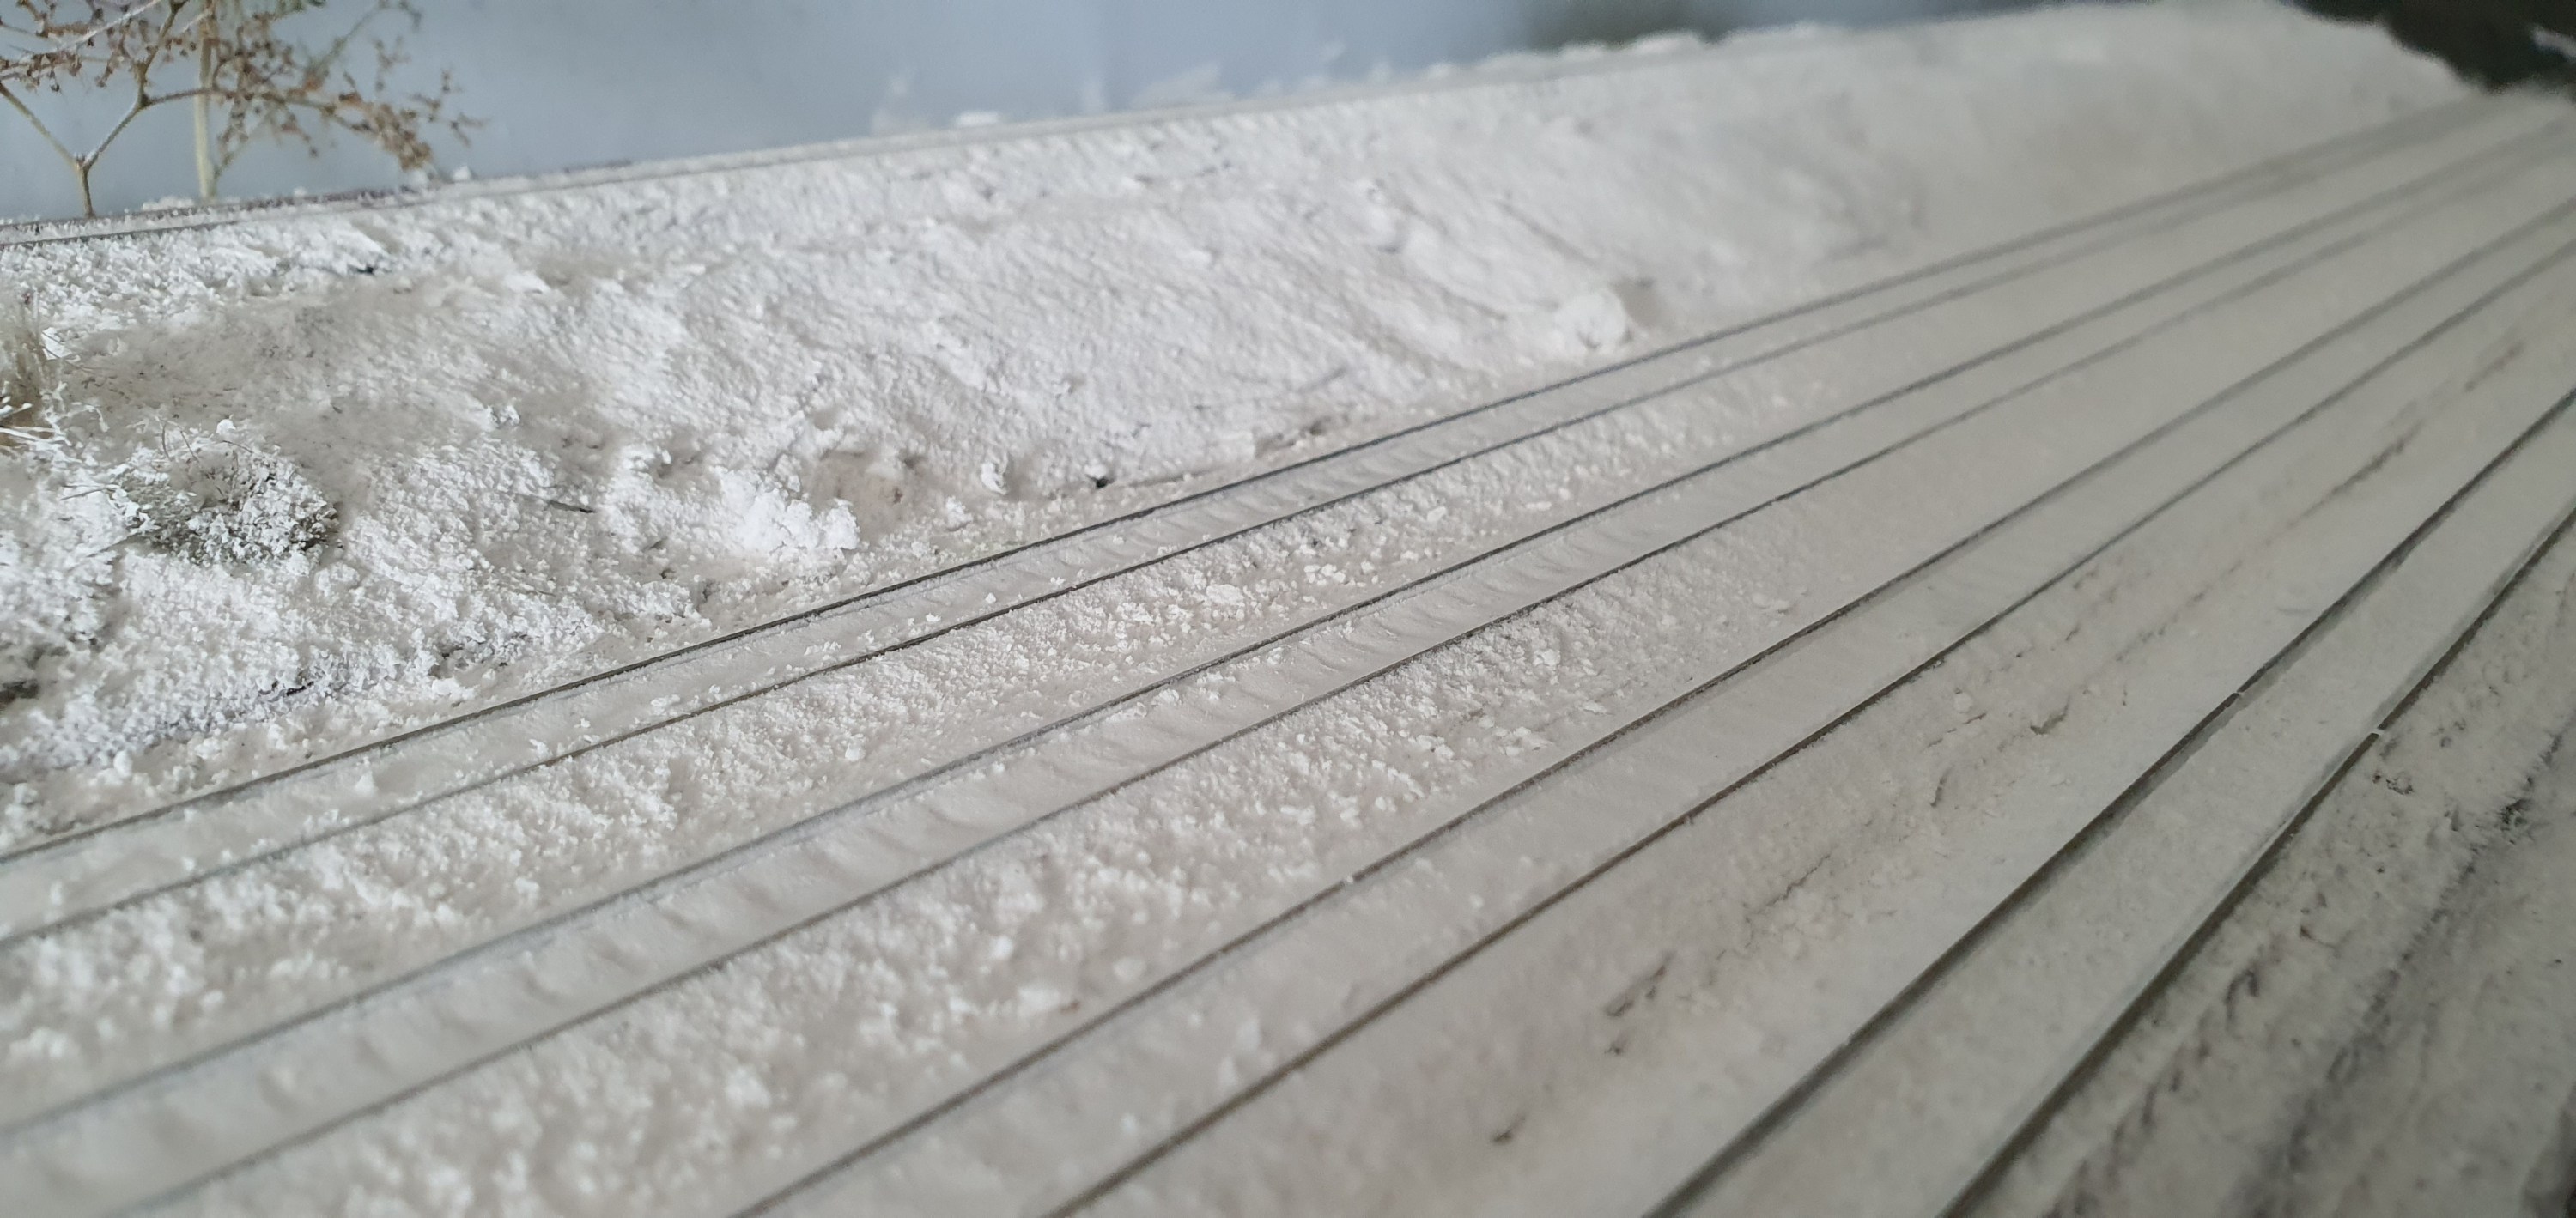
It might be hard to see but you can see alot more of the rail in the after pictures. Its subtle but its vital for a smooth running layout.
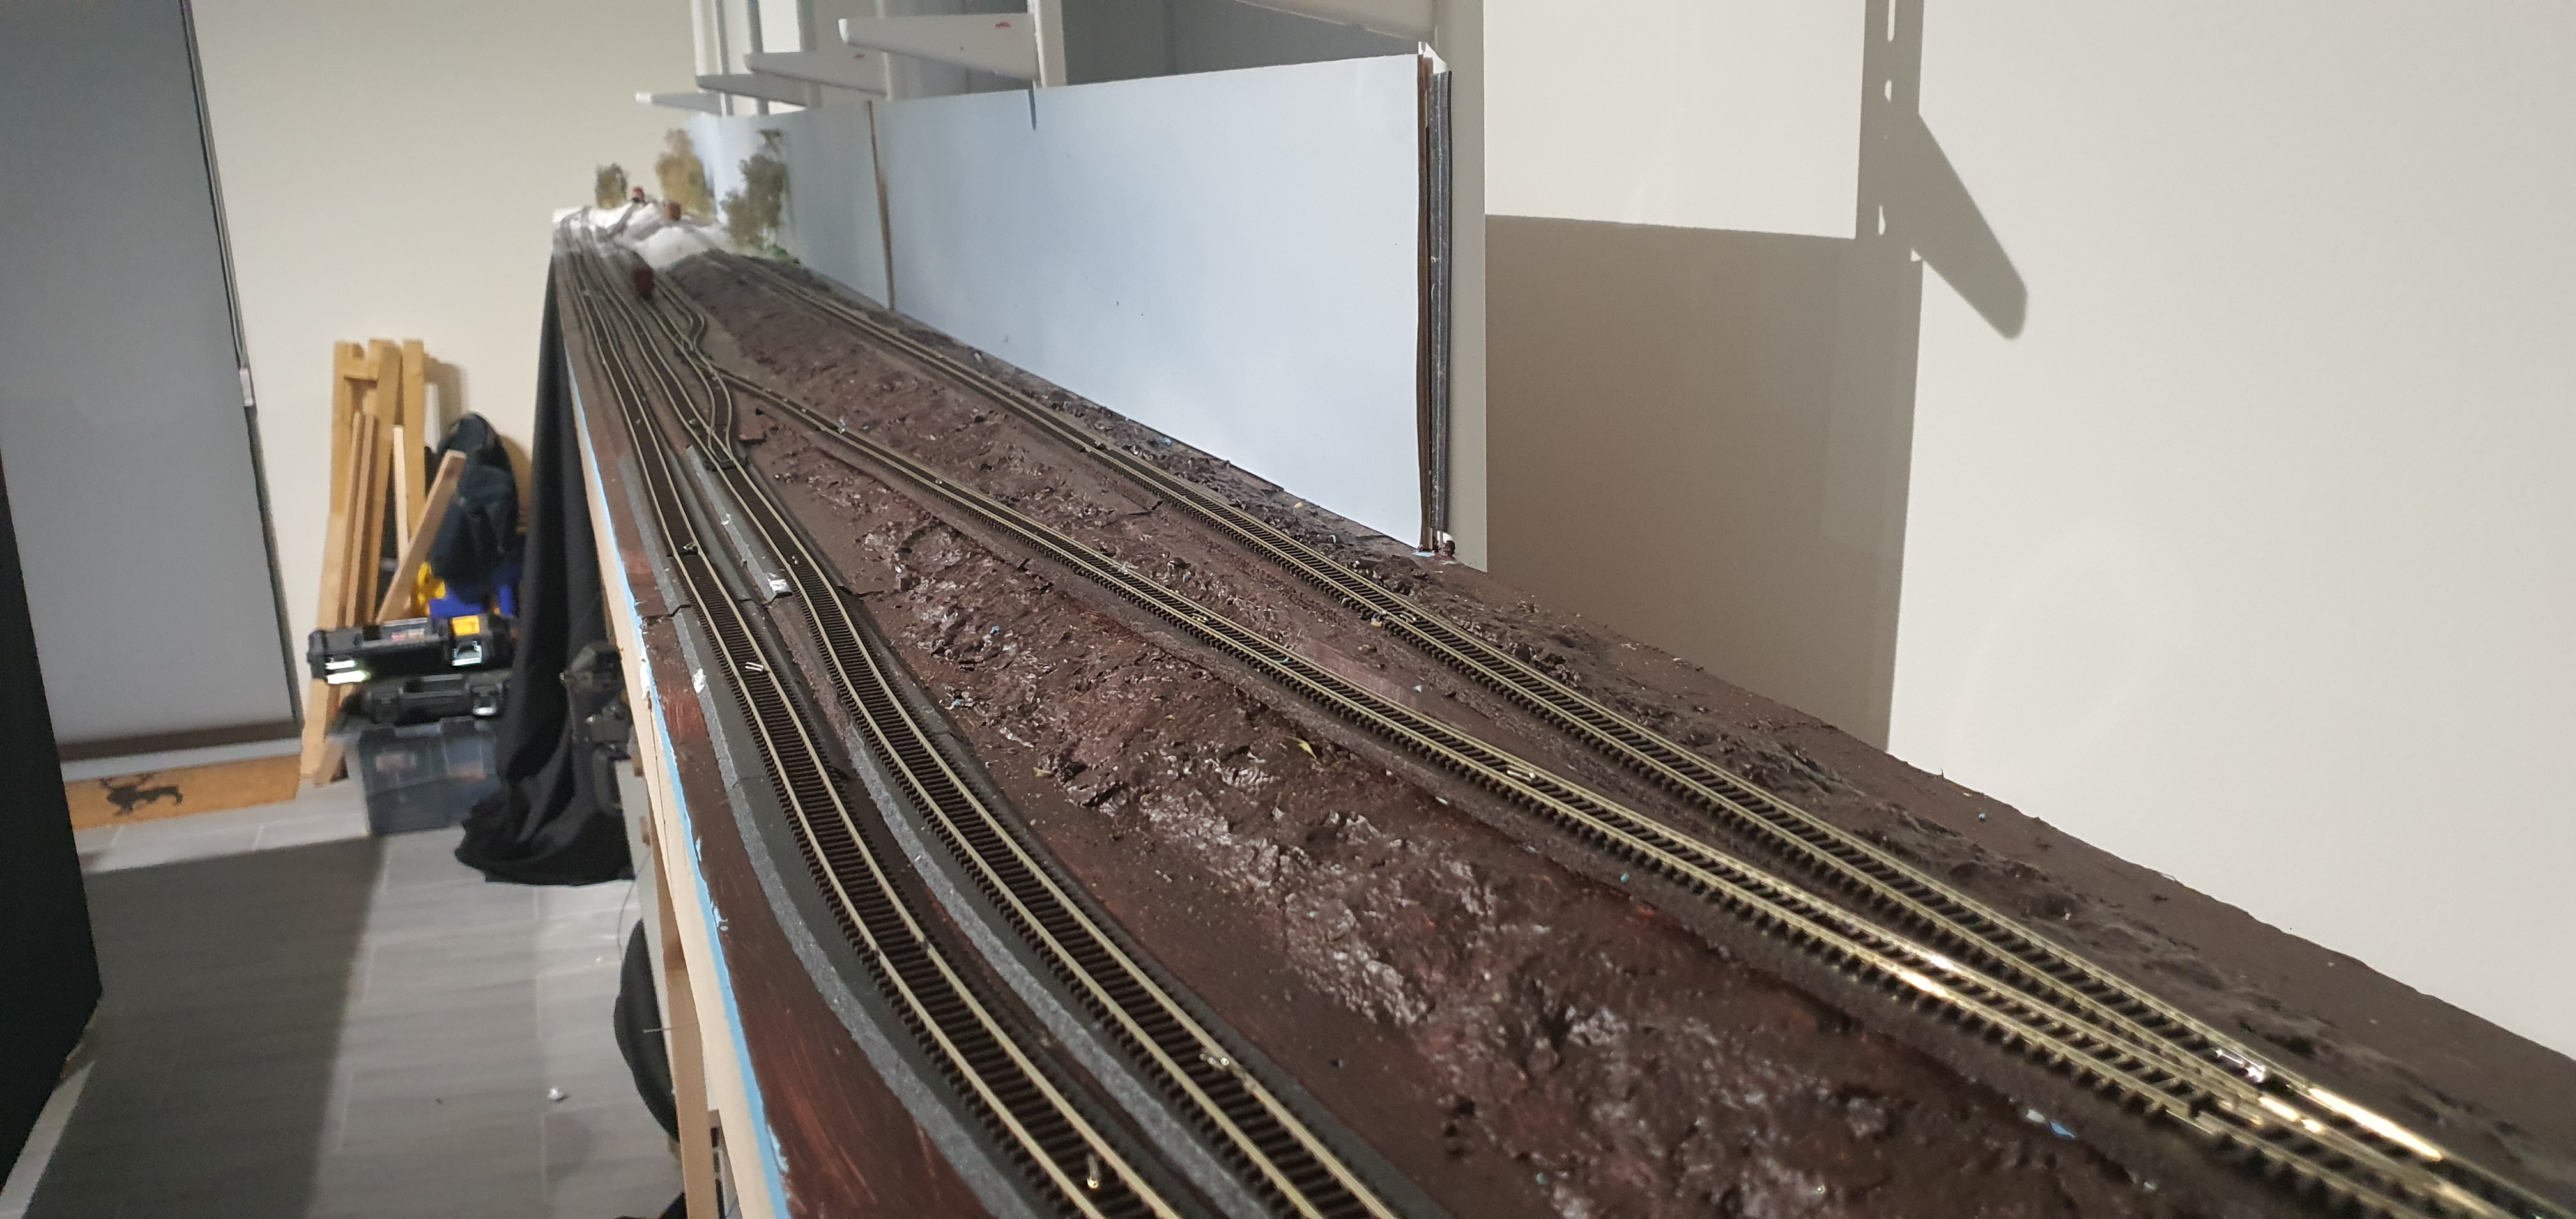
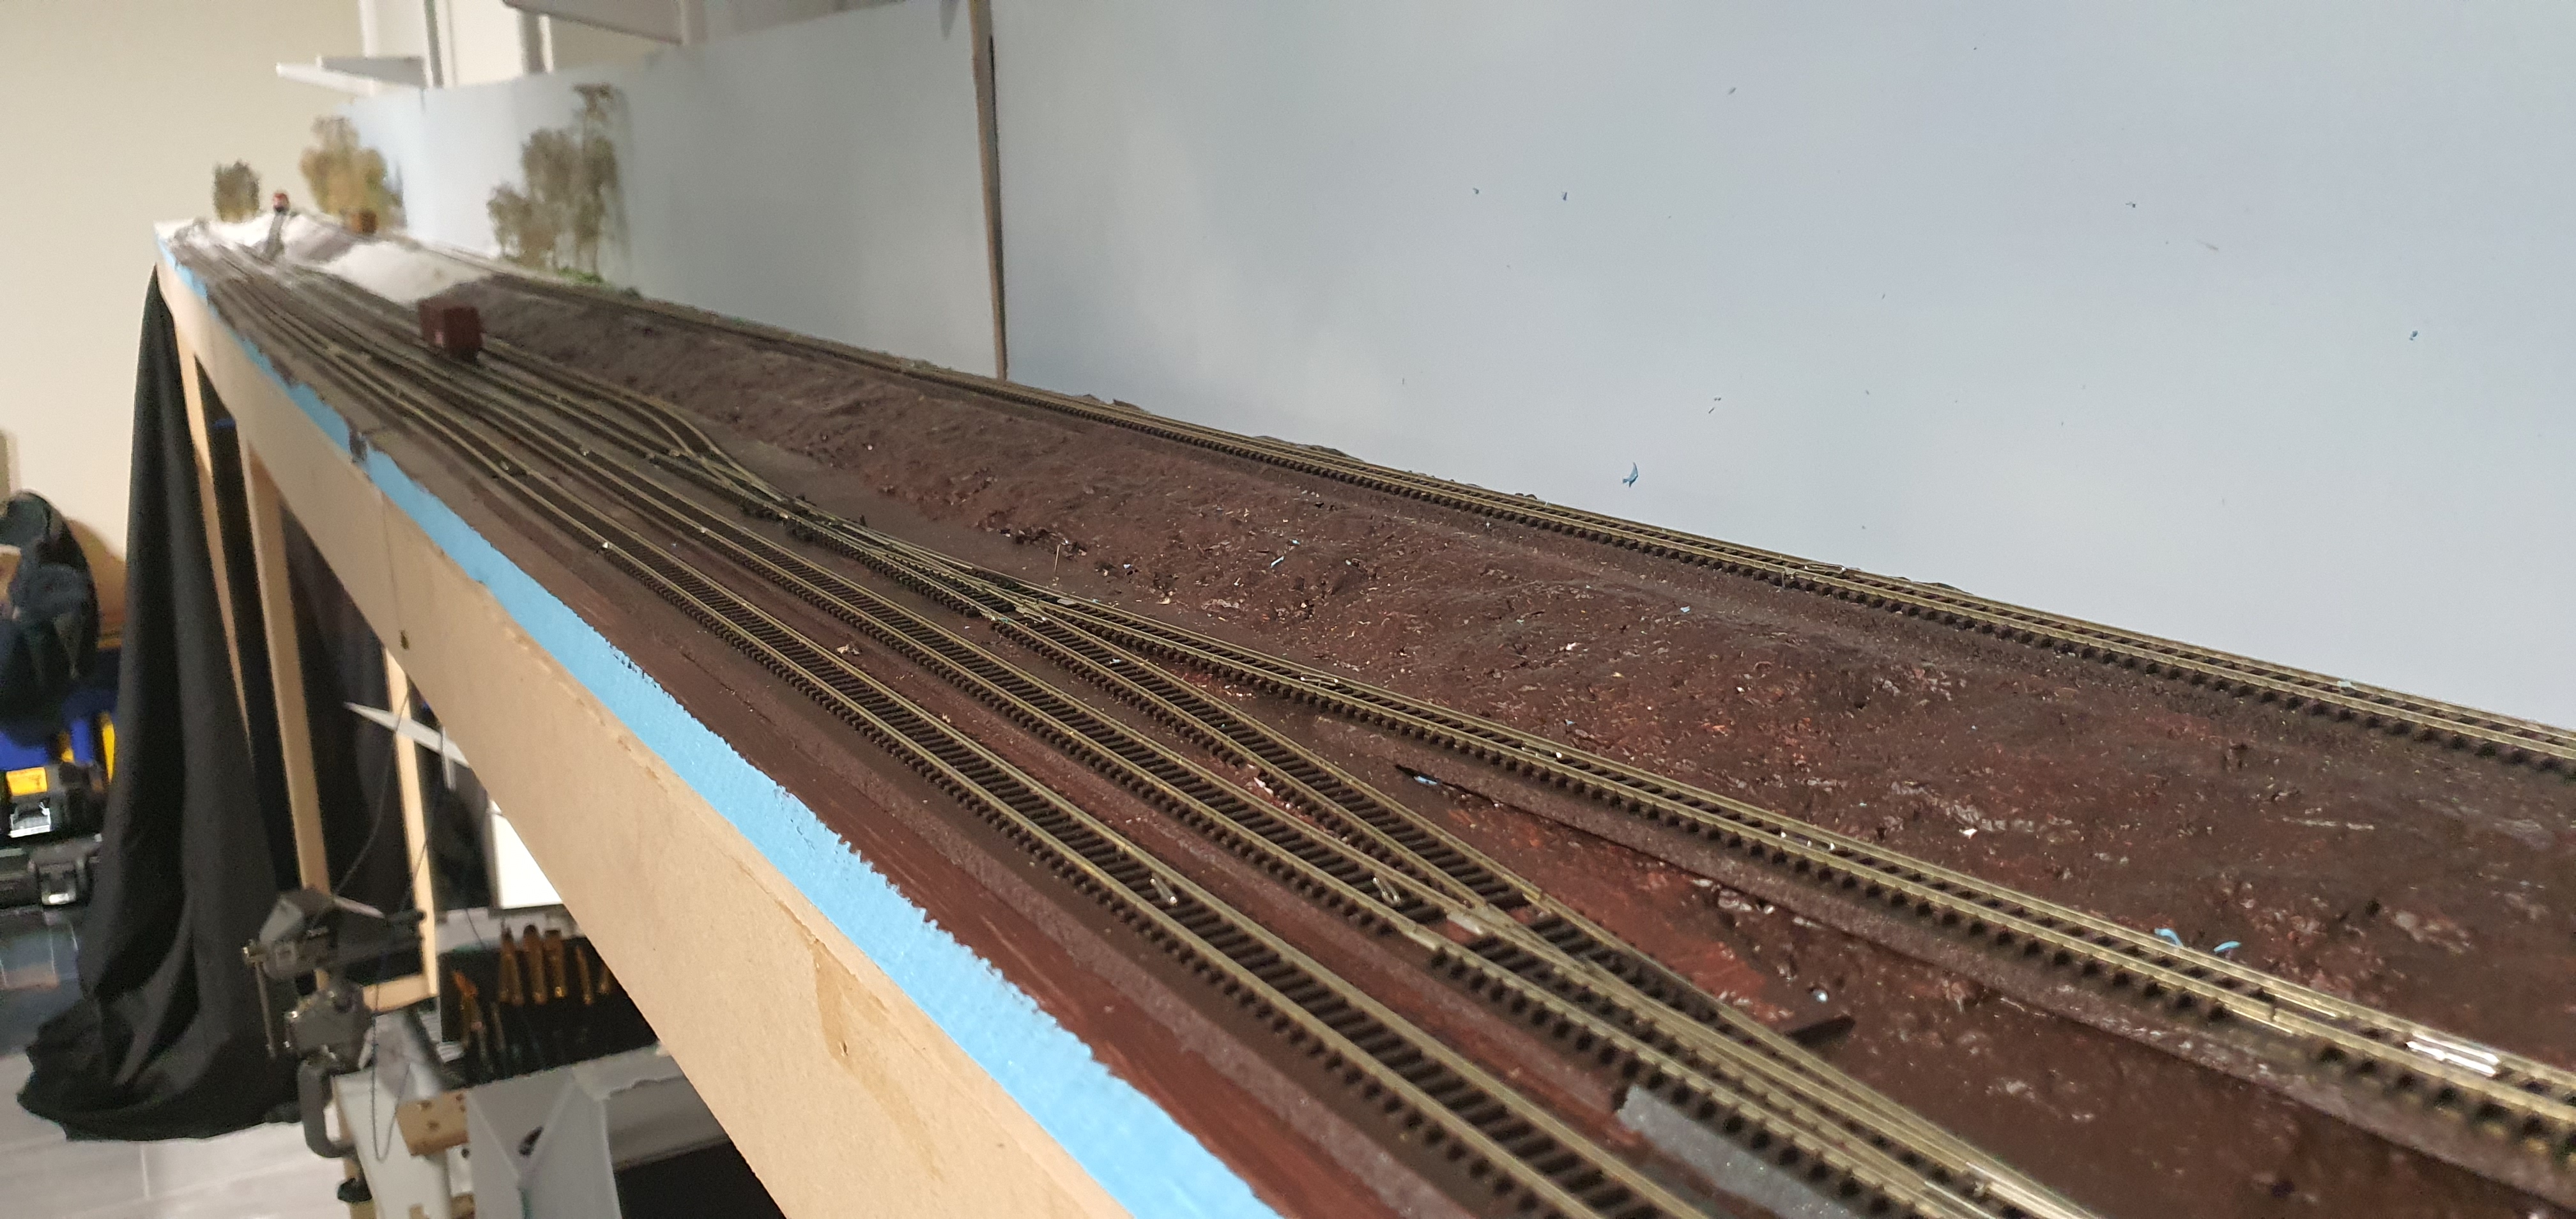
We are getting really close to being done with track on most of ackerville. Then the great snow storm will happen and everything should come together quite quickly. So this is just another quick update of what got done today.
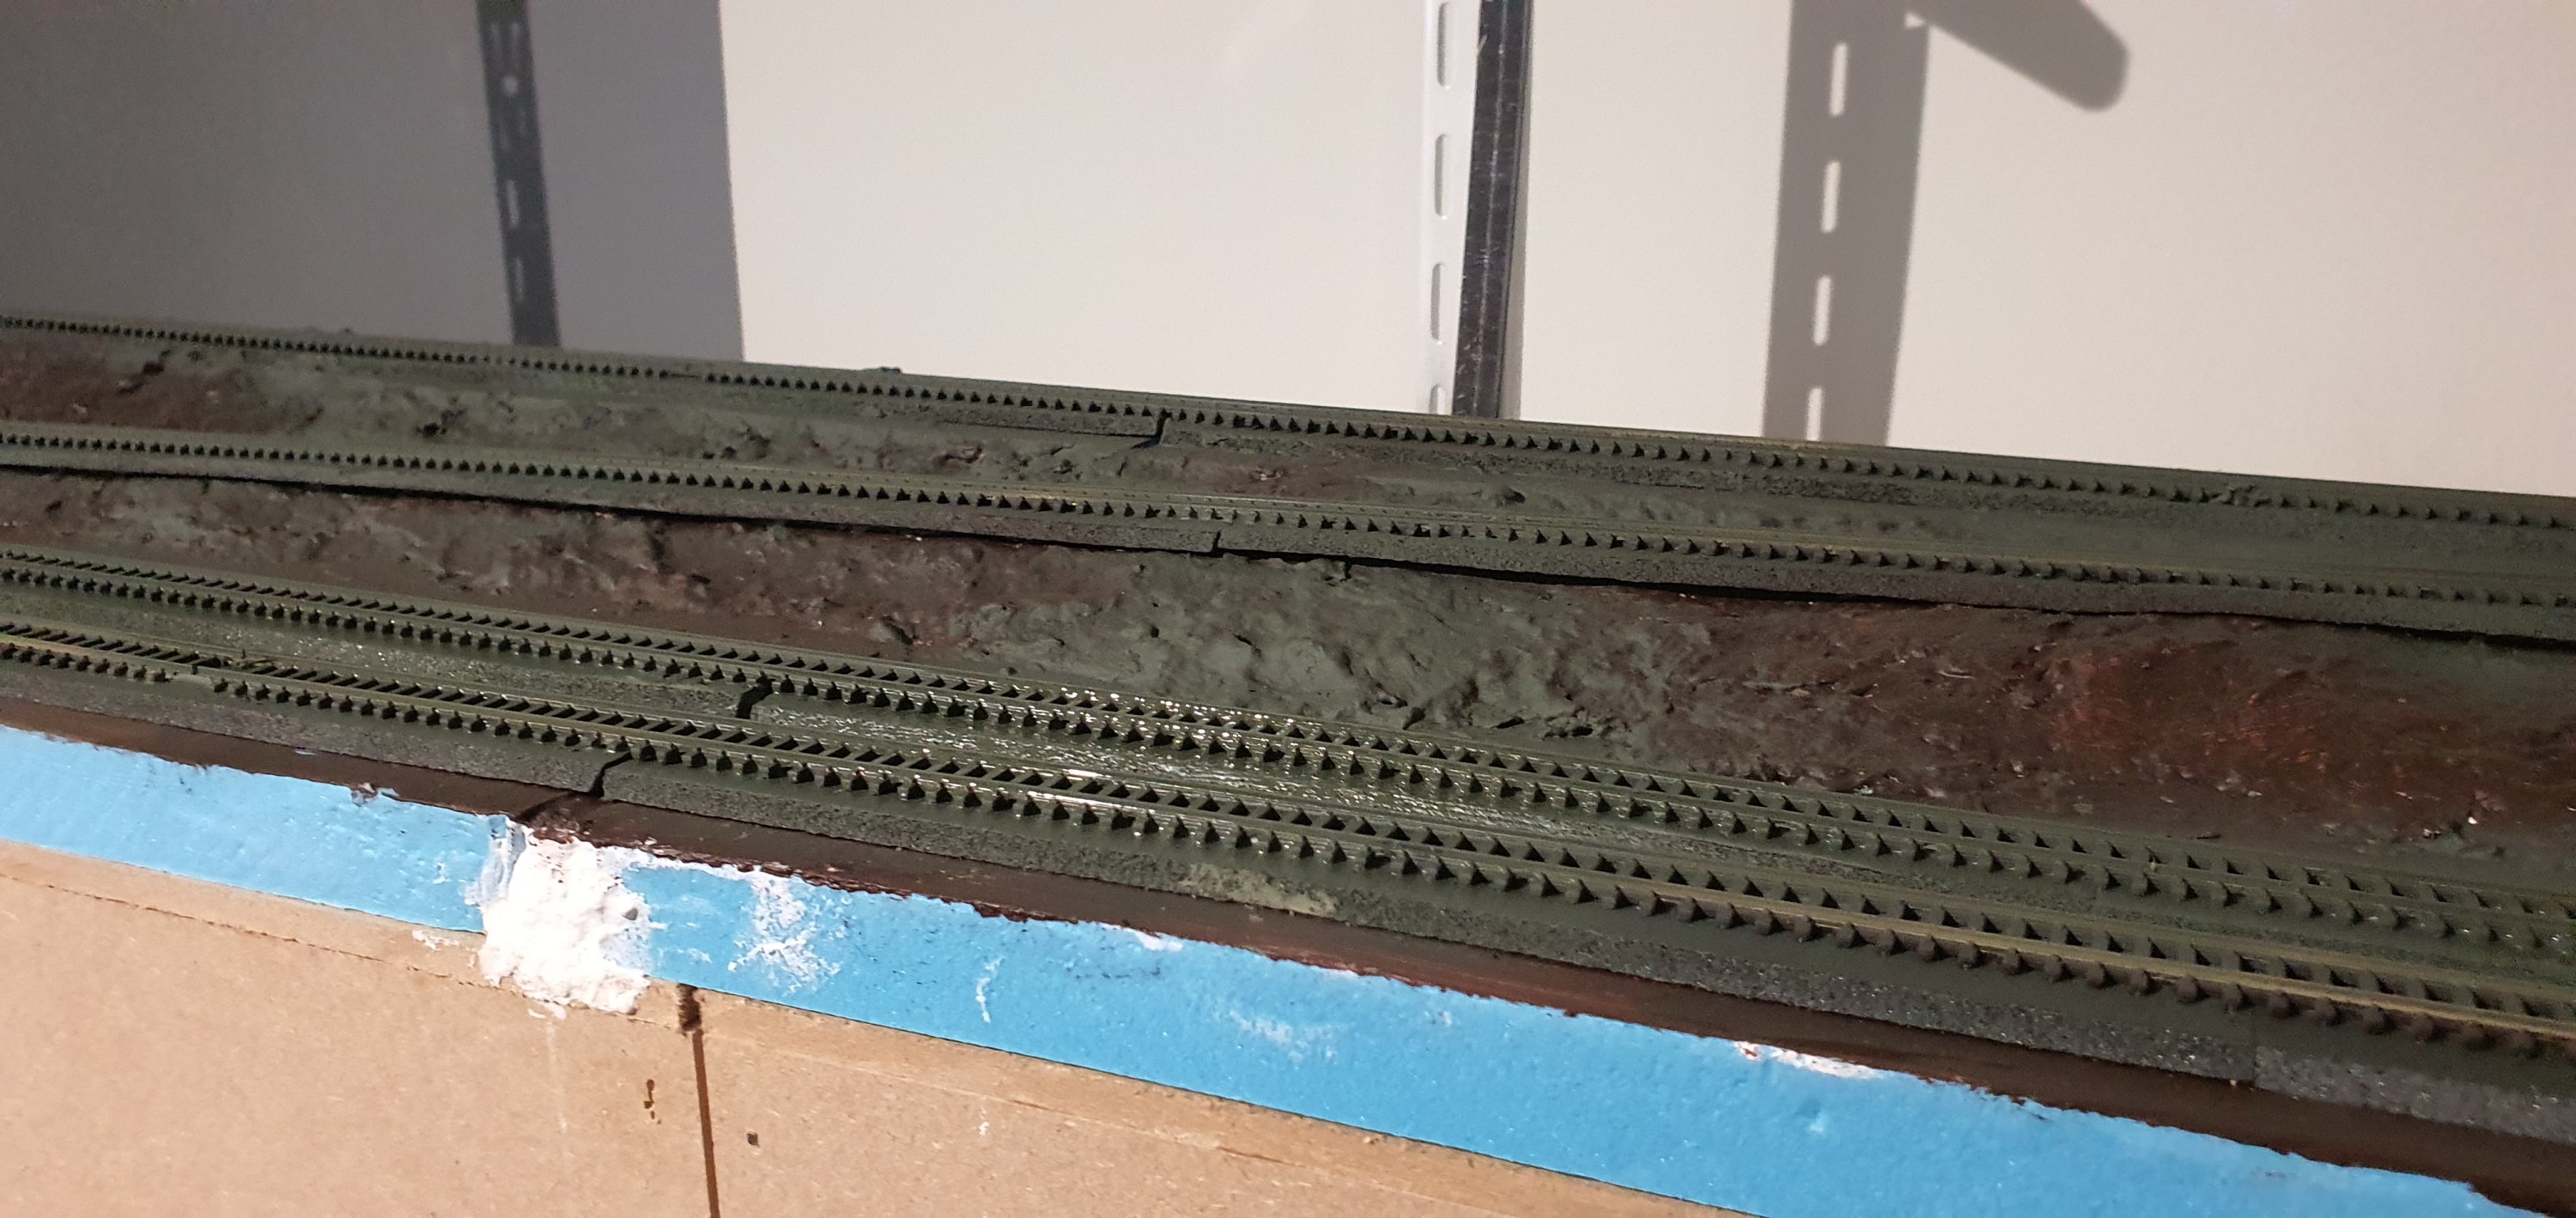
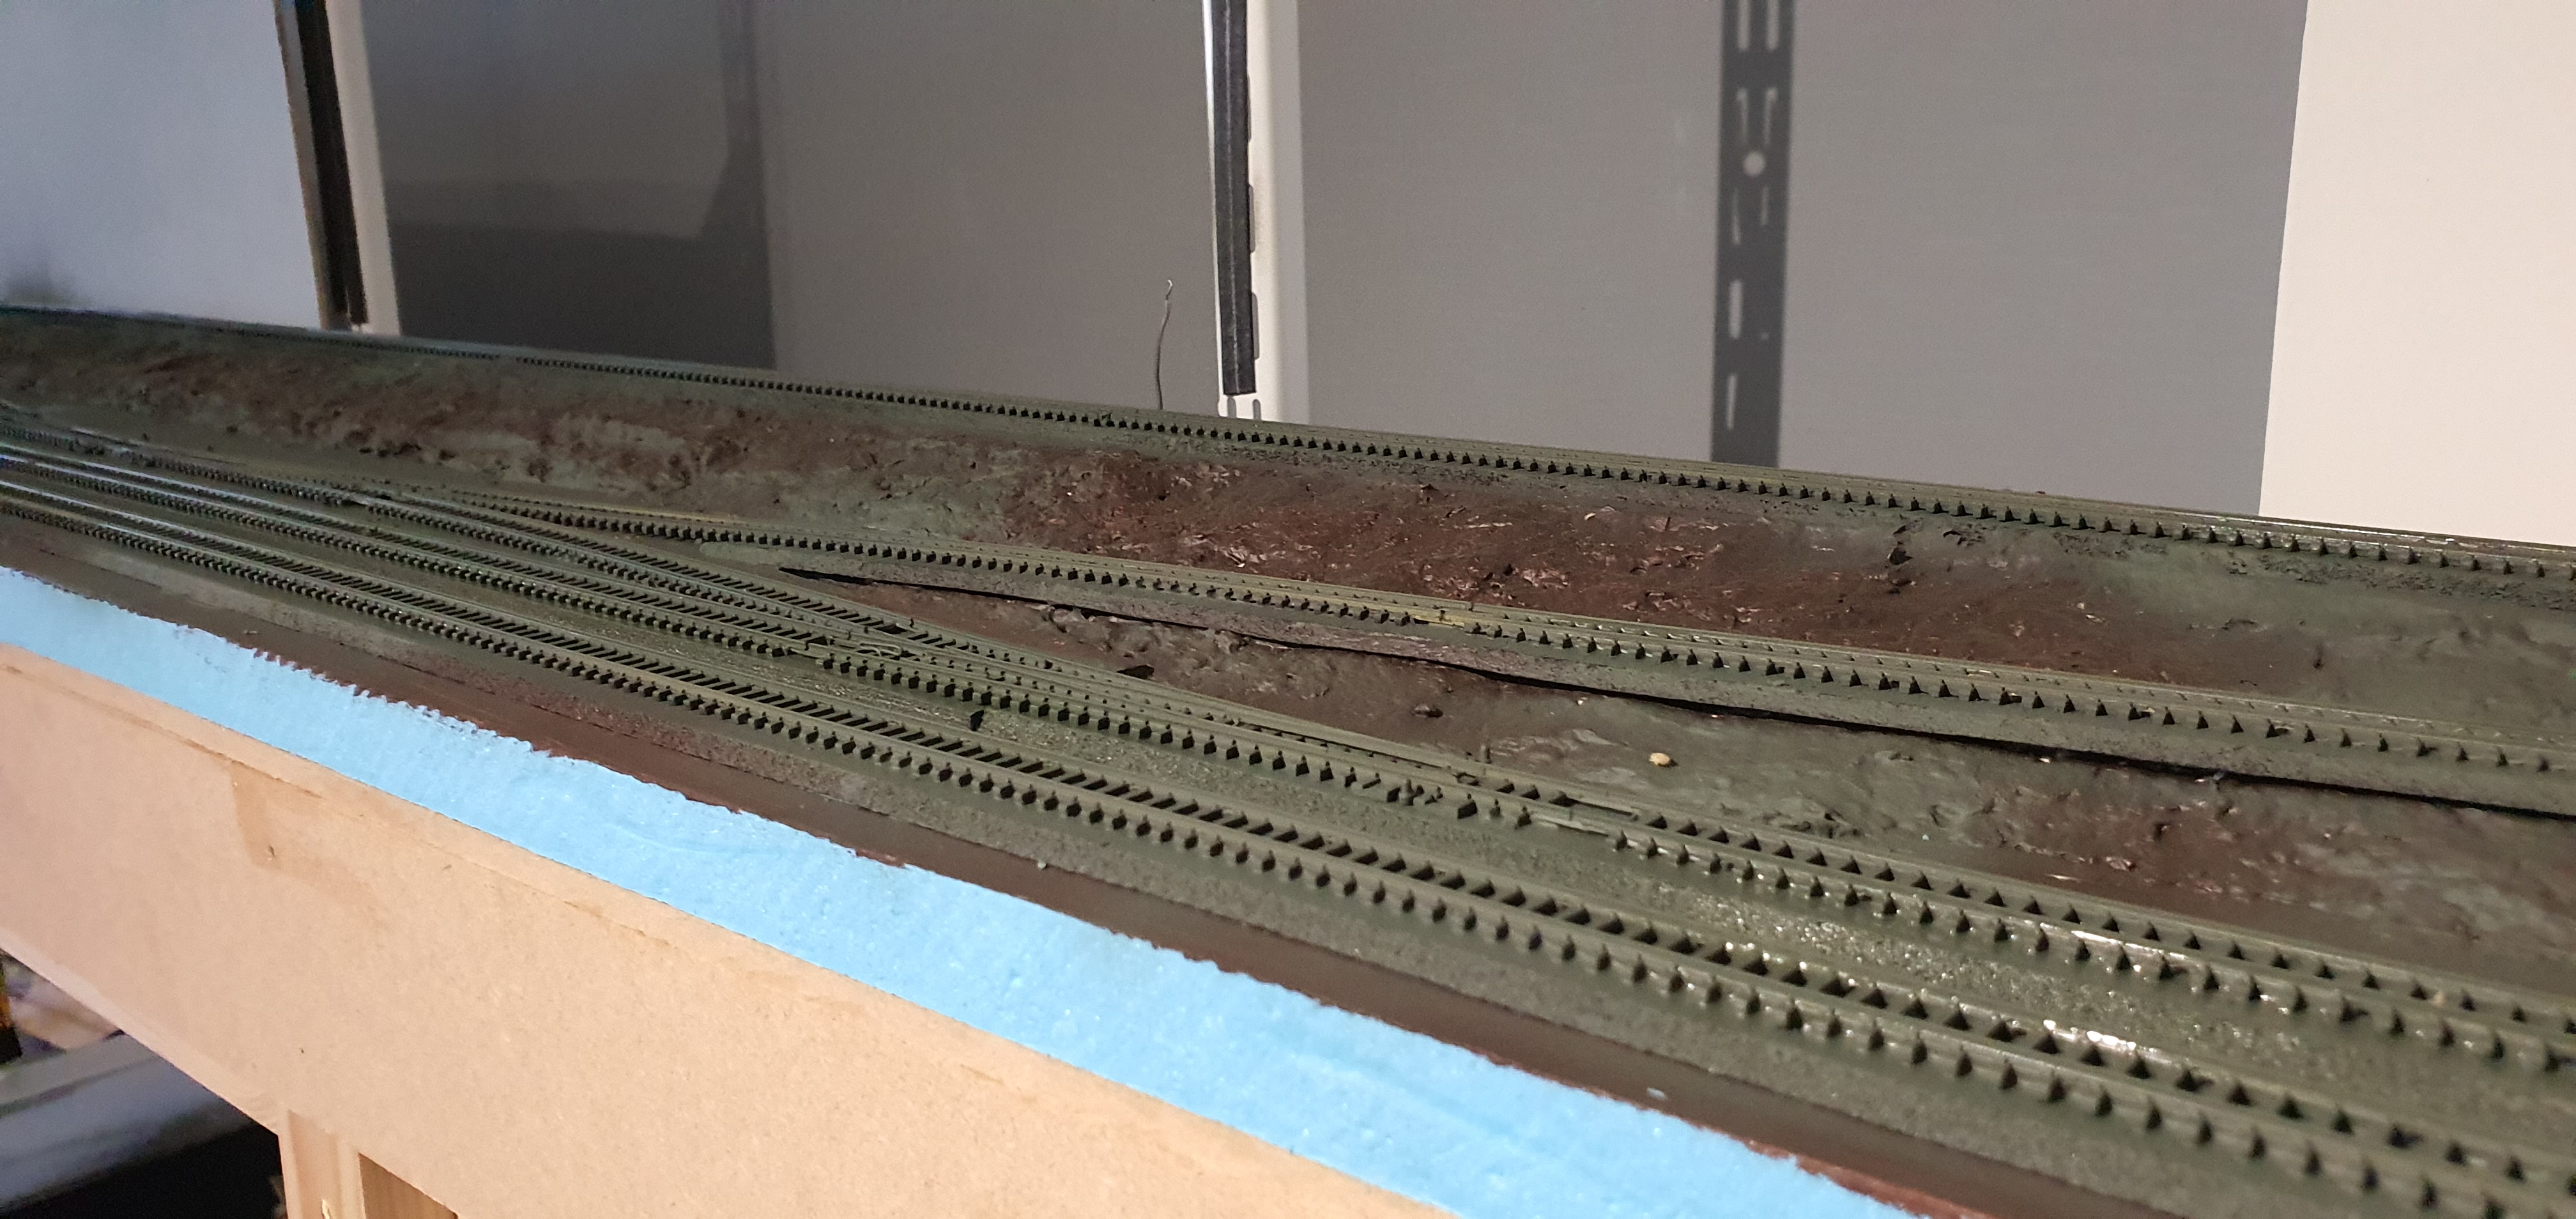
The whole track area got a good dose of ultra flat brown krylon camo paint. It looks a tad green but drys brown.
Immediately after painting I cleaned the paint from the railhead with a track cleaner. It’s messy and the whole area needs vacuuming before the matt medium goes down.
We did have a few mistakes and over spray onto the snow but this looks kinda weathered so whilst I’ll clean this it could be a good technique to mist some brown when weathering the snow near roads.
This was tonight’s final Job this is the track feed board for the South end of ackerville. The block detection unit will go in the centre of this board.
Right on to tomorrow let’s see what we can get done.
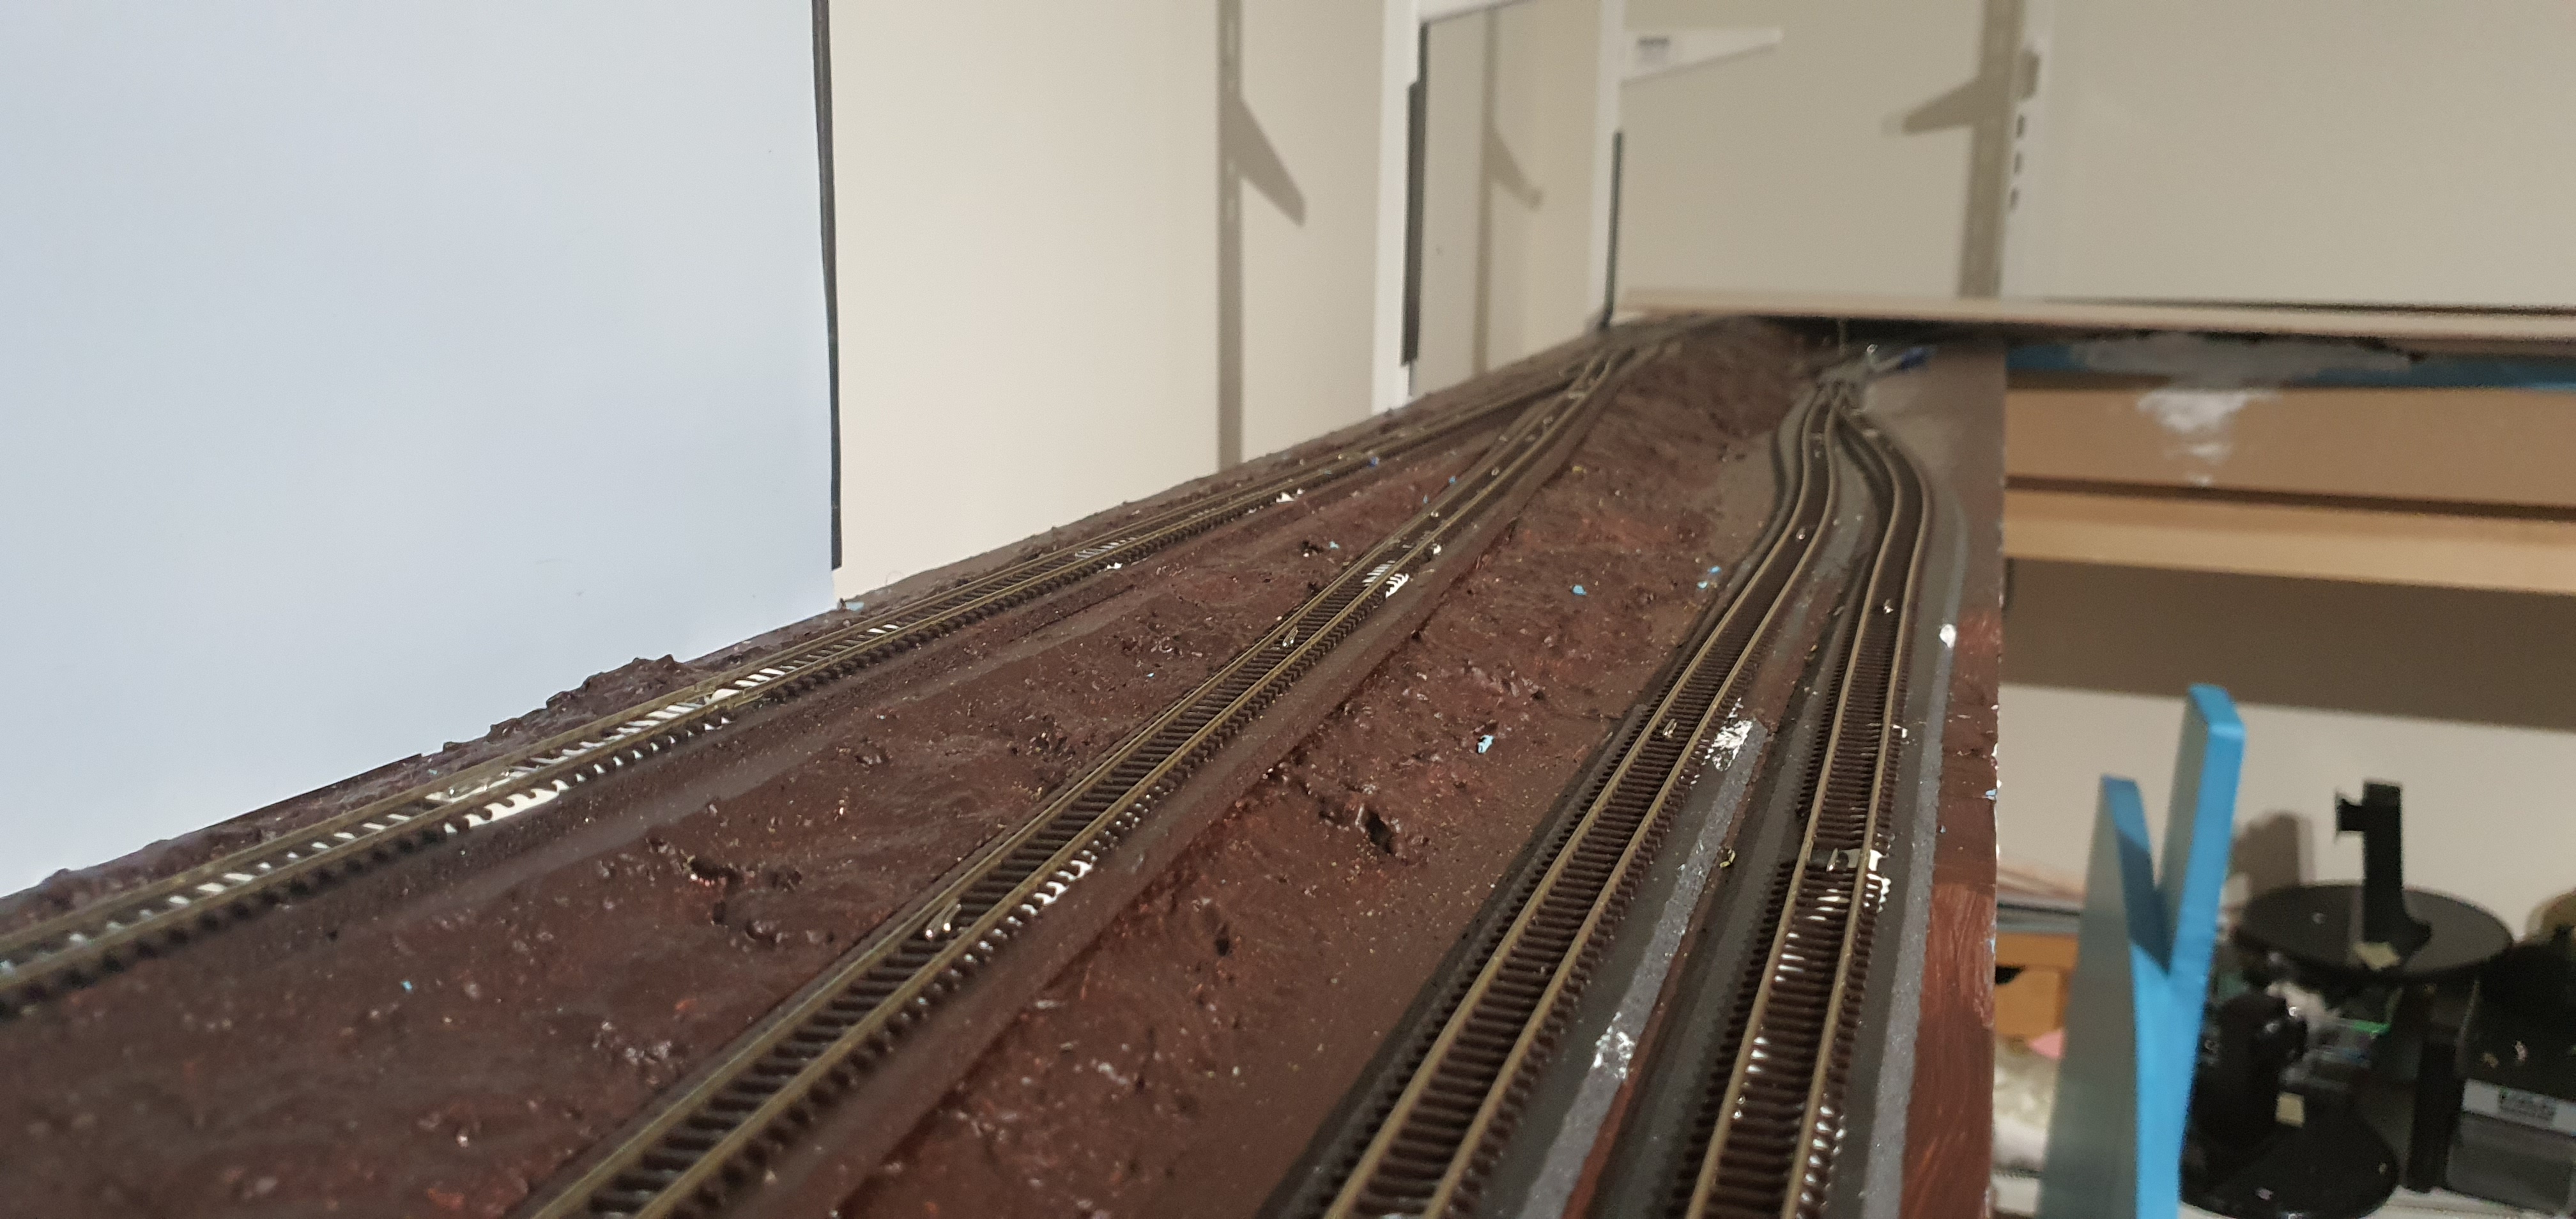
This is just a quick update to day that we are now at 90% of the track laid with feeders attached on the ackerville section of the layout. I have covered my track laying efforts before so this is really just an update on progress.
Now it’s onto snow & trees, lots of snow and trees.
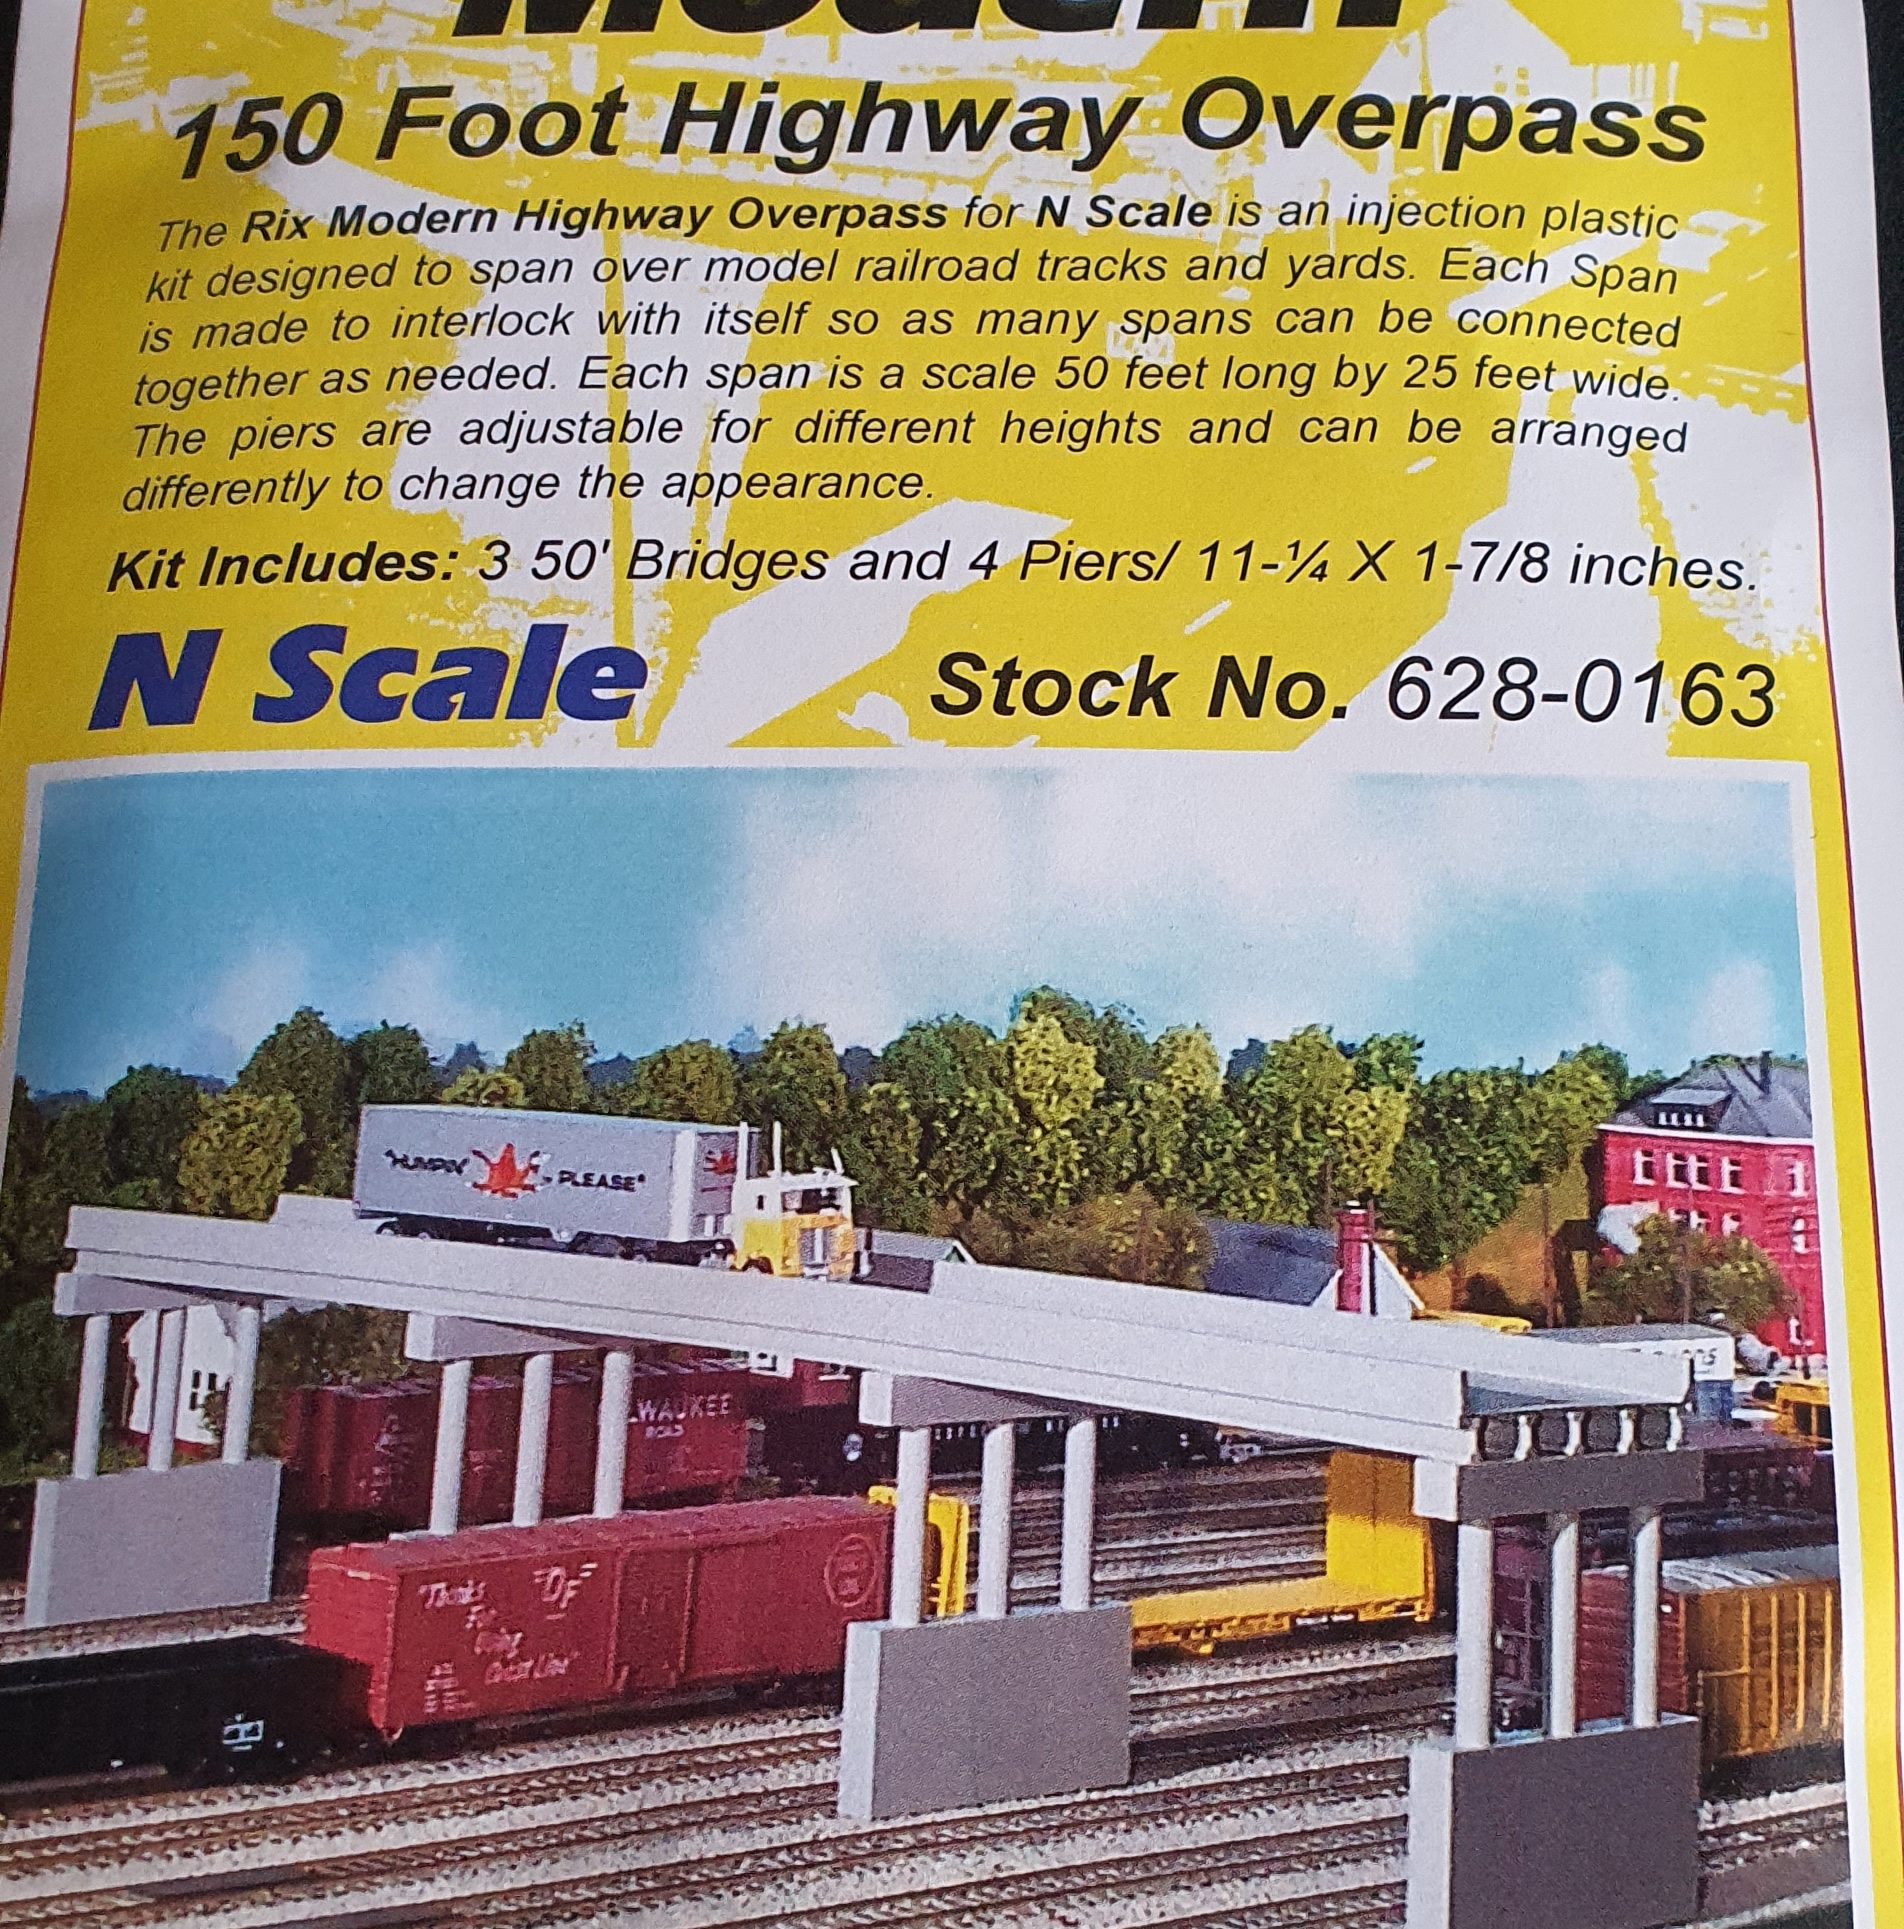
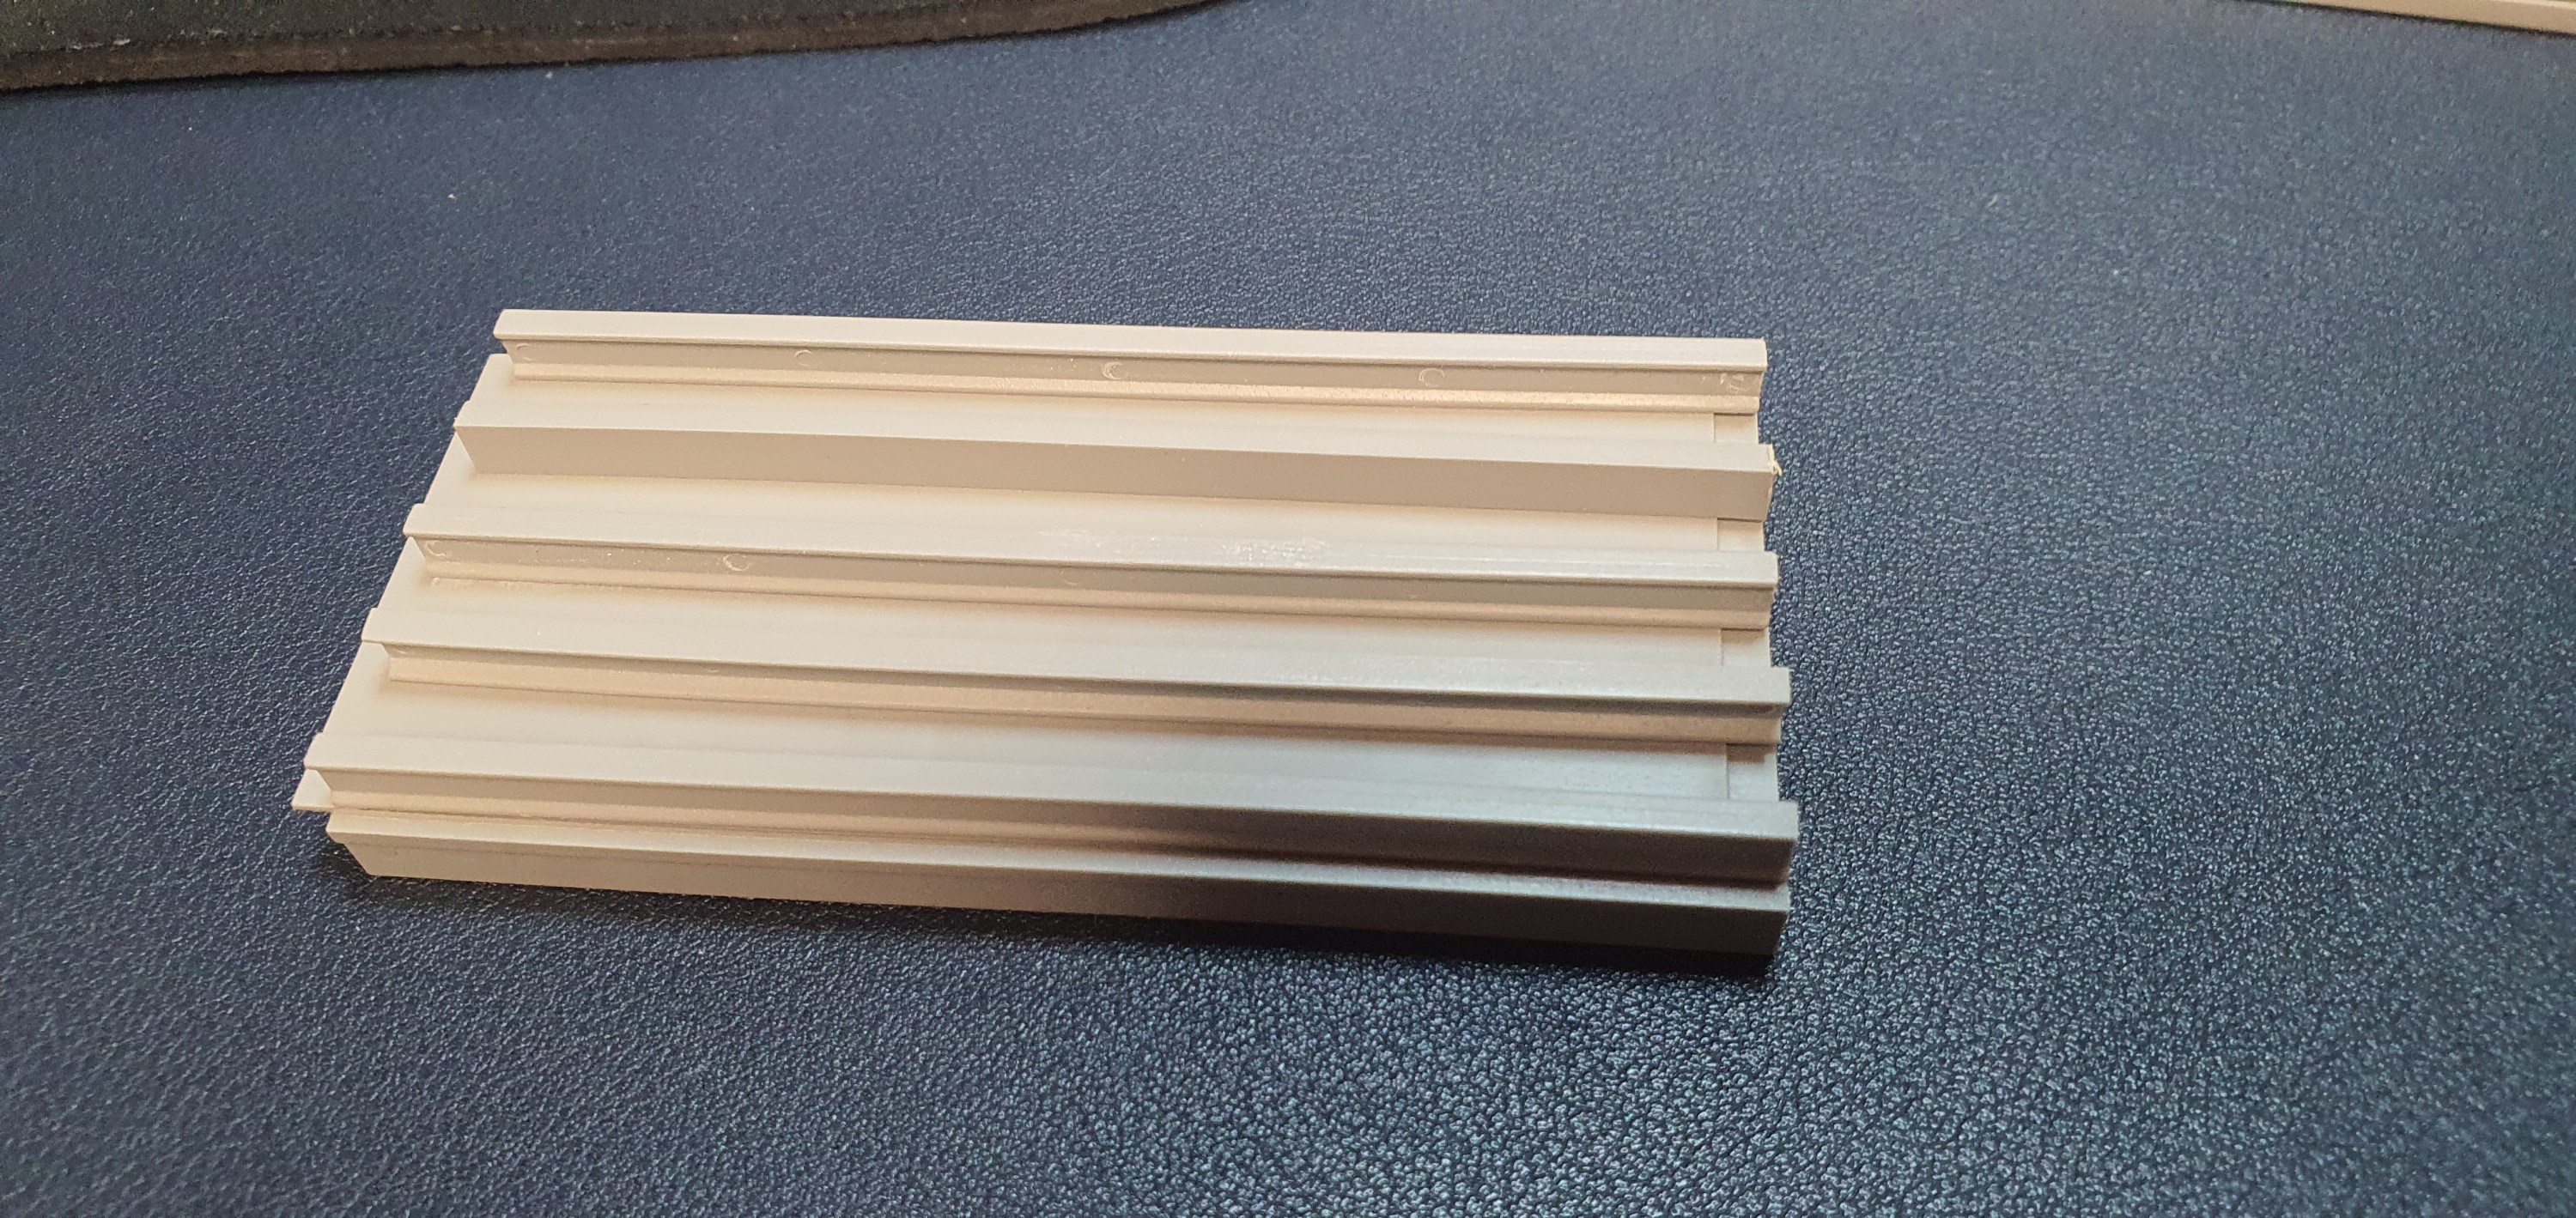
At the south end of Ackerville there is a highway overpass that crosses all the tracks. To model this overpass I used a Rix Products modern highway overpass kit. It is narrower than the prototype but the whole Ackerville area is compressed by 25-50% so having a narrower bridge still fits in the scene.
Lets have a look at what is in the packet.
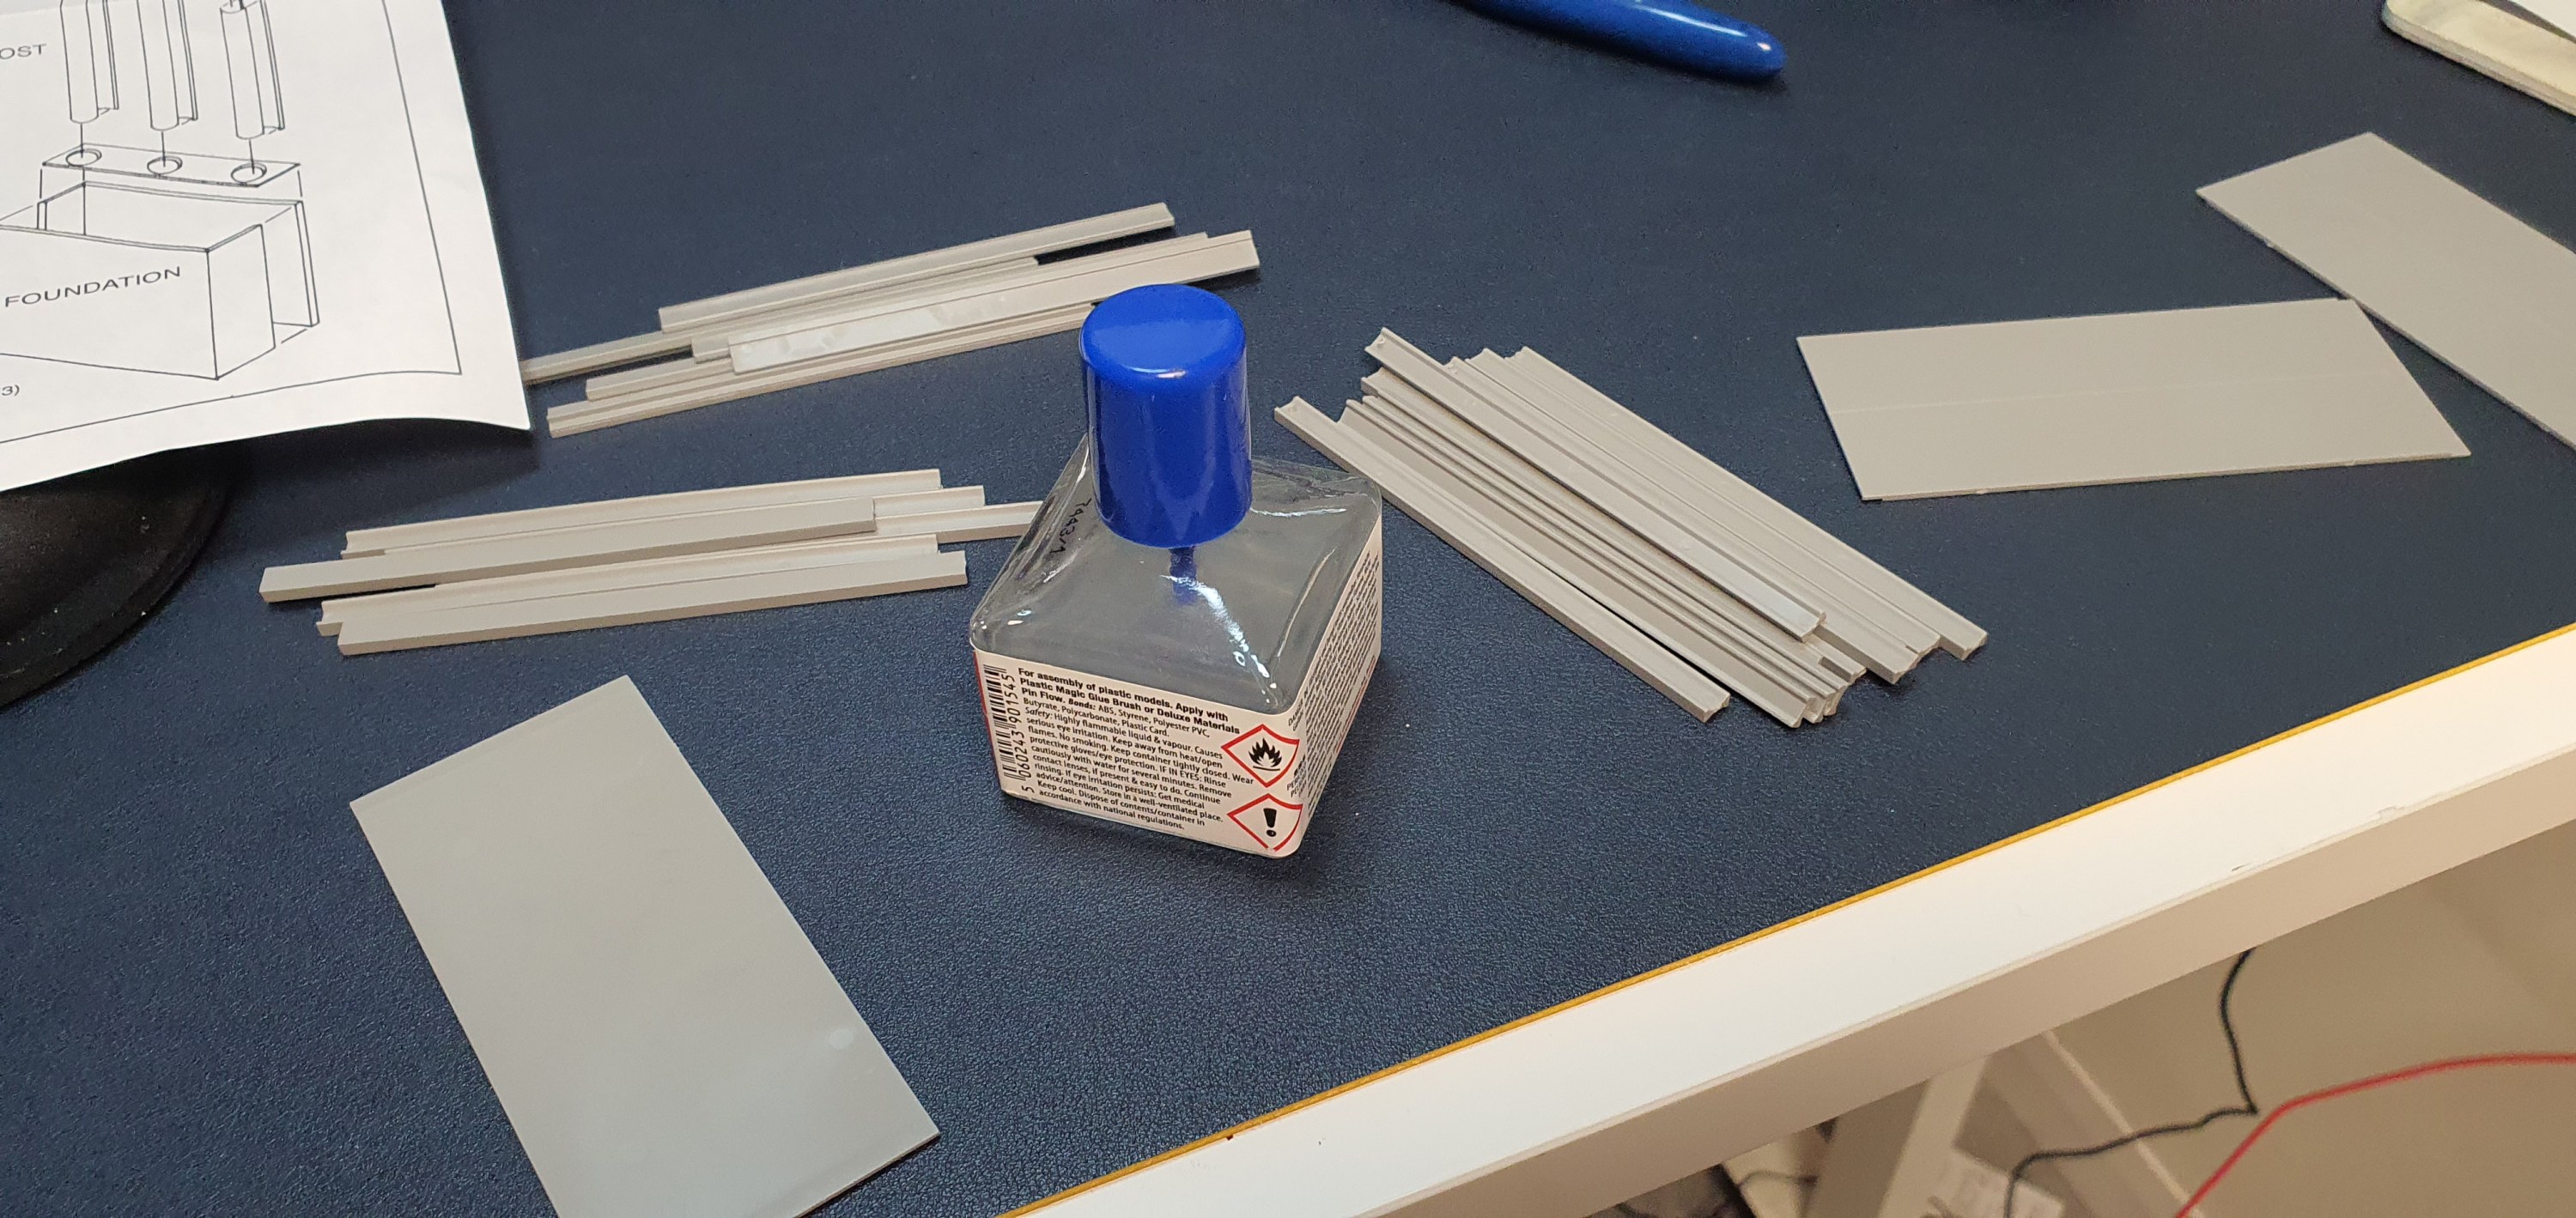
The first thing to do with the kit is to cut and file the girders from the sprues and seperate them. Here you see the I beams, C beams and barriers. The bridge decks each have three I beamsn and two C beams under each 50ft section.
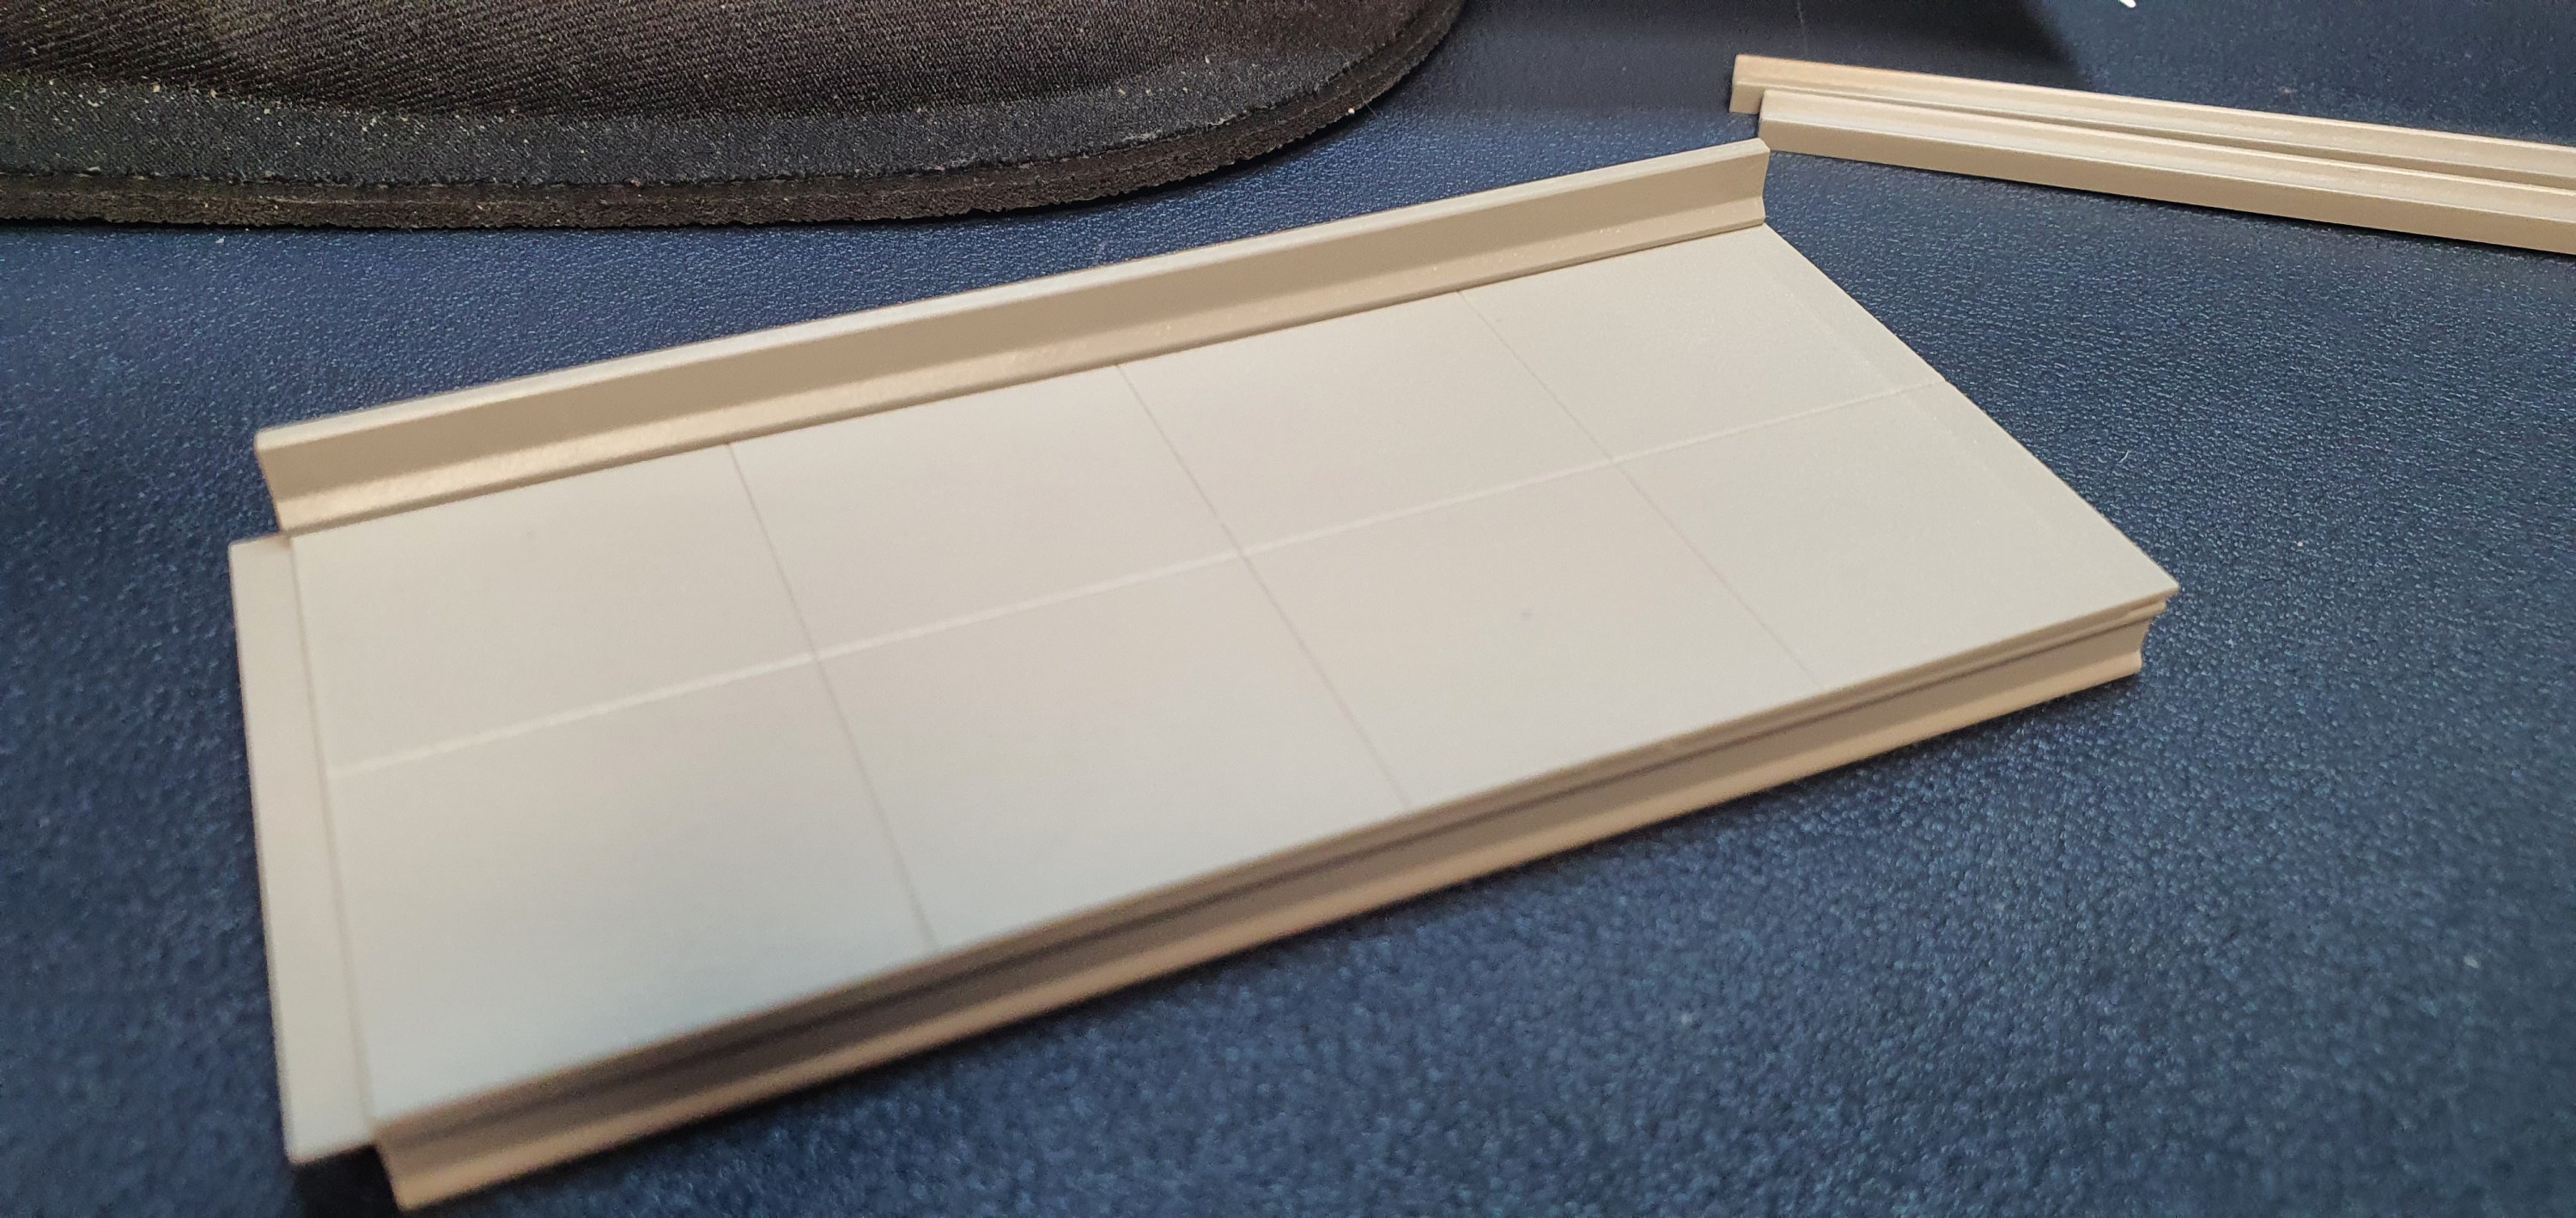
The I beams go in first and then the C beams between each I beam.
If the bridge is being assembled in one piece then I would suggest that you glue the road deck sections together on a flat surface and then line the beams up on each section.
Then I added the crash barriers to the edge of the roadway.
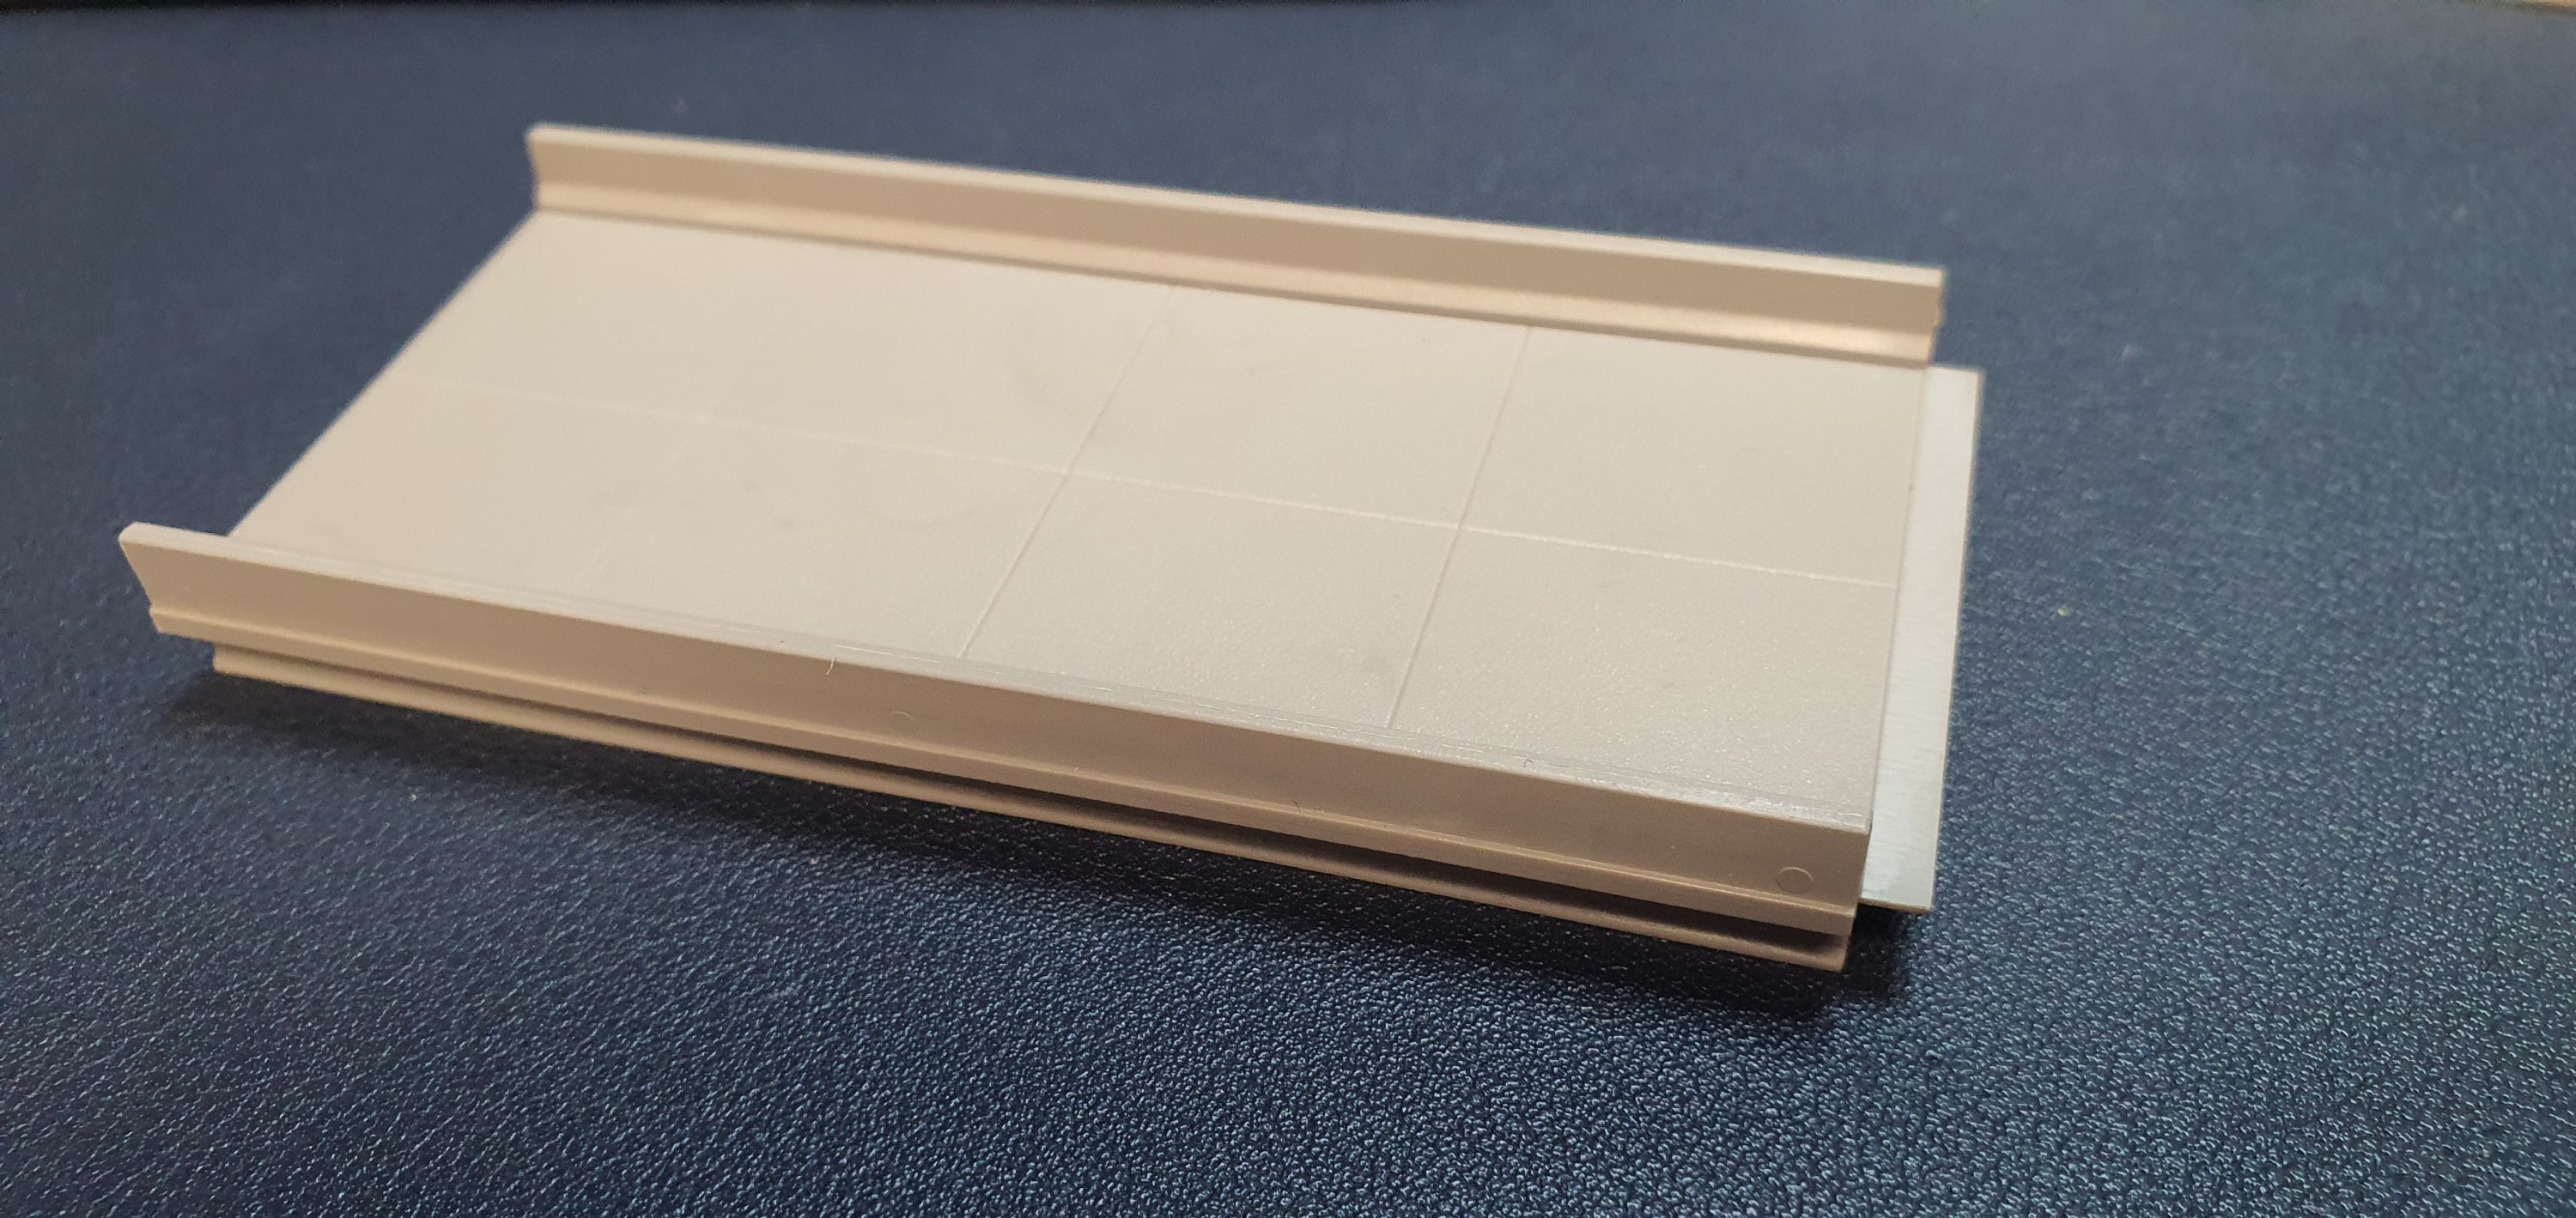
Here is a completed 50′ bridge section
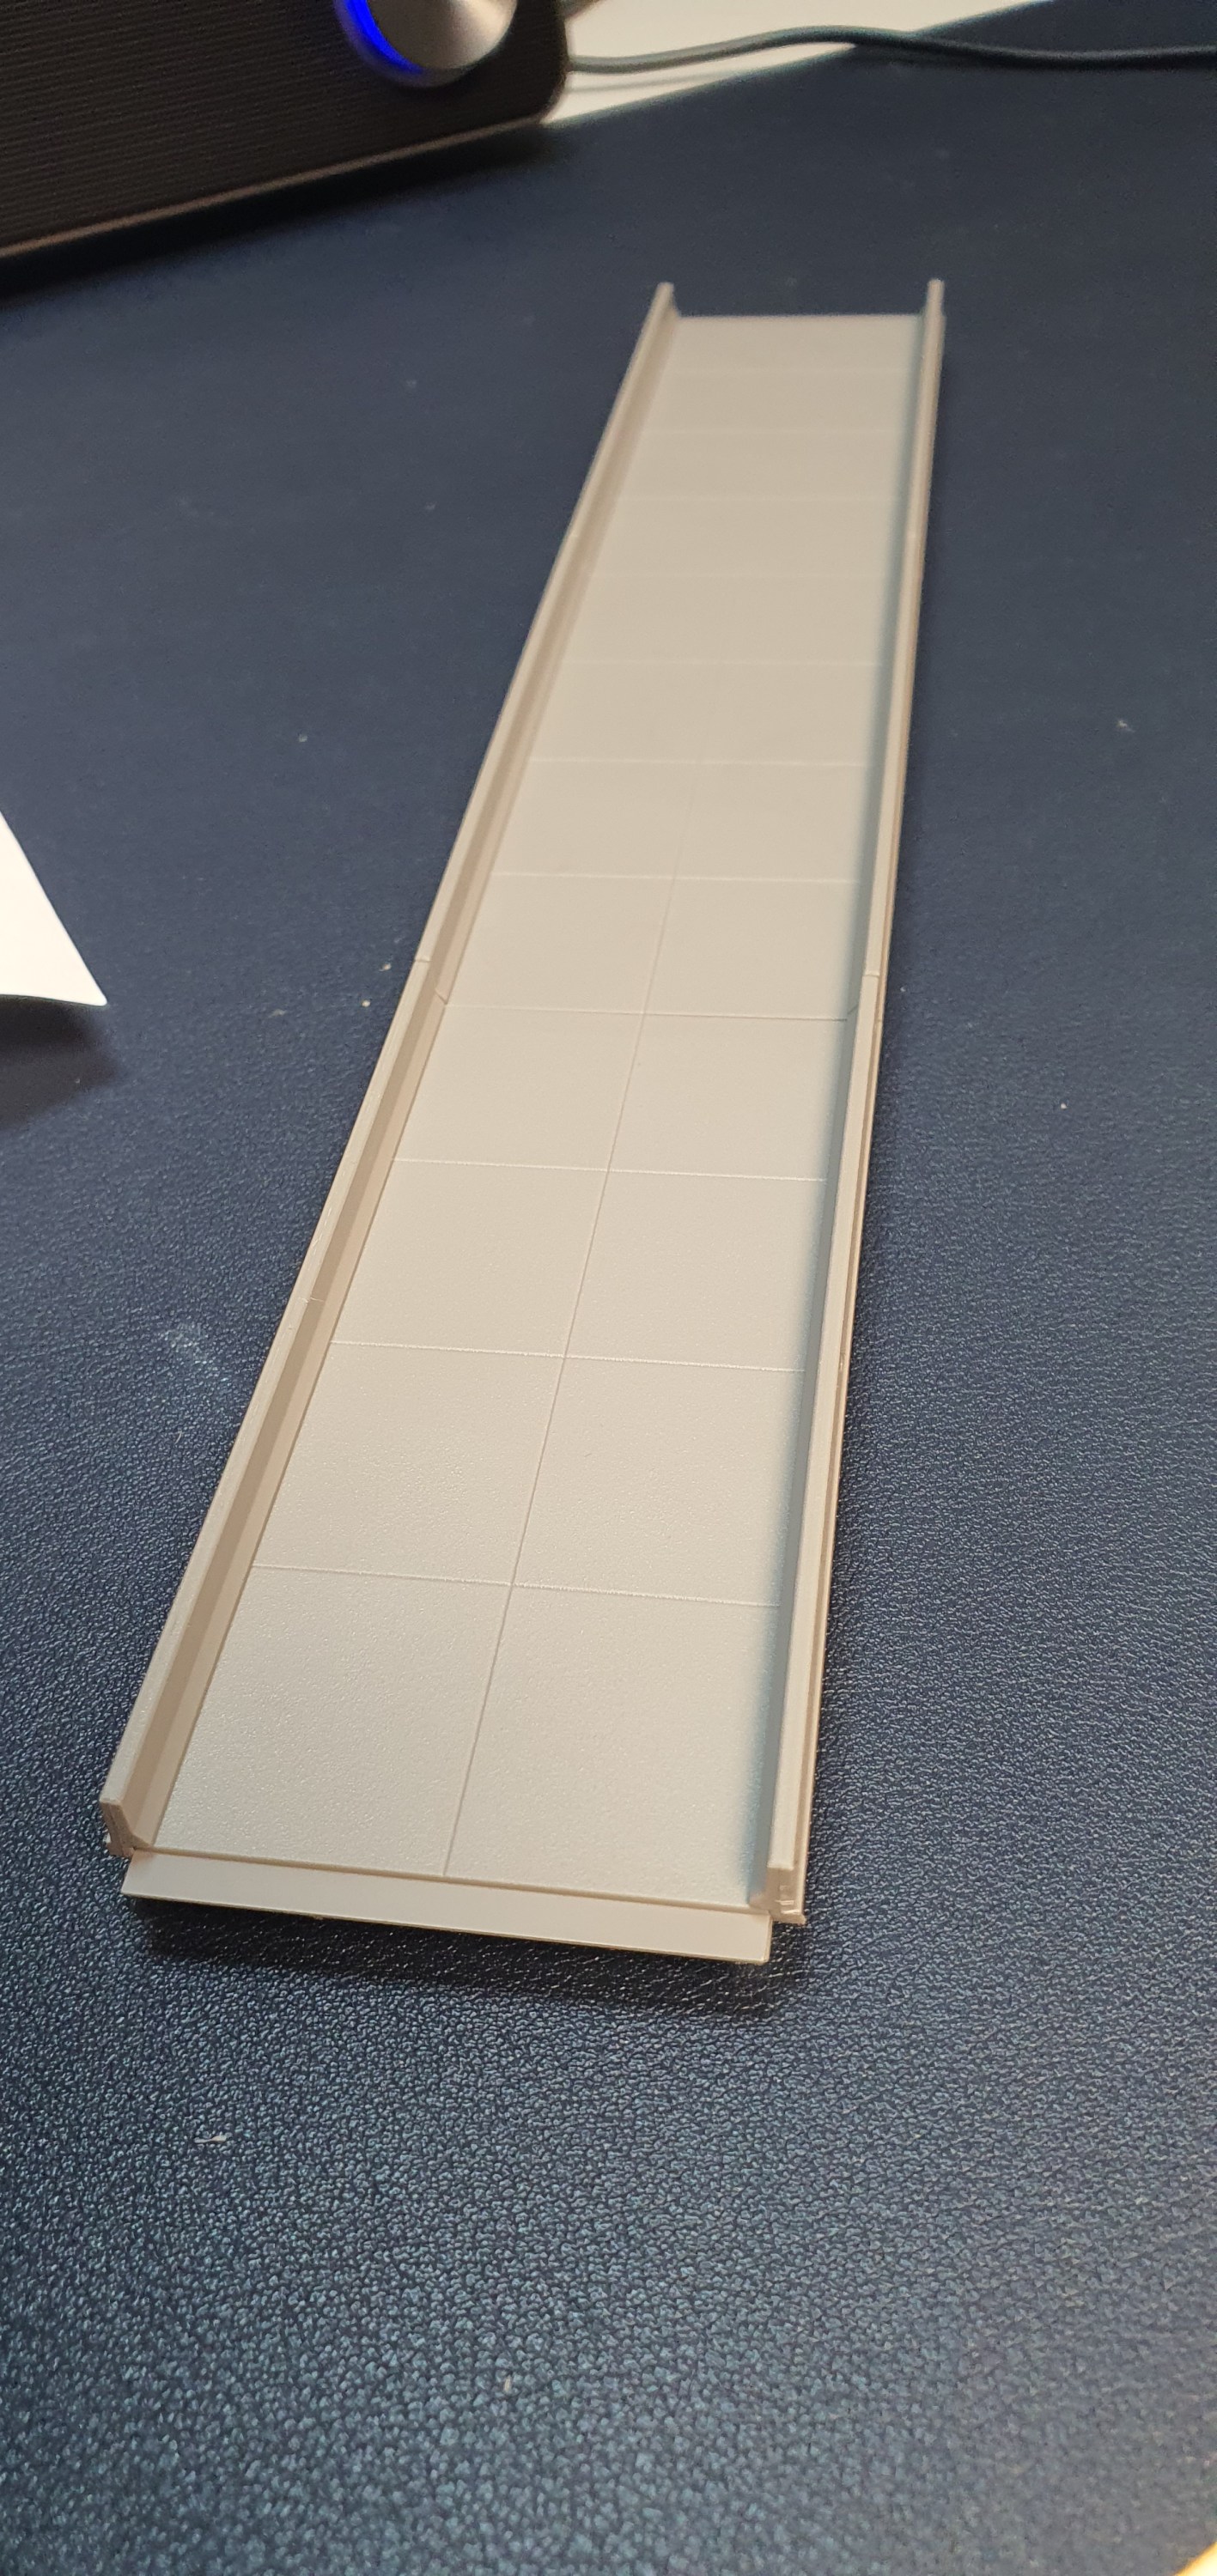
The completed 150′ of bridge deck. So time for the piers.
Start by assembling the upper and lower sections of each pier and then measure the hight you need the bridge to be. Now on this section of Ackerville the WSOR is 20mm higher than the CN mainline so I want my bridge to be 70mm above the CN mainline.
Once I was happy with the hight of the piers I glued the posts into place.
Done, but lets get it on the layout and test everything before we take it to the paint booth in part two.
This looks awesome, well yeah I am biased and I know its nothing like the actual bridge in Ackerville but no one in Orkney will have seen the real bridge. By making the deck solid I am able to offset the piers to allow for a larger gap between the piers on the WSOR section and narrower for the CN.
Ok I see the middle pier is too low but we’ll get that fixed before final installation. right I don’t know when part two of this builld will be getting some paint and weathering on it and we’ll get it installed.
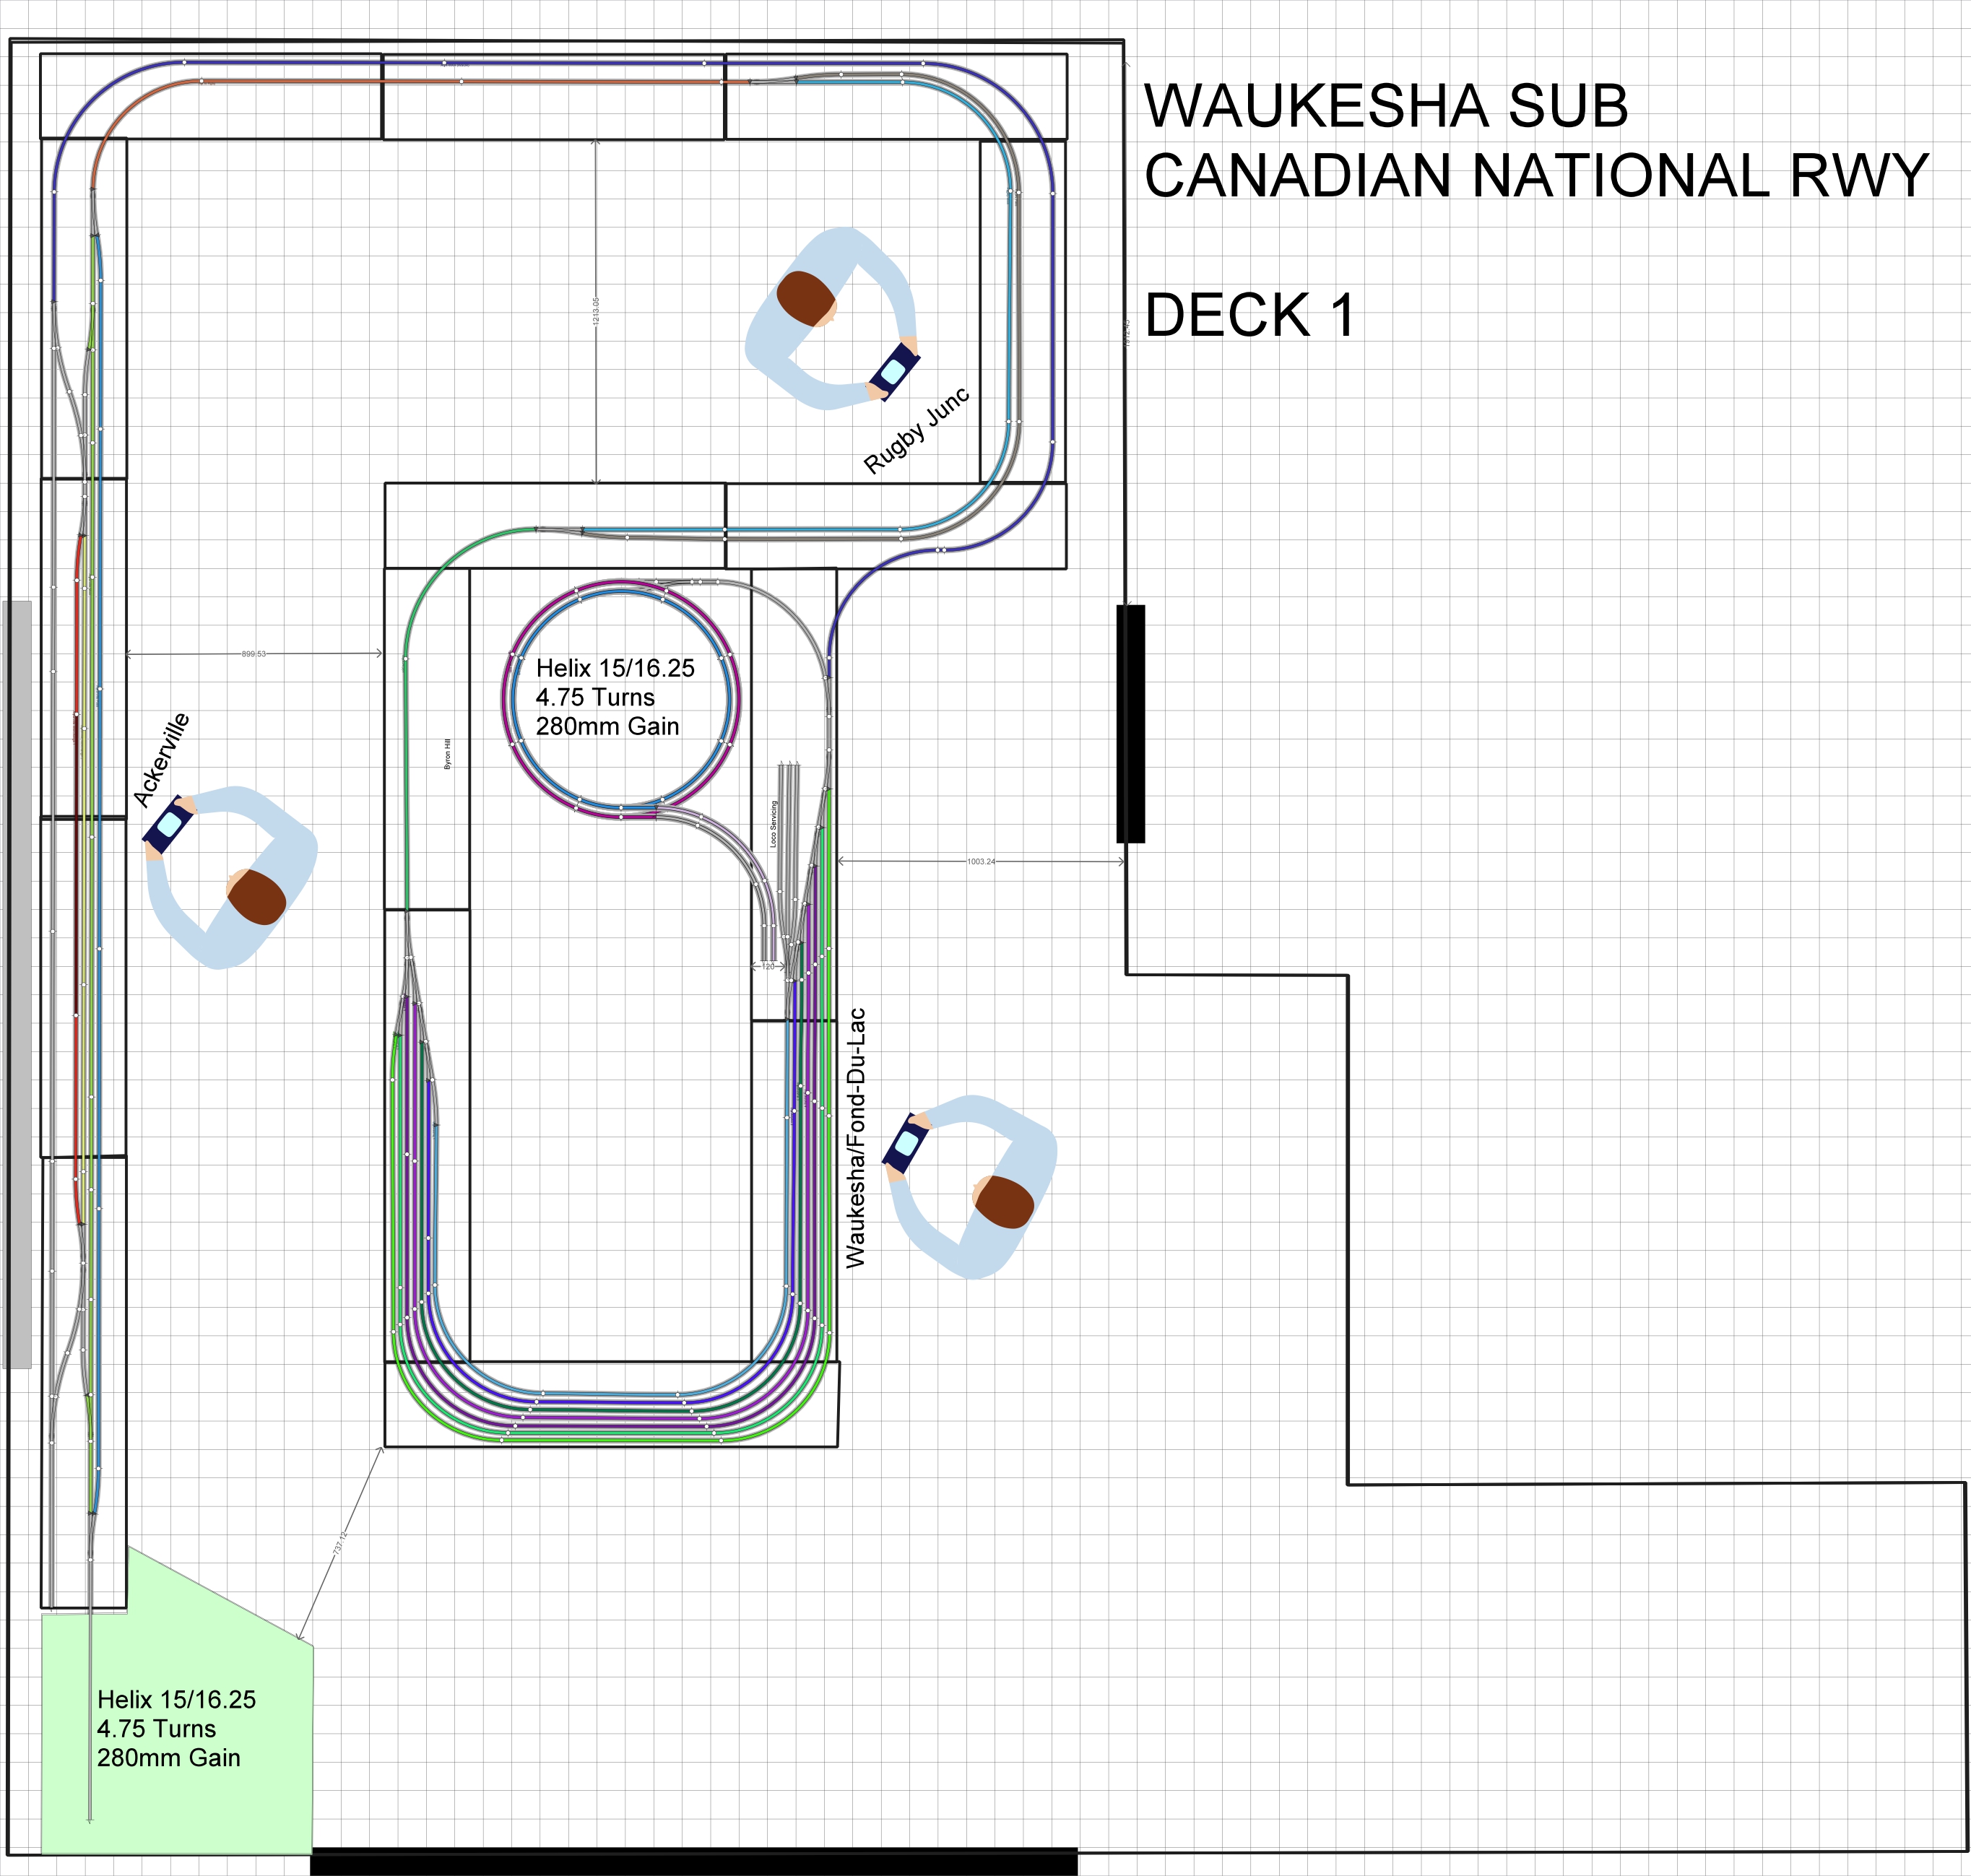
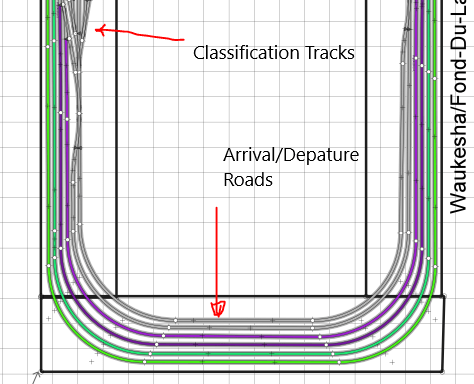
An opportunity to buy some more code 55 turnouts will allow me to add a classification yard to my yard. As a quick re-cap the yard on my layout is also my staging yard, in the first iteration of the plan it contained five loops and a small loco shop area.
the original plan the yard area goes around the pennisular
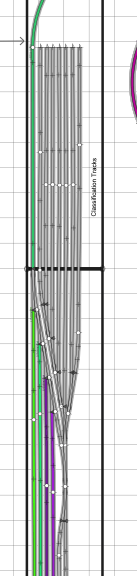
I managed to get an assortment of medium and large radius turnouts which will allow me to have a calssification yard and switch lead. The idea being that manifest trains are made up from the cars in these tracks and then broken down upon their arrival back to the yard area. I don’t know how I will do the operating schema for car forwarded as the cars wont have industries on the layout so it may be left upto the switch crew to choose cars for the train based on a quantiy of each car required for each train.
the classifcation yard (capacity: 79 50′ cars)
By sacrificing one of the through loops in the yard I was able to add a 7 road classification yard which will have a capacity of 79 cars. The classification yard is served from a 27 car capacity arrival and departure tracks.
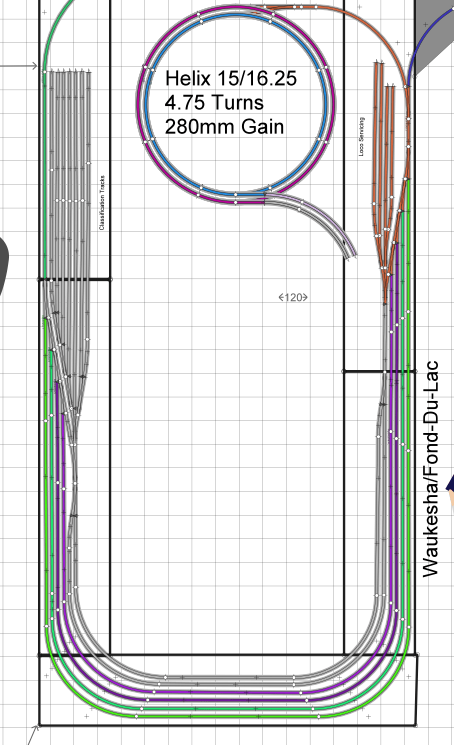
The loops in Green and Purple on the plan allow me to store four unit trains in the main yard although with layouts out on the railroad this is really about 6 unit trains in total. Each with a capacity of 40-50 50′ cars but the passing sidings will only take trains with a max length of 40 cars plus locos so they won’t fill the sidings.
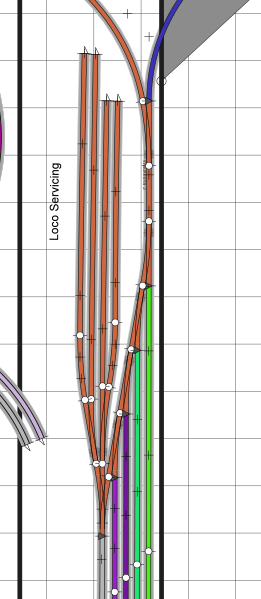
New loco servicing area
The loco servicing area has now had a re-vamp with two additional tracks and yes that’ll mean more Gevos & Dash 9’s.
So here is the whole yard area I am hoping that not being able to see each end of the train will trick you into thinking that the train is actually bigger than it really is. The use of mid train DPUs will help even more with this illusion.
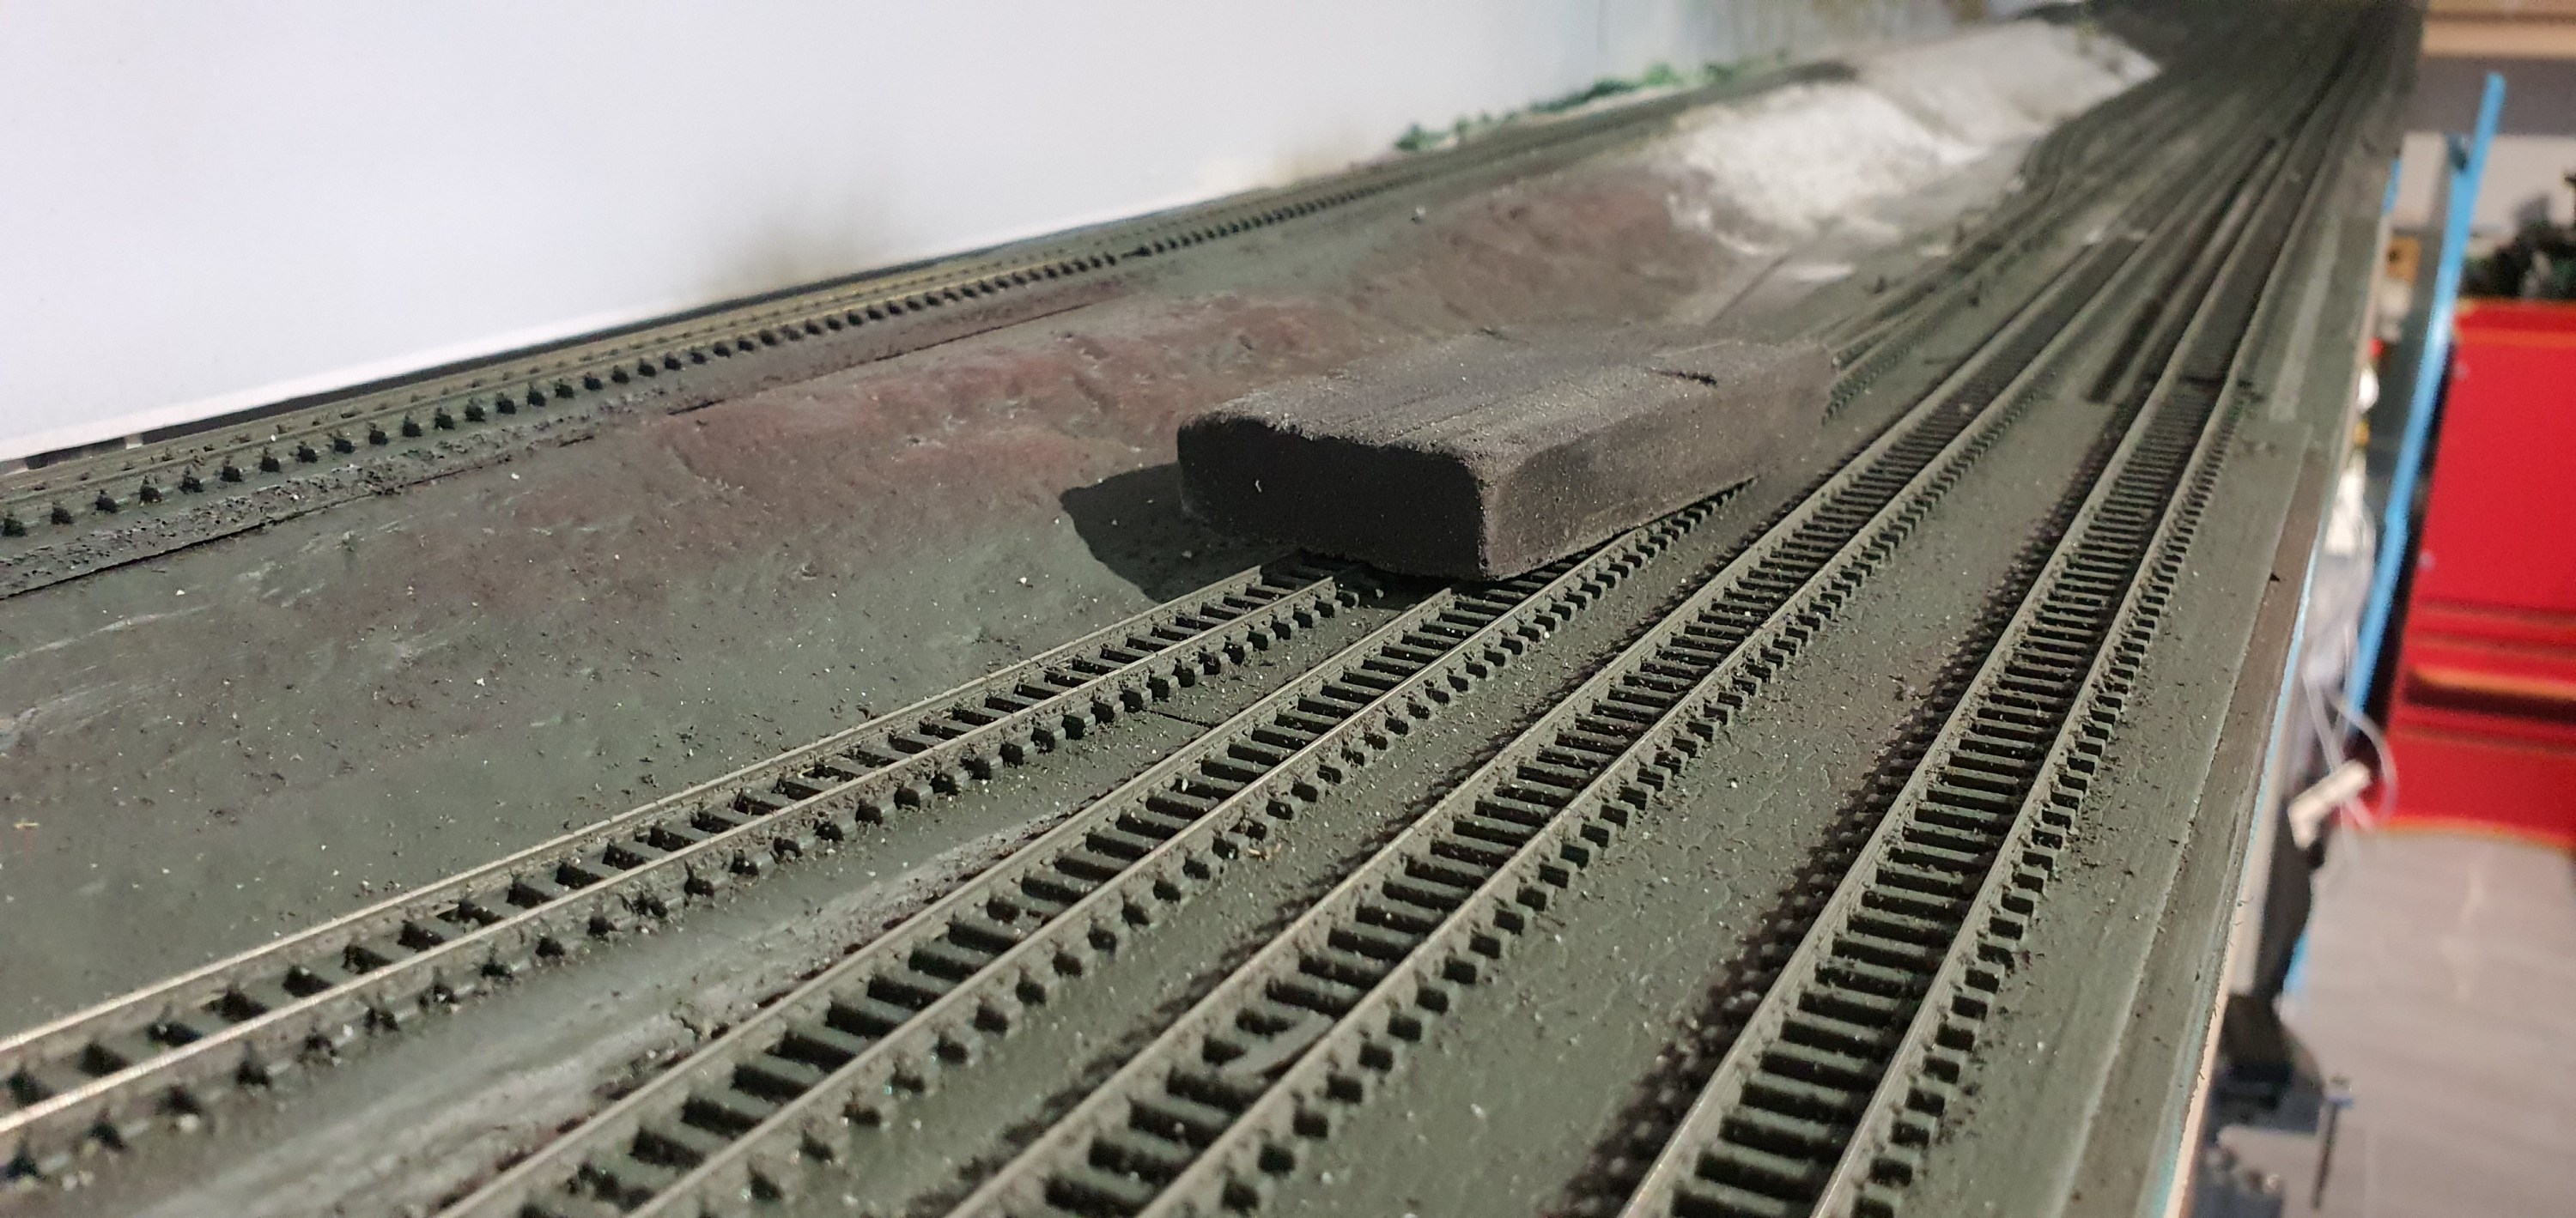
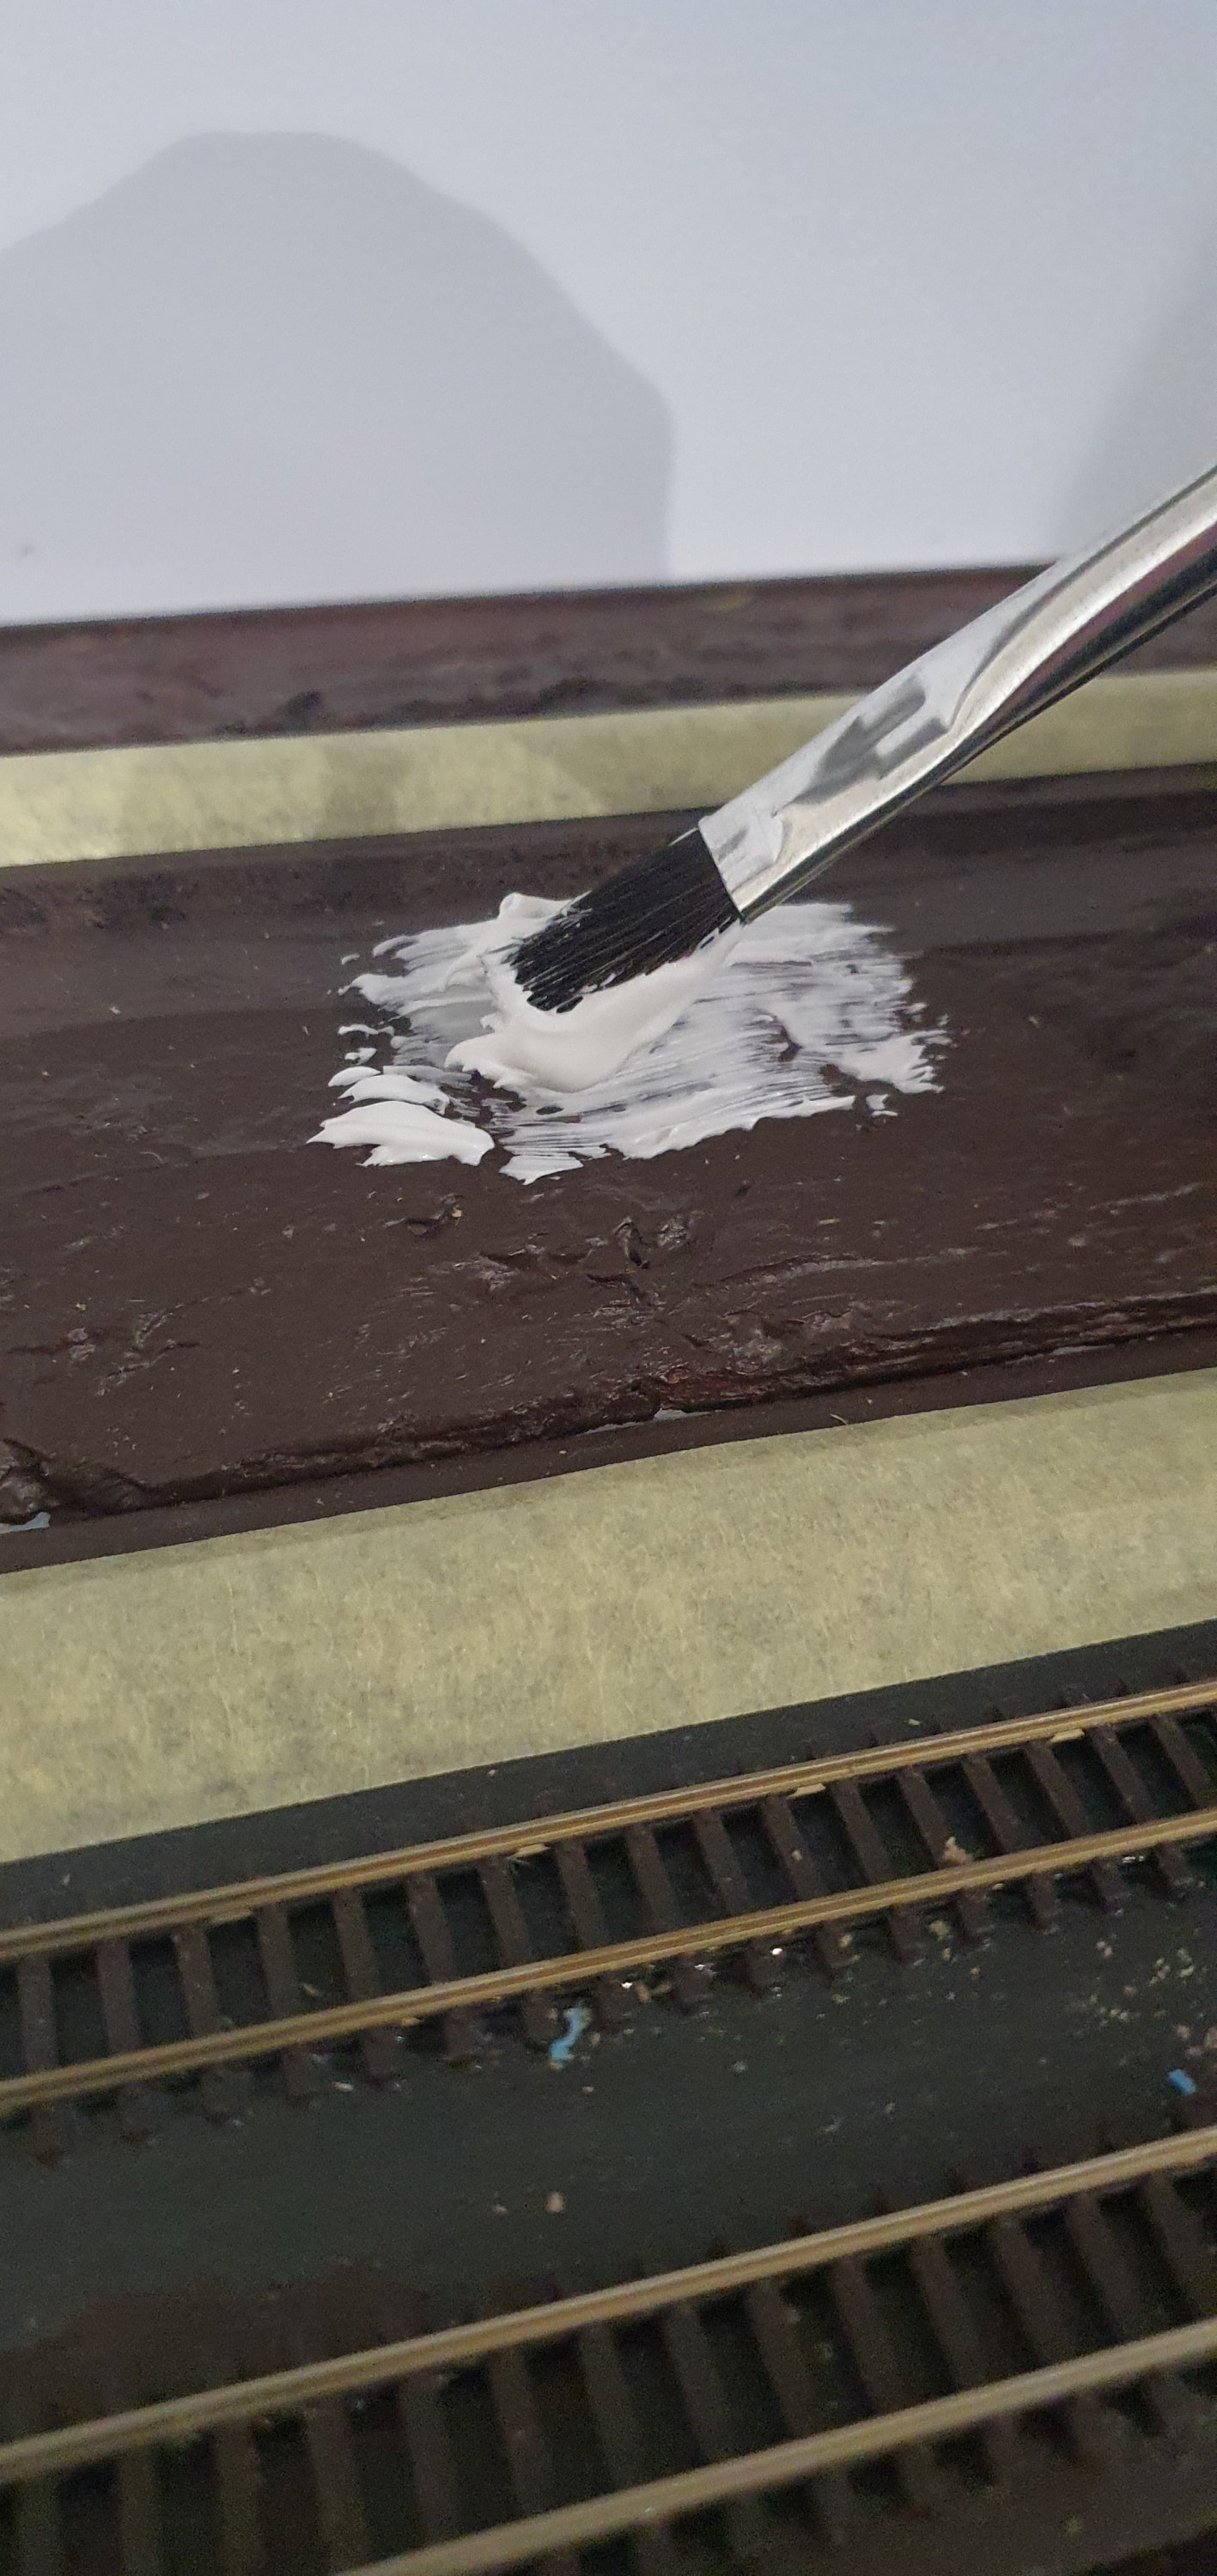
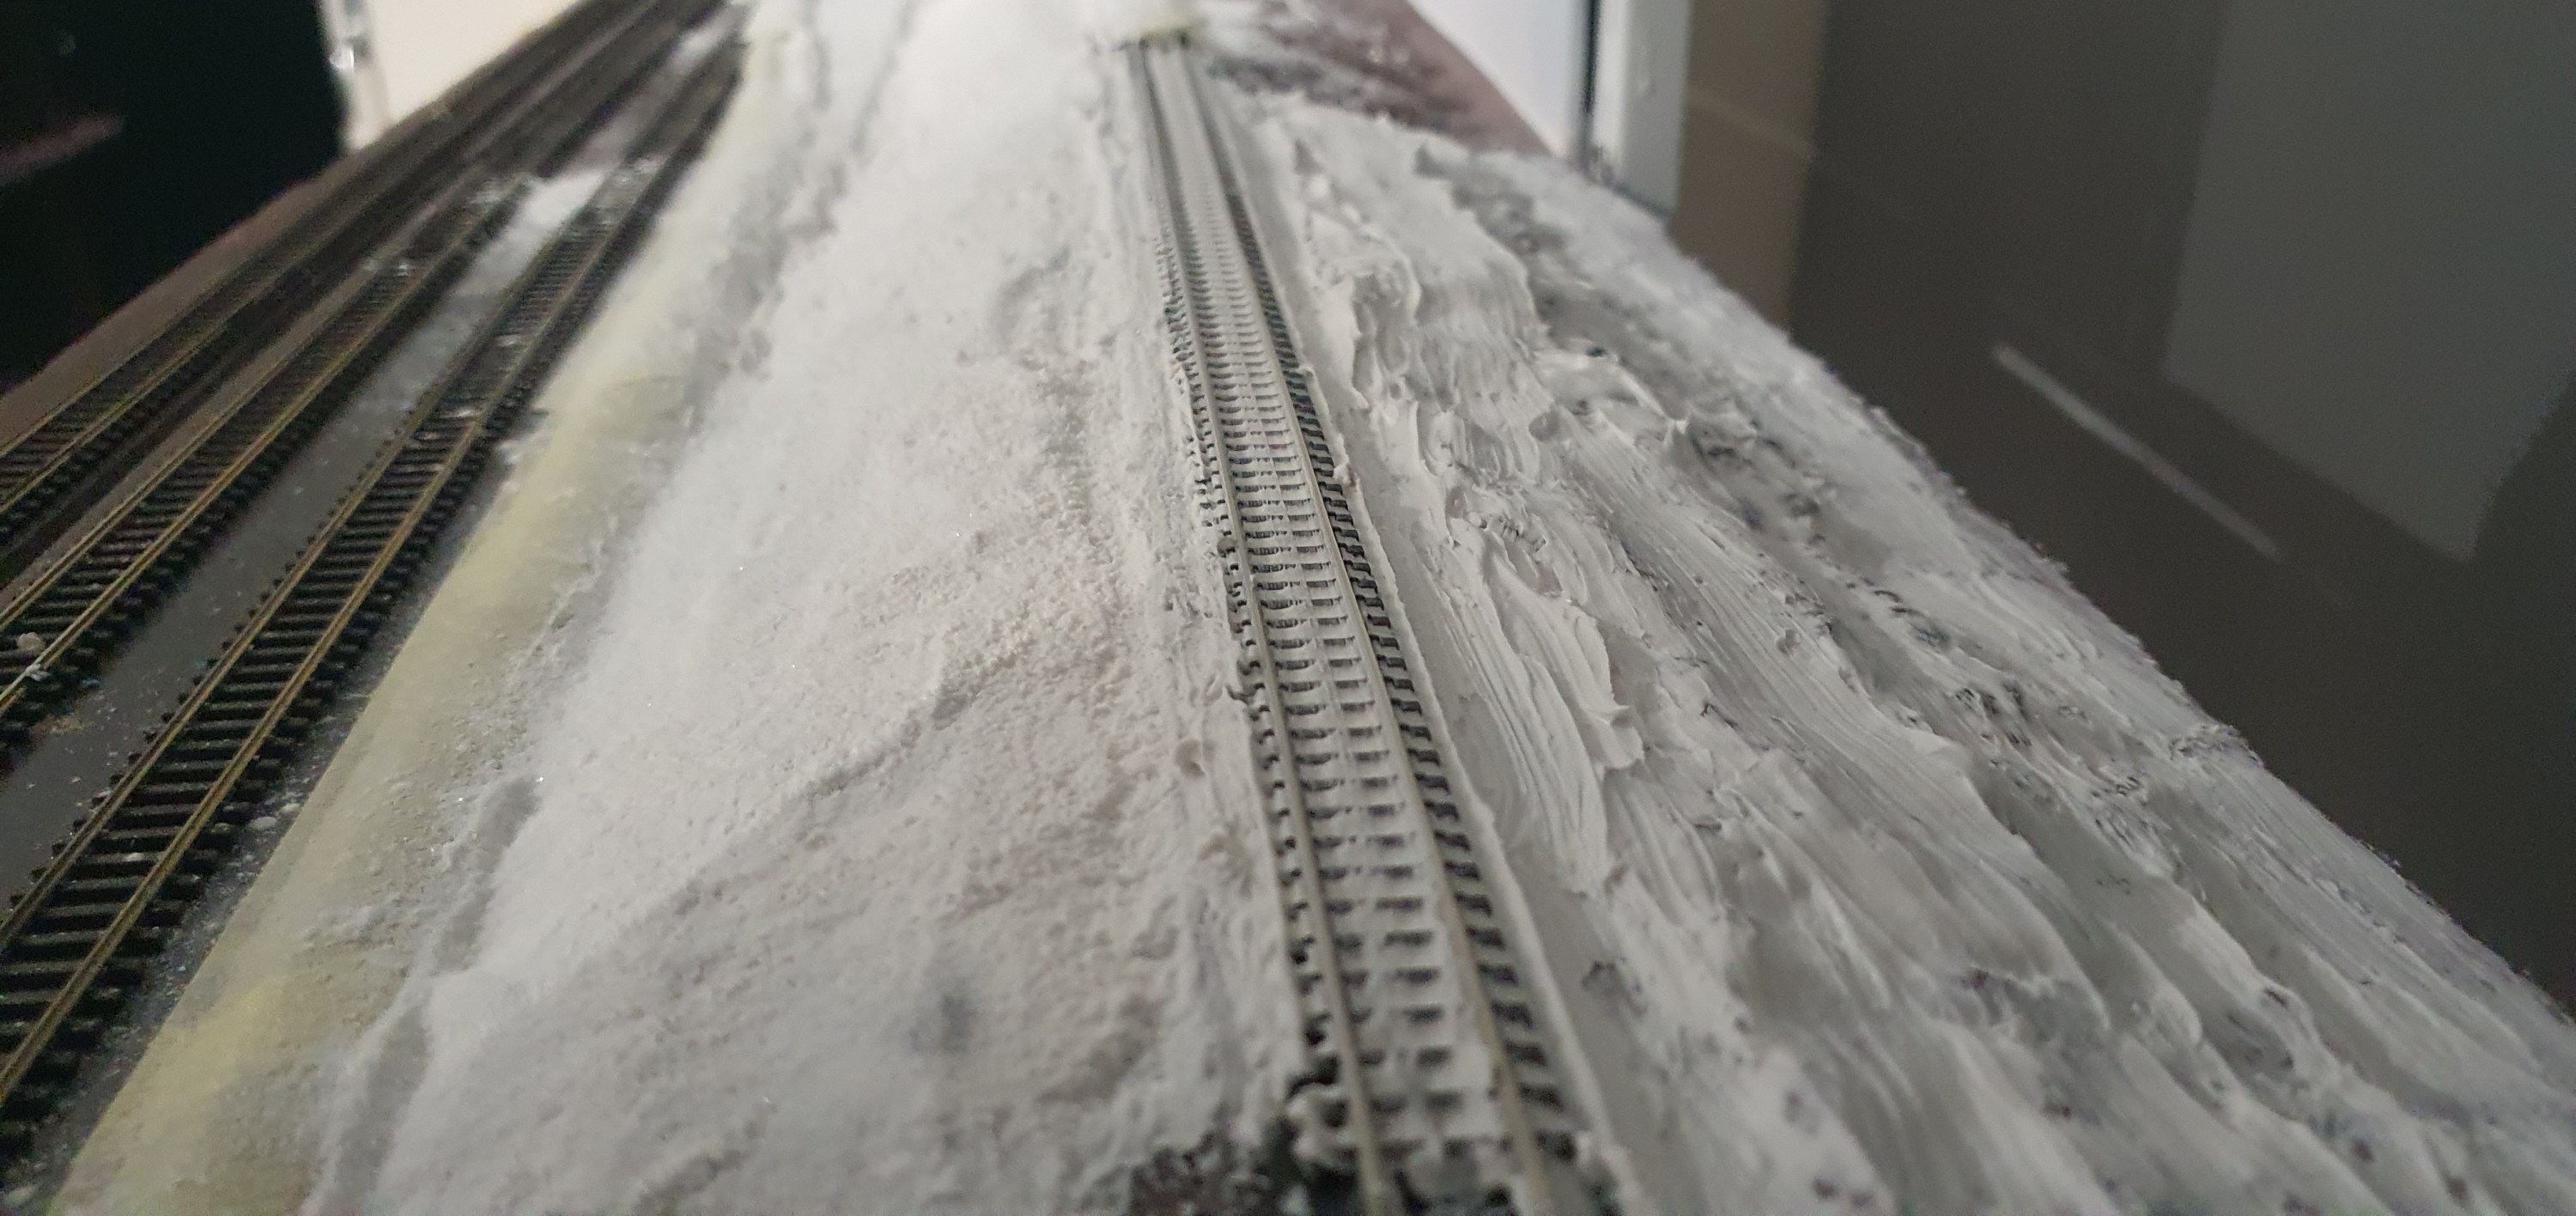
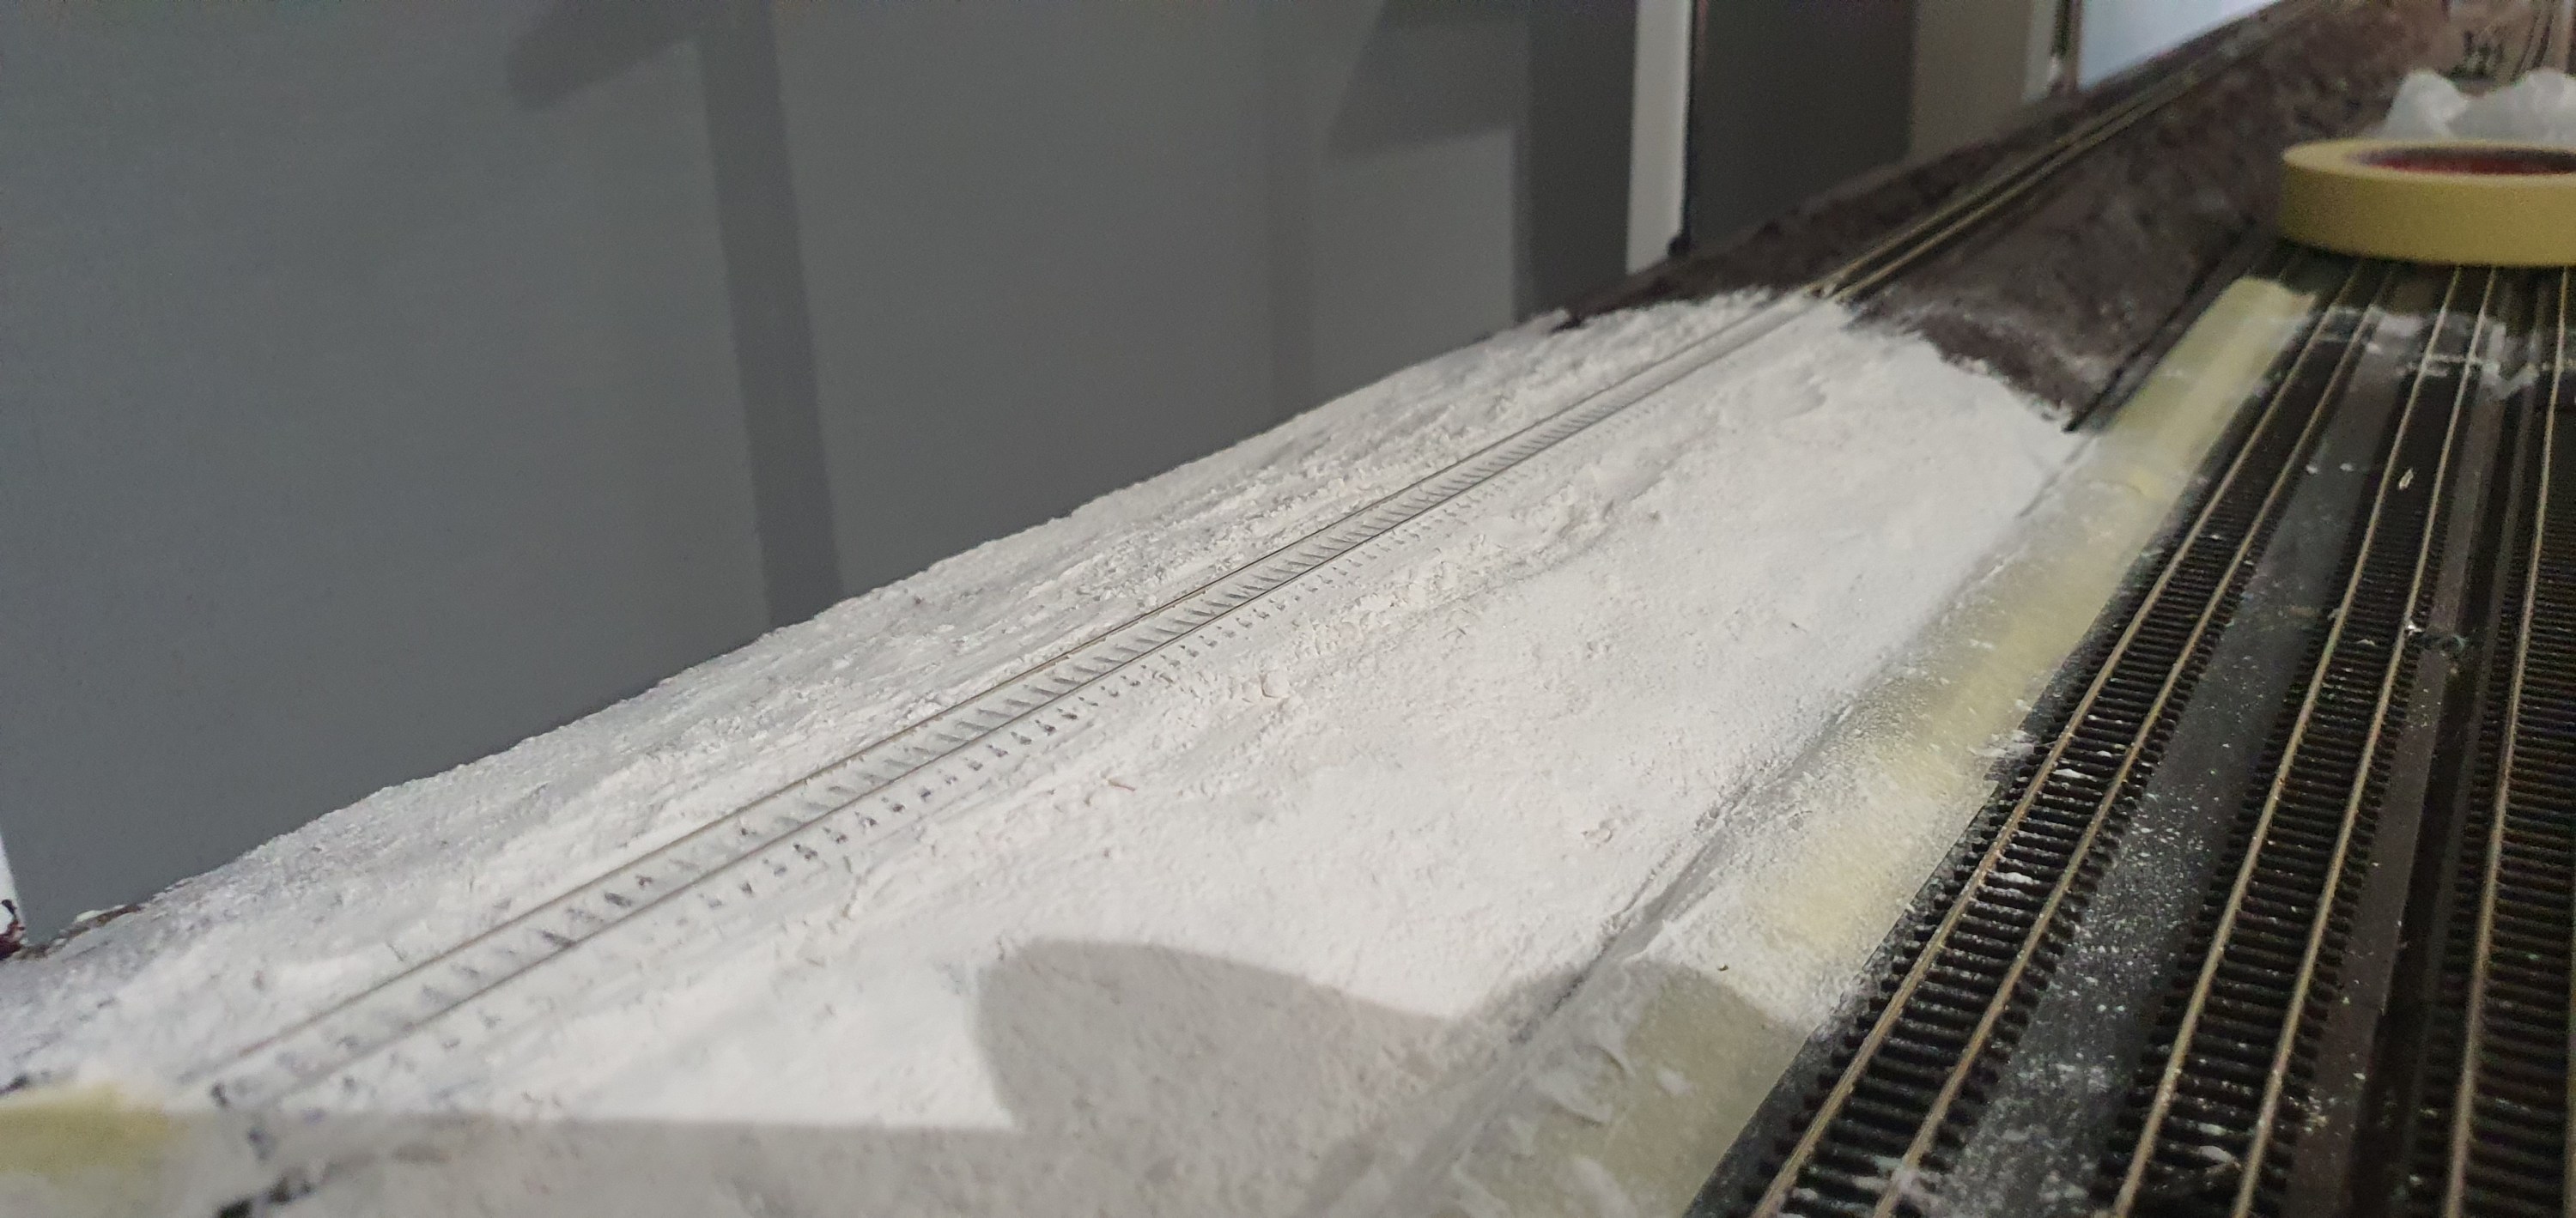
I decided therefore to modify my process and use acrylic medium onto the painted surface and then apply the snow to the wet medium. My idea is when that dries it will hold the snow. lets look at the process.
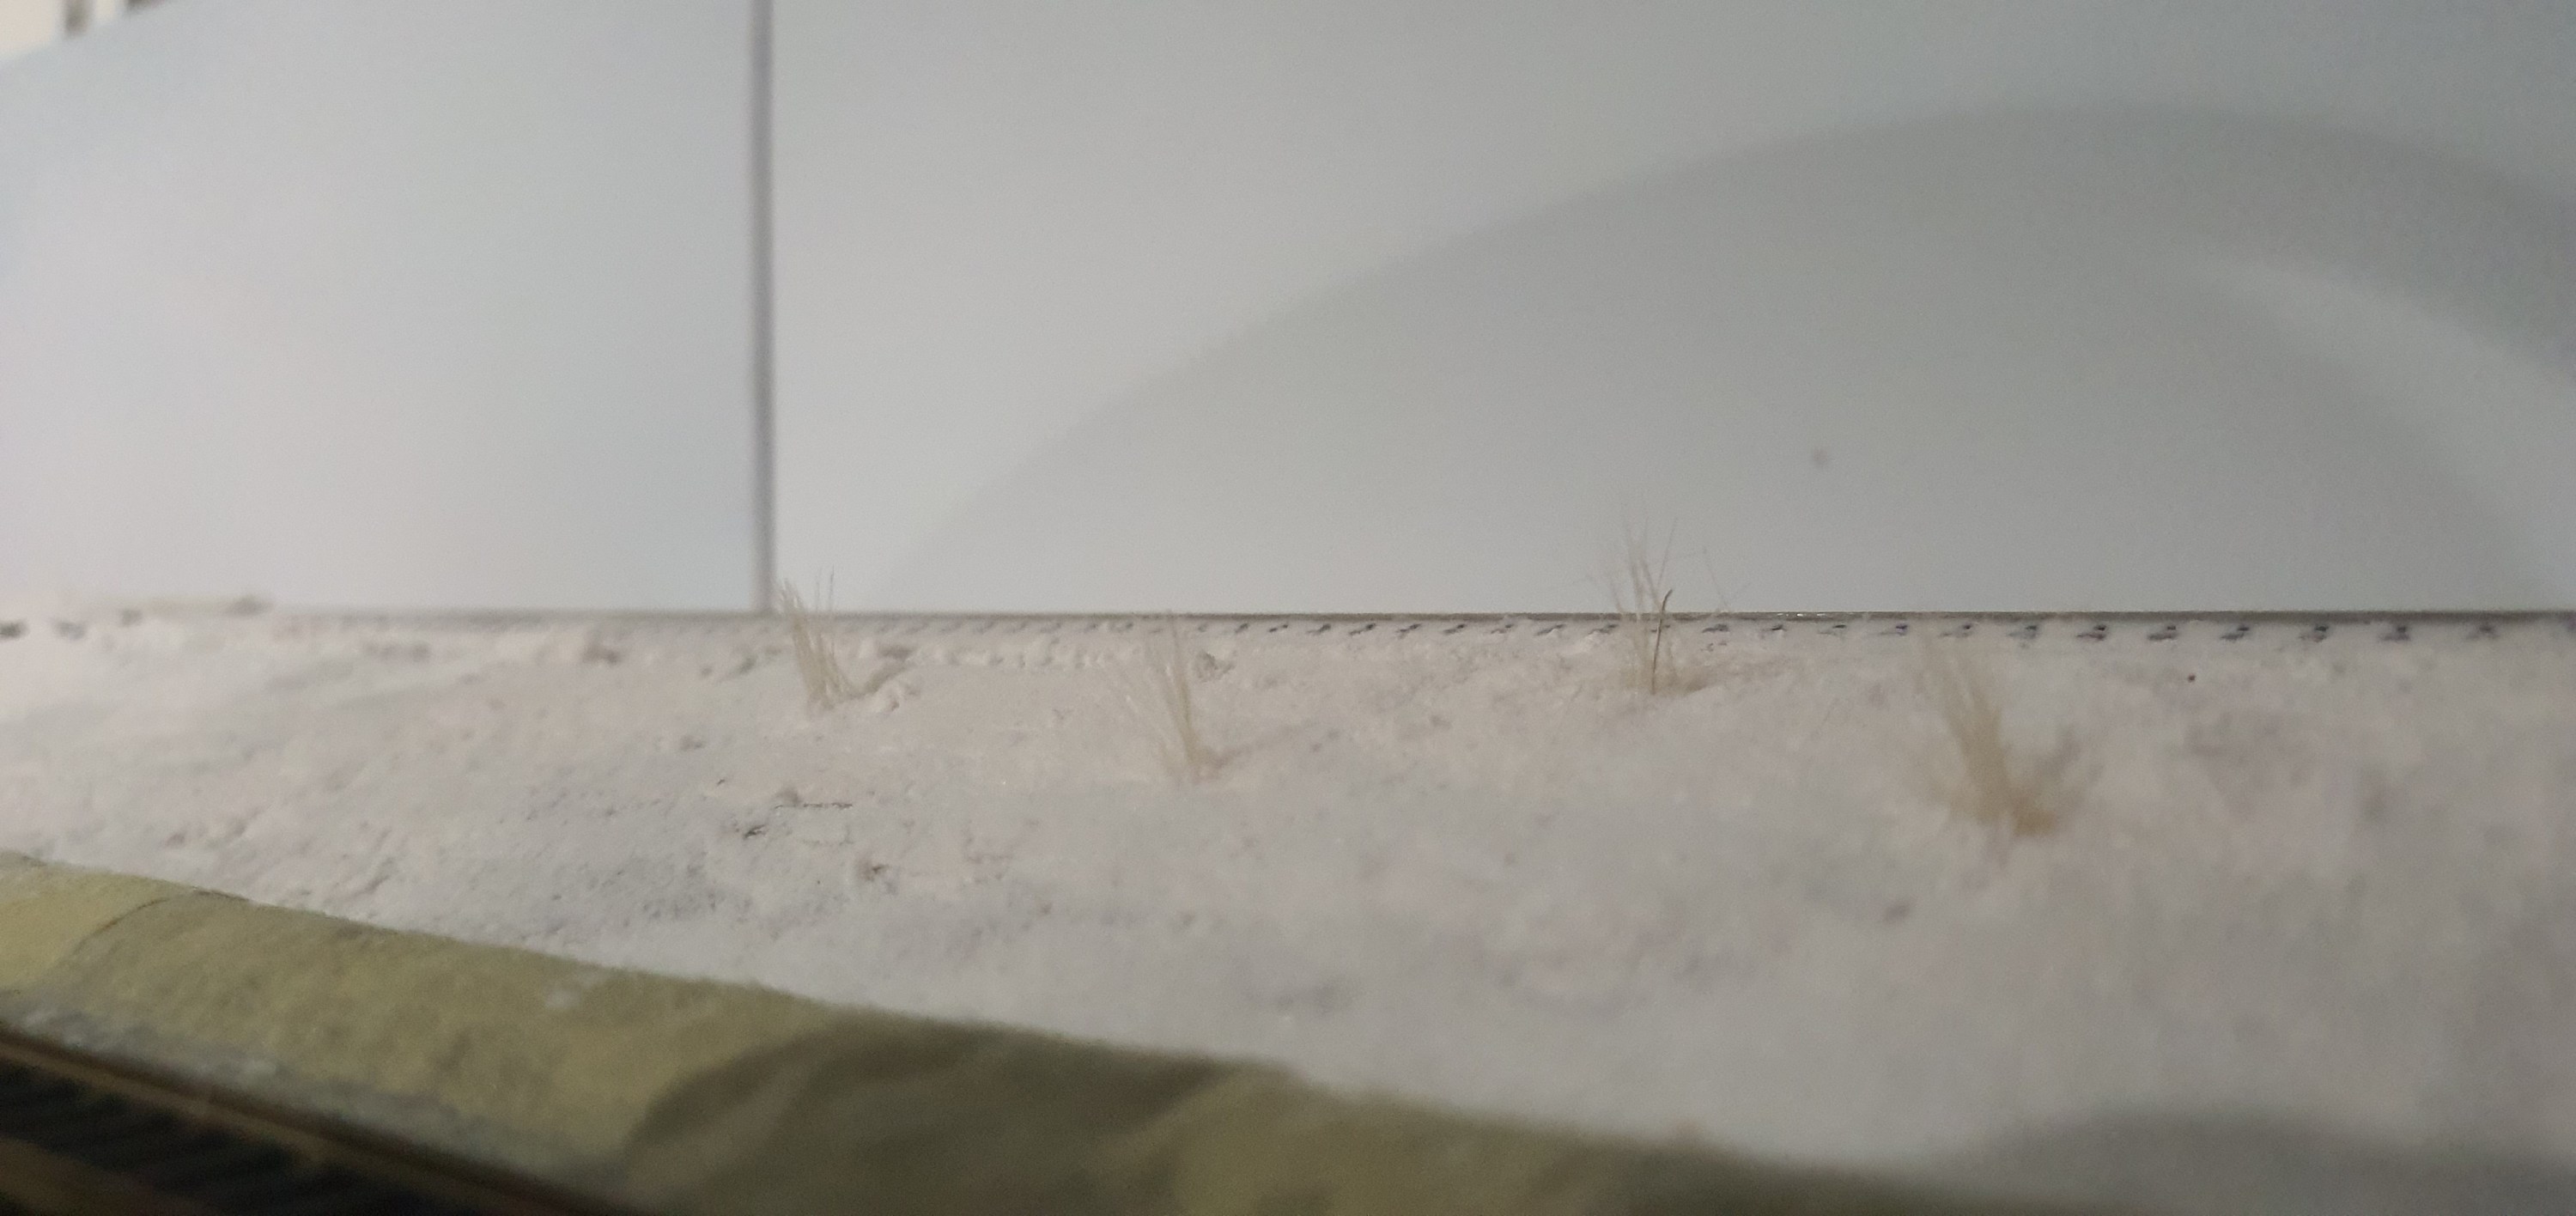
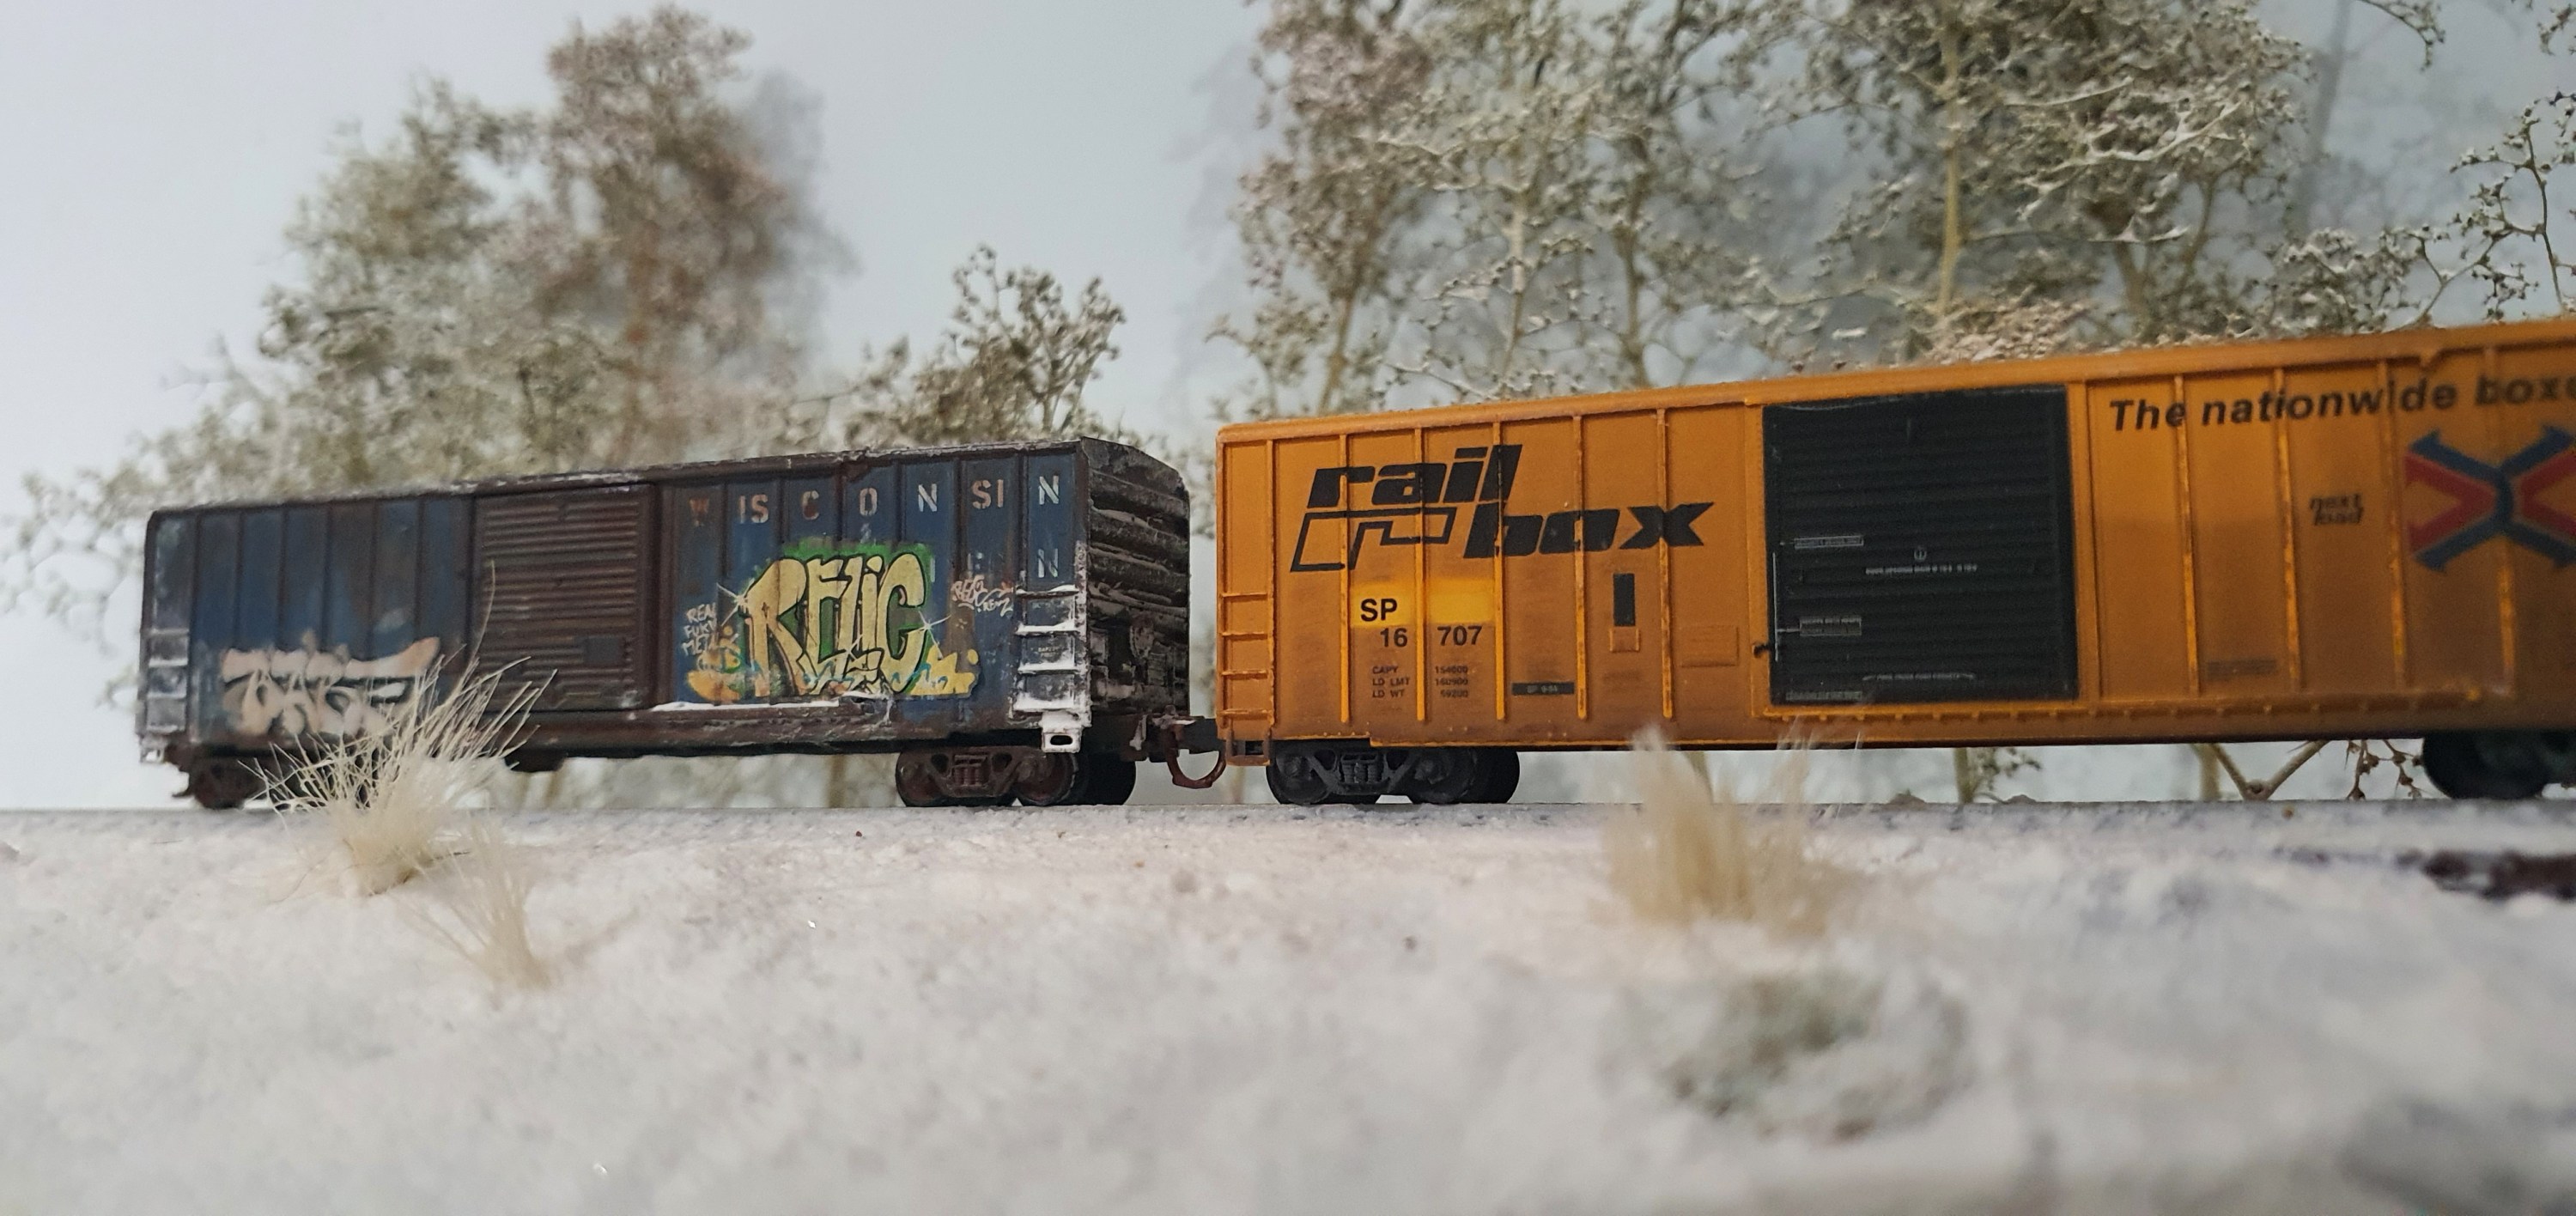
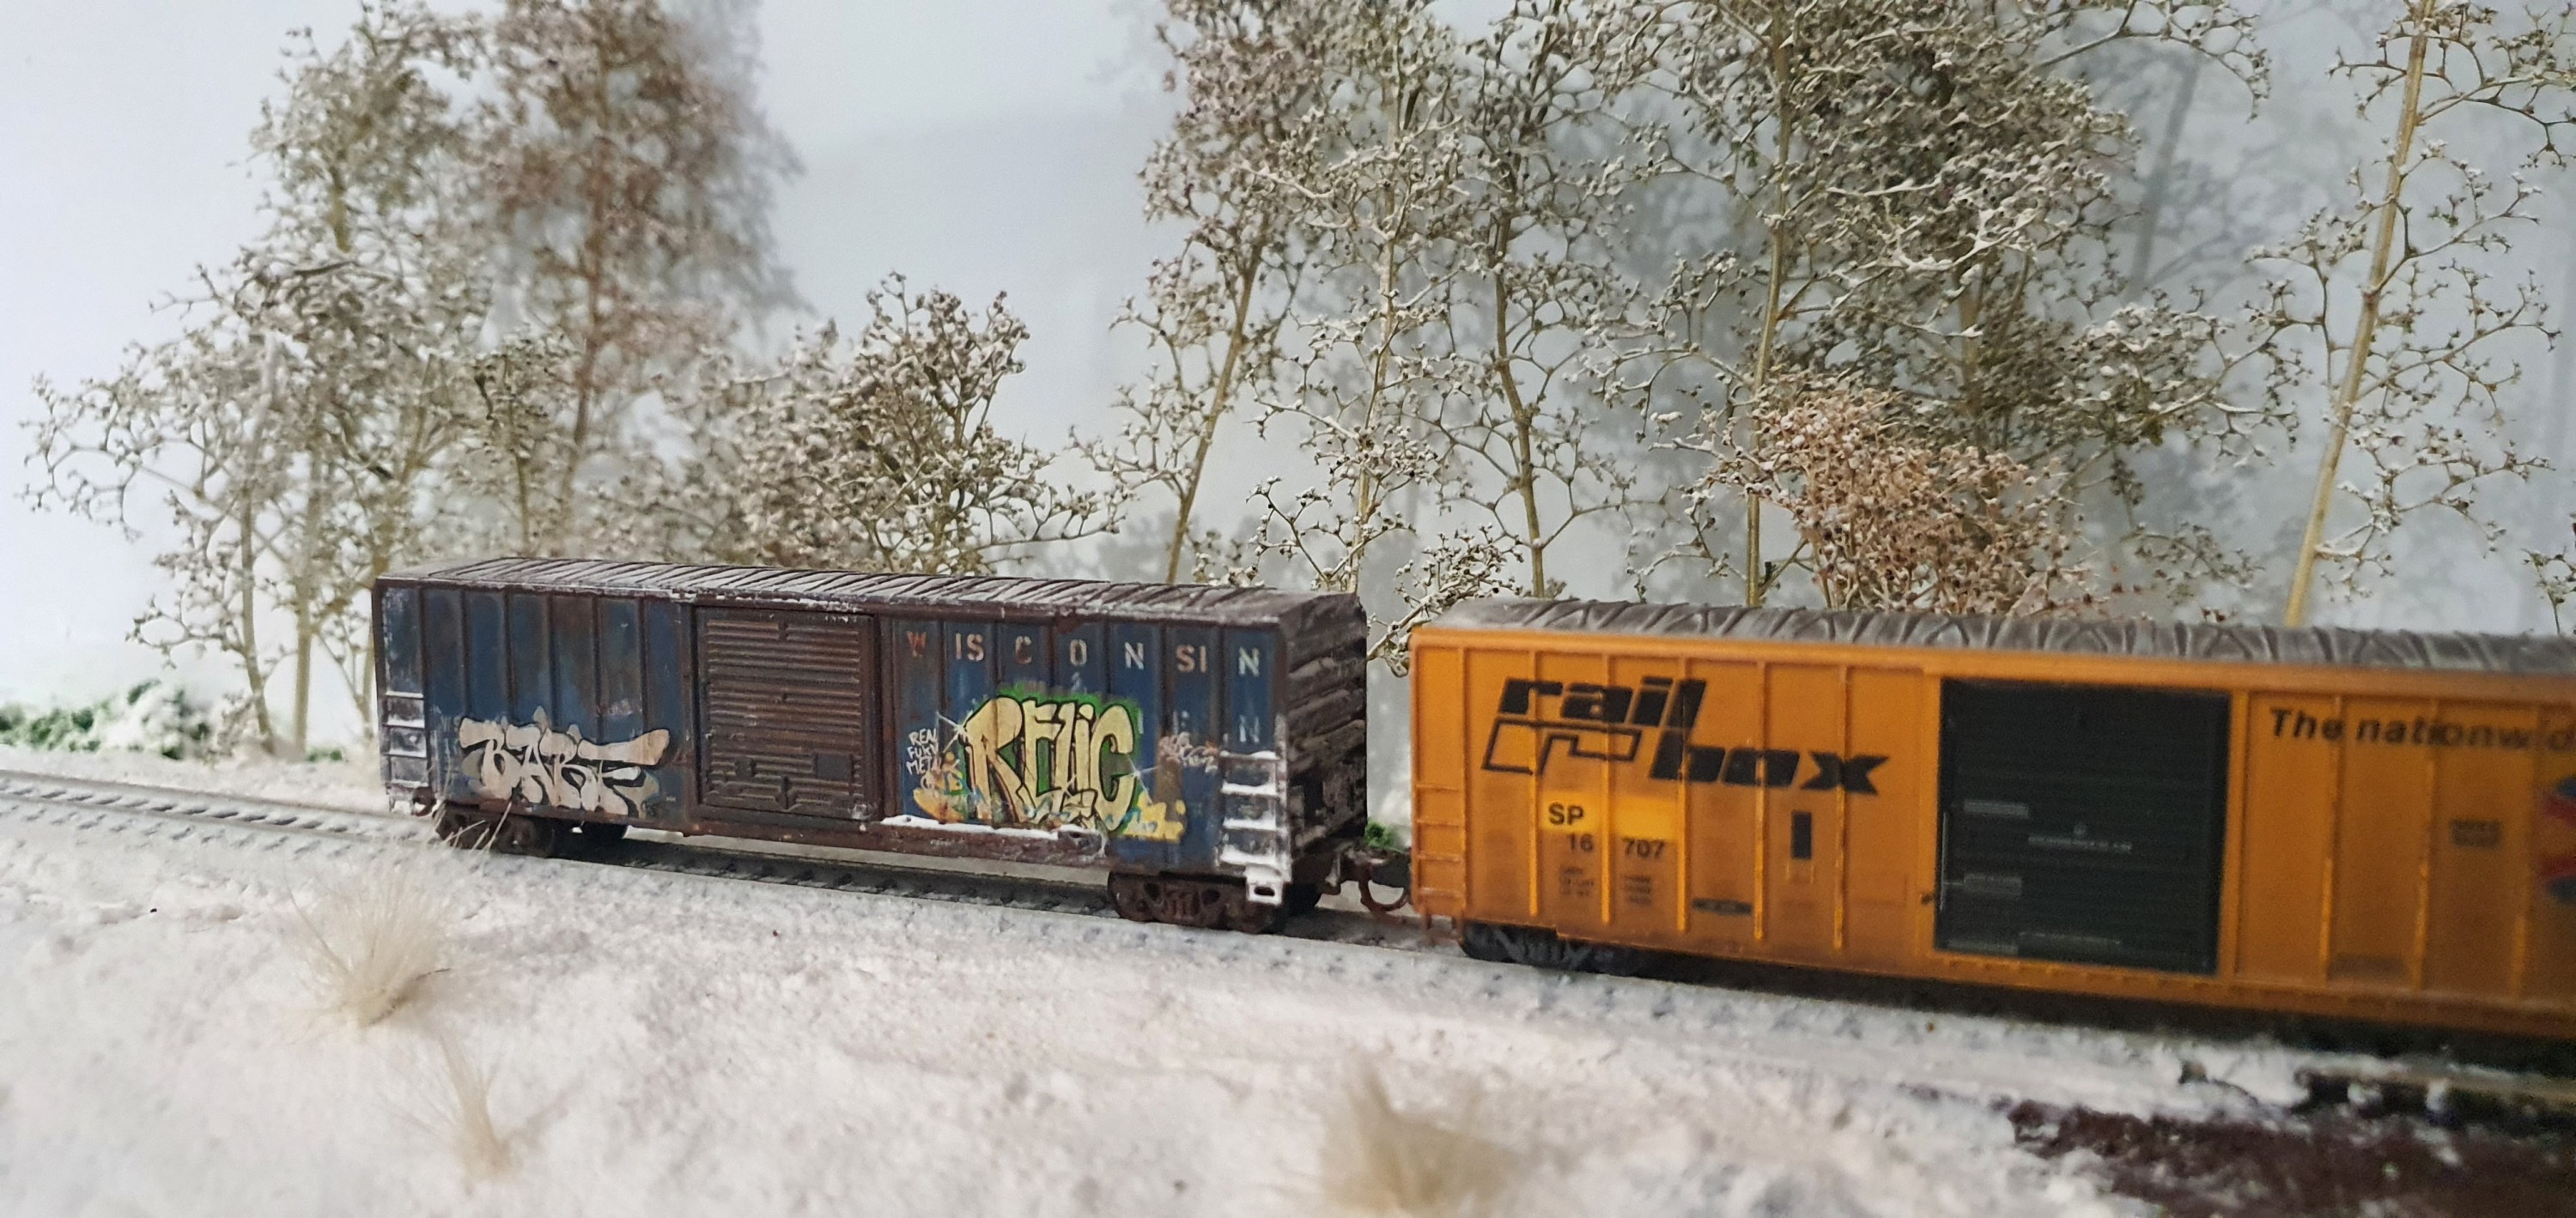
This is the test area.. I masked off the track to protect it from the medium Apply the medium its a paste if I wasn’t going for fresh snow I would add colour to the paste before applying it. Here you see the matt medium on the right and the medium with snow on the left. I decided to remove the masking tape and apply the medium between the ties. I applied snow to everything with the Sieve to get an even coatfinally securing it with some scenic spray glue from Woodland Scenics then I added some grass Tufts straight into the medium. I think this could end up being done with static grass and it would probably look better. next I started to add trees and foliage along the backscene looks a bit too colourful eh! then back over with the glue and more snow lets check out some stock An overhead view that you won’t see when the layout is being operated as its at Eye level and the bottom of the backscene is 1 inch below the height of the track at this point.