Elgin Modelfest 2017

One of the jobs i have as Division Rep for Scotland is raising awareness of the NMRA across the country. One of the ways we do this is by attending train shows. This past weekend i was at the Elgin Model Railway club show who invited us to come all the way to Elgin about 40miles from Inverness so its the most northly train show we have attended in many years. 

What i normally do is set up a table with NMRA leaflets and models, but and also sit work on my own models during the show. This is great because people which come, watch me work and then usually start a conversation where we can talk about the NMRA. So yesterday i managed to make contact with two members we had lost touch with locally as well as handing out a number of membership leaflets. There was even an NMRA member from Austrailia at this little show in Elgin.

Just to show how much i managed to get done here are my models from Saturday:

First i built and weathered this Scale Trains boxcar Kit.


Then i went on to build this N Scale laser sub shop kit


Then i weathered these two micro trains N scale bulkhead flat cars.


Then i finished my modelling for saturday by starting another N scale Laser kit for a warehouse.


Well see how far i can progress with this on Sunday. 

Sunday started with completing the warehousr and painting it, took about 3 hours to get it painted. 


Then i weathered the warehouse with rust deposits on the exposed metal work and then used a grimey wash to tone down the model.


And while i had my stuff to hand, i weathered the sub store i built yesterday. 

Flat Car Build

For my 7th car I really wanted to build a flat car and i wanted to do it from a kit that used strip wood as I had built a laser cut kit but i hadn’t done anything from strip wood, even my passenger car solid sides to build from it wasn’t all from strip wood. This kit took me 6 hours to build and paint. I know this because I built it whilst demonstrating on the NMRA Scottish Division booth at the Perth Model Railway Show 2017.

Supplied in the kit were comprehensive instructions and scale drawings. The first part of this build was to drill and notch the sides of the flat car.

IMG_6677

I made the outer frame of the car with the end sils. I ensure this was square before adding the buffer block and the centre stays and mounting block for the draft box.

IMG_6678Turning the car over i then added the deck, this was simplified by using selotape to hold the planks together and then rolling them down the car length.

IMG_6679

Once the deck had dried,  I added the bolsters and the Needle Beams. I then added the truss rods which are made from nylon wire. Next came the brake details and the steps fabricated from brass wire. I also notched the deck and added the stake pockets to the side sill of the flat car. Some of the castings were poor and caused the stake pockets to not be a straight as they could be but this is not as noticable in real life as it is in some of the following images. IMG_6680IMG_6681IMG_6682

The brake rods were fabricated from some brass wire and secured them to the bolsters with CA. I am sorry there are not more photographs of this build but i was busy talking to the public whilst doing the build. IMG_6683

After fitting the underframe gear I then added the draft box and brake wheel. The trucks are tichy arch bar trucks. The model was finished with a flat black under frame and a box car red body. It was running on a layout at 4pm exactly 6 hours after the show opened. IMG_6691IMG_6693IMG_6694

USRA rebuilt boxcar build

Having built my caboose, passenger car & flat car from wood, my skeleton log cars from metal I wanted my last freight car to a plastic model. I have collected over the years a number of Tichy Trains plastic kits, I had some boxcars, flat cars and even a cement car. Having already built a flat car I needed to build something different so I opted for one of the box car kits. In this case a rebuilt USRA box car, I decided that i would letter the car for the ficticious Turtle Creek Central a railroad that appeared in the Model Railroader Magazine back in 2003.

The start of the build concentrates on cleaning the components and drilling holes for grab iorns. Its essential to do the drilling now as its alot harder to do later. The first part of the build was to add the nuts supplied in the kit for weight to the underframe, i did this with some medium CA. Once dry I then started the build of the body, to be honest this is kinda self explanatory but you glue the ends to the body and roof casting and then secure that to the car floor.

After waiting for that to dry the next part of construction was the underframe and adding all the detail under here that your won’t really see when the model is on the layout is the longest part of this build. Start by adding the centre frames, making sure that these are the correct way round (they have a lip on them and holes for the train line that need to be in the correct place). Add the bolsters and then add the cross beams along the length of the car. With all the beams in place I added the kit supplied stands to the truck mounting points to protect the model

The next part of the kit was to add the plumbing for the brakes, don’t under estimate how hard or long this is going to take, it was probably 40-50% of the build. First add the train line (the main airline) along the centre of the car, i had to redo this as the first line wasn’t straight. Then I added the supports and the brake equipment castings to the underframe. With those fitted I added the brake hangers and the brake rodding. Then it was onto the airlines that connect the individual components to the train line, this wasn’t easy and if you don’t drill out the holes in the castings before you start on this its going to be impossible.

Now with the underframe complete I returned to the body, as there is still alot of detail to add there. I started with the boxcar side doors and side grab iorns before I moved onto the ends of the car. The grab iorns are made from brass wire and need to be secured with a dab of CA. The boxcar door is in three parts first the door runners are attached to the side of the car and then the door is put in place with no glue so that the door can slide open if required.

Having completed the sides i moved to the ends of the car, obviously you have one end here with brake equipment and I started with that end. The other end is similar but without the brake gear.

Time to move on to adding the ladders and the roof walkways. The ladders supplied in the kit need to be cut down to size for the end and side of the car, in total there are 4 ladders that need to be fitted. The roof walk way was fitted to the car and completed with brass corner grab irons that are supplied in the kit.

With the detail parts on each end I had the great idea to add my own cut levers a great detail not included in the kit. The problem was i did this rather late at night and didn’t engage brain, resulting in two lovely hand bent cut levers for a loco (i.e. operated from both sides of the car) but not so great on a box car where this would have only operated from the one side. Well its a ficticious railroad so the turtle creek decided to be different and we have a cut levers on both sides of the car end, but lesson learnt.

Time for the part of the build i hate, painting. I decided to paint the car box car red , roof brown on the roof and walkway, with a black underframe and car ends. Before painting I applied a grey plastic primer to the whole model. I then masked the bottom of the car sides and turned the car on its roof and painted the underside black, being careful not to miss any areas under the detail parts. I then painted the car end, there was nothing special here about the paint I used Tamiya flat black which drys with a very flat finish.

I then moved onto the sides and roof, painting the sides with model masters boxcar red and the roof in roof brown. when this had dried I added the couplings, trucks and Kadee air hoses.

I now moved on to dcaling the model, I used woodland scenics dry run decals for the car data. The Turtle Creek Central decals are by microscale, after applying them and allowing them to dry for i found that I had silvering so i pierced the decals in several places and applied micro sol. I then applied a coat of dullcote to seal the decals to the model and prepare for weathering.

I had weathered the wheel sets in the trucks and the truck springs but over all the car needed a good weathering. Good weathering takes lots of layers and i applied layers of AK weathering enamels, mixing rust deposits with dust deposits before finishing the model with streaking coats of grime from the roof and down the sides of the car. what i also do is apply a very thin wash of thinners, using a soft brush that i dip in thinners and then dry off so the brush is just slightly moist. Here are a series of photographs that show how I built up the weathering on the model.

Here is the finished car.

IMG_8557


A few recently completed projects

Its the NMRA British Region convention in a week so I have been busy finishing projects to be judged for the AP. Here is my final two freight cars which pages will soon be appearing for.


I have also completed, less some detail parts the section house I started at the Convention in Orlando and I am hoping that I can get this verified and discussed at the convention before I start on my other structures for my AP that need to earn Merit Awards.

Be on the look out for my pages detailing each build coming to the website soon.

Gordy


44871 Mainline UK Steam – Dusting off the DSLR

I usually use my iPhone to capture all my Model and Prototype photographs but today I decided to dust of the DSLR. To capture some shots of some mainline steam that was travelling through the village where I live.

Here are my efforts, it will be coming back through the county later on its return journey and I will head out to catch some more shots.

OLYMPUS DIGITAL CAMERA

Burntisland, Fife, Sco

OLYMPUS DIGITAL CAMERA

Burntisland, Fife, Sco

OLYMPUS DIGITAL CAMERA

Burntisland, Fife, Sco

OLYMPUS DIGITAL CAMERA

Cowdenbeath, Fife, Sco

OLYMPUS DIGITAL CAMERA

Cowdenbeath, Fife, Sco

OLYMPUS DIGITAL CAMERA

Inverkeithing, Fife, Sco

OLYMPUS DIGITAL CAMERA

Inverkeithing, Fife, Sco


OLYMPUS DIGITAL CAMERA

Dysart, Fife, Sco

OLYMPUS DIGITAL CAMERA

Dysart, Fife, Sco

OLYMPUS DIGITAL CAMERA

Dysart, Fife, Sco

OLYMPUS DIGITAL CAMERA

Dysart, Fife, Sco

OLYMPUS DIGITAL CAMERA

Dysart, Fife, Sco

Ackerville WI – Layout Planning

Following on from my Layout Inspiration post here is part two of that post – Layout Planning, I will start with the must haves and nice to haves before looking at operations and portability.

So the must haves and nice to haves

Must haves

  • 18sqft of scenery so sceniced staging a must
  • Space 6ft x 3ft x 2 ft (to fit in the trunk/boot of my car)
  • N Scale
  • at least 25ft of track
  • Meet the requirements of the NMRA Civil section 2
  • Prototype Ackerville must be represented on part of the layout

Nice to haves

  • some switching
  • continous operationg for train shows
  • a self contained lighting rig
  • depth of frame for folding legs with castors
  • DCC operation
  • variation in scenery for max AP points
  • a town scene
  • the ability to have prototypical operations

Here is attempt one at a track plan, I have chosen to compress Ackerville onto one side of the layout and add a small town onto the other side of the layout. This means that I can choose to operate one side or the other at train shows/at home making the layout two scenes for railway/railroad shows. Castors would allow the layout to be moved to the centre of the room for full operating sessions.

At the top of the plan we have a small town and at the bottom on the other side of a backscene divider you will see Ackerville.

ACKERville Draft 2

Operating

Every layout needs a reason to exist or else it is just trains passing through nice scenery which is not the objective I am looking for. So to help understand how the layout works lets see the two railroads trackage rights, in the track plan below CN is in Blue and WSOR is in Red.

ACKERville Draft 3

The layout can accomodate upto 5 trains, which would be 2 CN through frights and a CN local with the WSOR handling 2 locals. Every Model Railroad needs a reason to exisit even a small one such as this so lets explore the scheme. At its heart of this railroad the Class 1 mainline in the example the CN brings cars to interchange with the short line (WSOR) who then pick up and exchange cars before taking the goods into town and switching the local industries they then return to the interchange and exchange cars with the class one road.

The great thing about this railroad though is that you can choose to operate it in such a manner and probably occupy upto three crews for a 1-1.5 hour operating session, you can also do some switching and leave a train running on the mainline when operating the layout at home or exhibitions.

Portability

Being only 3ft x 6ft and 2ft tall this layout will be dificult to move but will fit through a 30″ door way. The framing can be made deep enough to accomodate folding legs with castors making transport so much easier. the layout will have a centre backscene which should allow for a lightweight lighting frame to be supported from it that will illuminate the layout at Model Railroad shows. This doesn’t need to extend to the edge of the baseboard and could just be some spot lamps fitted to a removeable upright that slots into the backscene. This should allow the layout to be set up and taken down at train shows very quickly which is an essential requirement as no one wants to spend hours at the end of a long weekend stripping down a layout.

Notes

The plan is drawn on Anyrail software, the track used is Peco Code 55. The track will disappear into the backscene on the left hand side through forest and on the right hand side under overpasses.


Layout Inspiration – Ackerville

Introduction

Being a modeller in the UK has its space disadvantages to those in the US, thats well know and a fact but its also a blessing because we can build small layouts. These layouts don’t take along time to build and can be sold or retired when its time to move on to another project. What that means to me as a modeller is that I can come up with lots of concepts and choose to try them out without significant investment.

But where do we get out inspiration from, well alot of people say childhood memories.  I grew up in England 12 miles from the centre of Manchester in North West England. I can remember catching the train into Manchester after School with my father some friday evenings when we would visit him and I remember we had to catch a specific train. Why because it was loco hauled, usually by a class 37 sometimes by a class 31, locos built in the 1950’s and this was the mid 1990’s they would thrash all the way to Manchester in 24 minutes sometimes faster. When i was 14 I would catch the train home from School i knew exactly the combination of tickets that would produce the lowest fair so with the small change i saved, i could afford to buy sweets once a week, on my way home from school.   So why then have I never modelled a 1990’s british layout, well it interests me and I have fond memories but I prefer to model other things.

As I grew up in England and I model North American Prototypes I don’t have any childhood memories of GPs or SDs thrashing through town horns blazing or blagging a ride home from school from the conductor in the caboose. Inspiration for my models comes from other sources, it could be a new product announcement, a magazine article, a forum post, a book I pick up, somewhere I have visited or even someone elses layout. I am fortunate though that i don’t have to mark my path in stone as I will probably never have the space to build a basement empire. I may even be pursuaded into a particular project because I need to do so to meet an NMRA Award/Certificate.

Space Requirements – how small is small!

So I know my space is limited to what can fit through a 30″ doorway, and into the back of my vehicle which gives me a space of W36″ x L72″ x H24″ in which I can fit all the sections of my layout, the supports, the stock and all the other bits that go with presenting a layout in the UK. Now your thinking he is crazy! well i also have a roof box so I can put legs in there if they are seperate from the layout so now we have some more space. You can also place rolling stock and electronic equipment behind the front row of seats so we literally have that whole 36 cubic feet to work with. Thats an empire in the UK as what ever we build also has to fit in a spare room or at least not intrude on the living space when not being used.

So Ackerville, WI

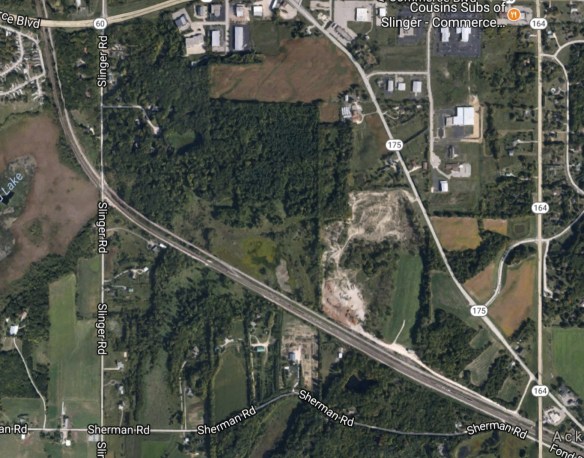
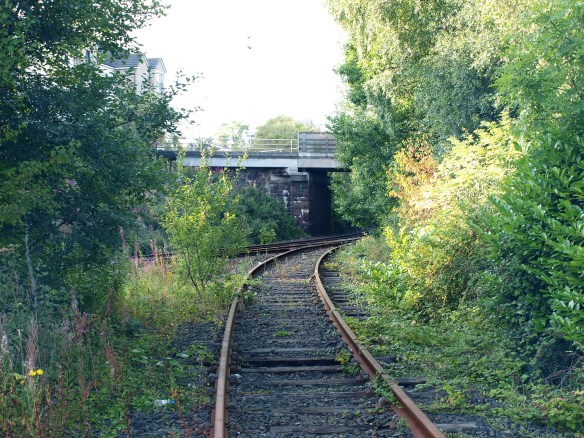
Ackerville WI is a small town, in Washington County, Wisconsin about 10 miles from German town. Its a small place there are a few small local business but nothing that is big enough to be rail served.  What there is though is small yard and Interchange between the Wisconsin Southern (WSOR) and the Canadian National (CN) ex Wisconsin Central mainline. The tracks here for the CN continue north to Fond-du-Lac, WI and south towards the diamond at Duplaineville, WI and onwards to Chicago. The WSOR tracks head south towards Milwaukee and North then West towards Horicon WI. The WSOR turns from Horicon and Milwaukee meet at Ackerville swop trains and then the crews return to their origins. Both crews work the interchange before they turn.

The CN mainline is busy and the CN local interchanges cars here with the WSOR, they also use their passing siding to plan meets along their busy single track mainline.

Ok so hopefully if you are still reading you are thinking, this is very interesting so how did a guy from Manchester 4000miles from WI, 1) discover Ackerville and 2) want to model it!

The Inspiration

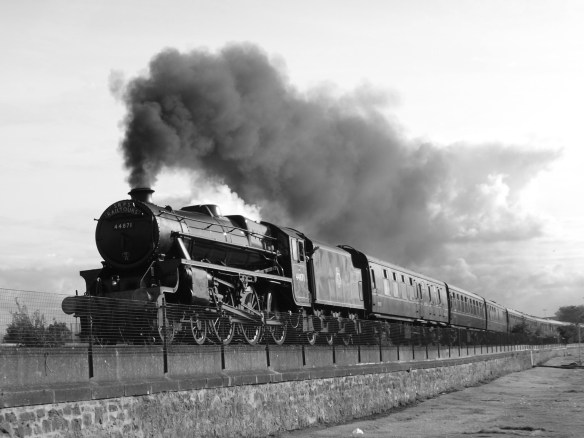
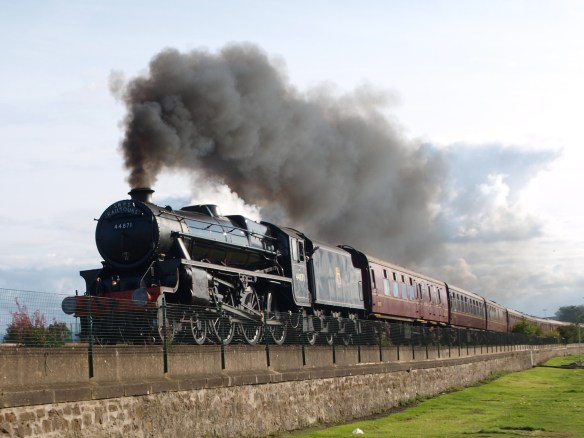
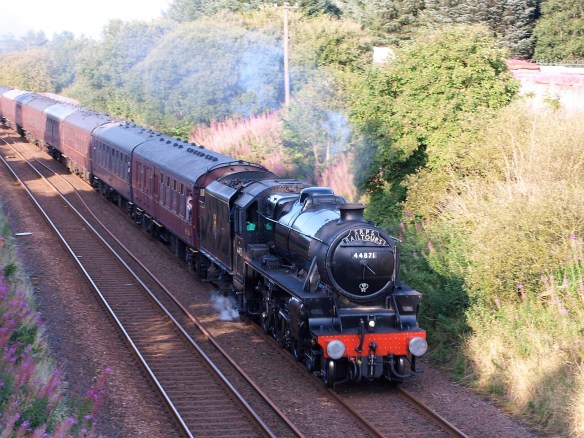
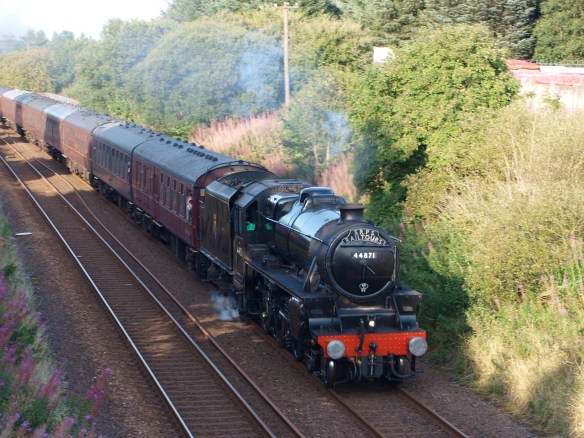
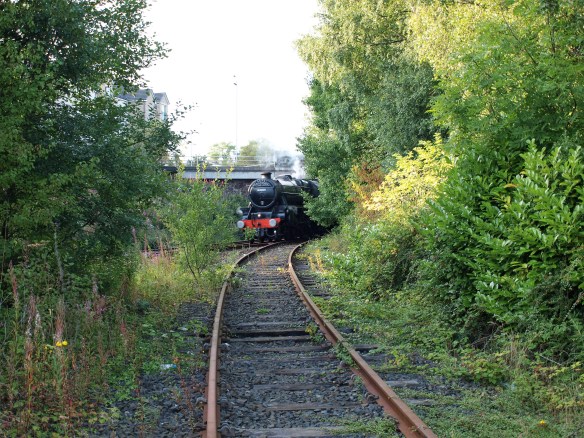
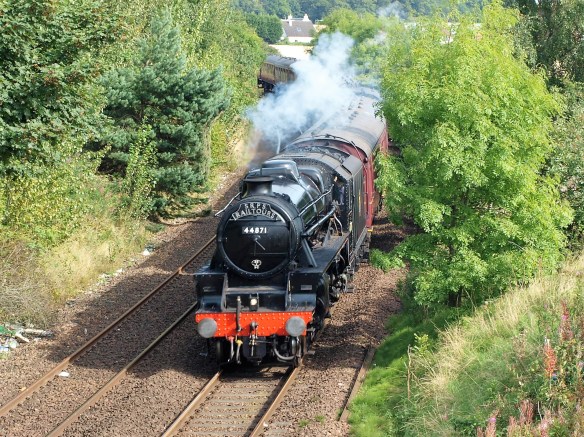
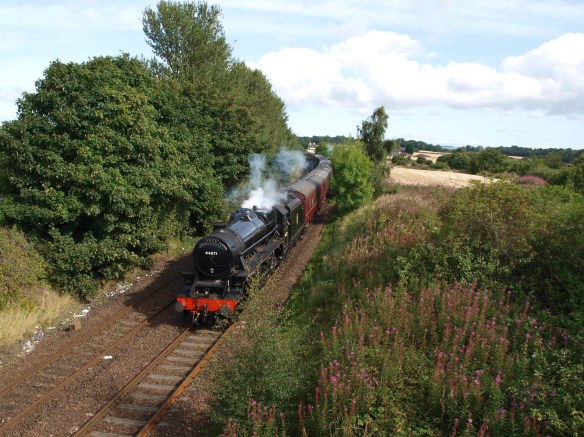
Rail fanning: Well in March 2016 I was lucky enough to be invited for a days railfanning with Dave Nelson a local modeller who I met online. We had been out railfanning around Milwaukee the previous year, my trip in March 2016 would include a trip to follow the CN mainline between Duplaineville WI and Fond-du-Lac WI. After shooting some shots of the local in Duplaineville we headed to Slinger Road, Ackerville to see if we could catch the WSOR local or some more CN traffic (both lines cross the road at the same point).

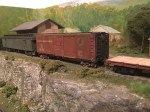
After a 20min wait we caught a CN train then head the WSOR local call the CN dispatcher and request permission to cross the CN main in Slinger WI, and we watched the WSOR local cross slinger road 5 minutes later. Dave suggested we head to Hwy 164 where there is a hwy overpass above the interchange. So we stood on the bridge at the side of the hwy and captured the following series of photographs. Note I am not condoning standing at the side of the Hwy its extremely dangerous we shouldn’t have done it but …..

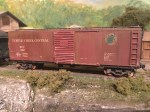
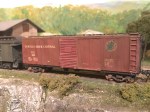
I really enjoyed watching the railroad at work and the colour and variety of the WSOR locos nevermind the rolling stock was awesome. Ok so this is cool but an afternoon and 5 photos doesn’t complete the inspiration cake here.

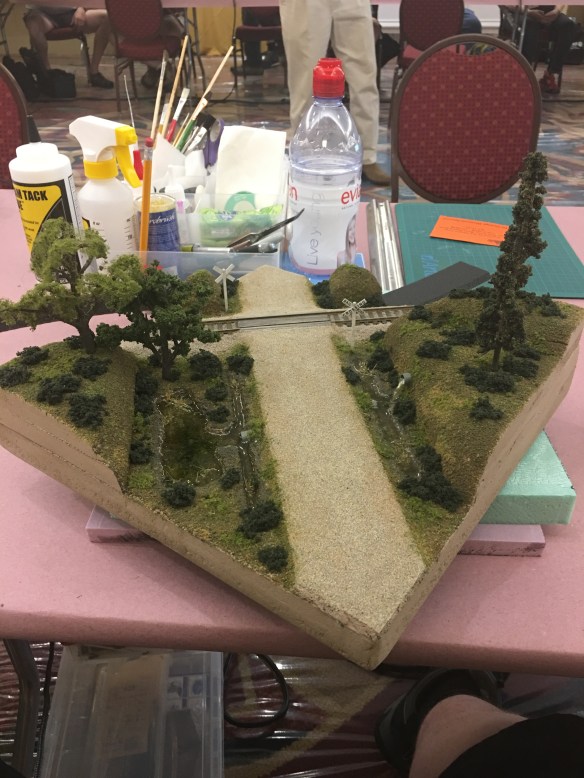
NMRA AP: For my NMRA Achievement Program I need to build a layout to meet certain requirements, I have built layouts before but ther are not big enough for the NMRA requirements for the scales they are in. So lets look at those requirements for HO I need to build a layout of 32sqft or in N 18sqft that meets a merit award for scenery. I also need to lay track for HO 50 linear feet for N scale 25ft. Now it just so happens that the space i have to fit this in my vehicle is exactly 18sqft with 24″ of room for baseboard and a lighting rig above the layout.

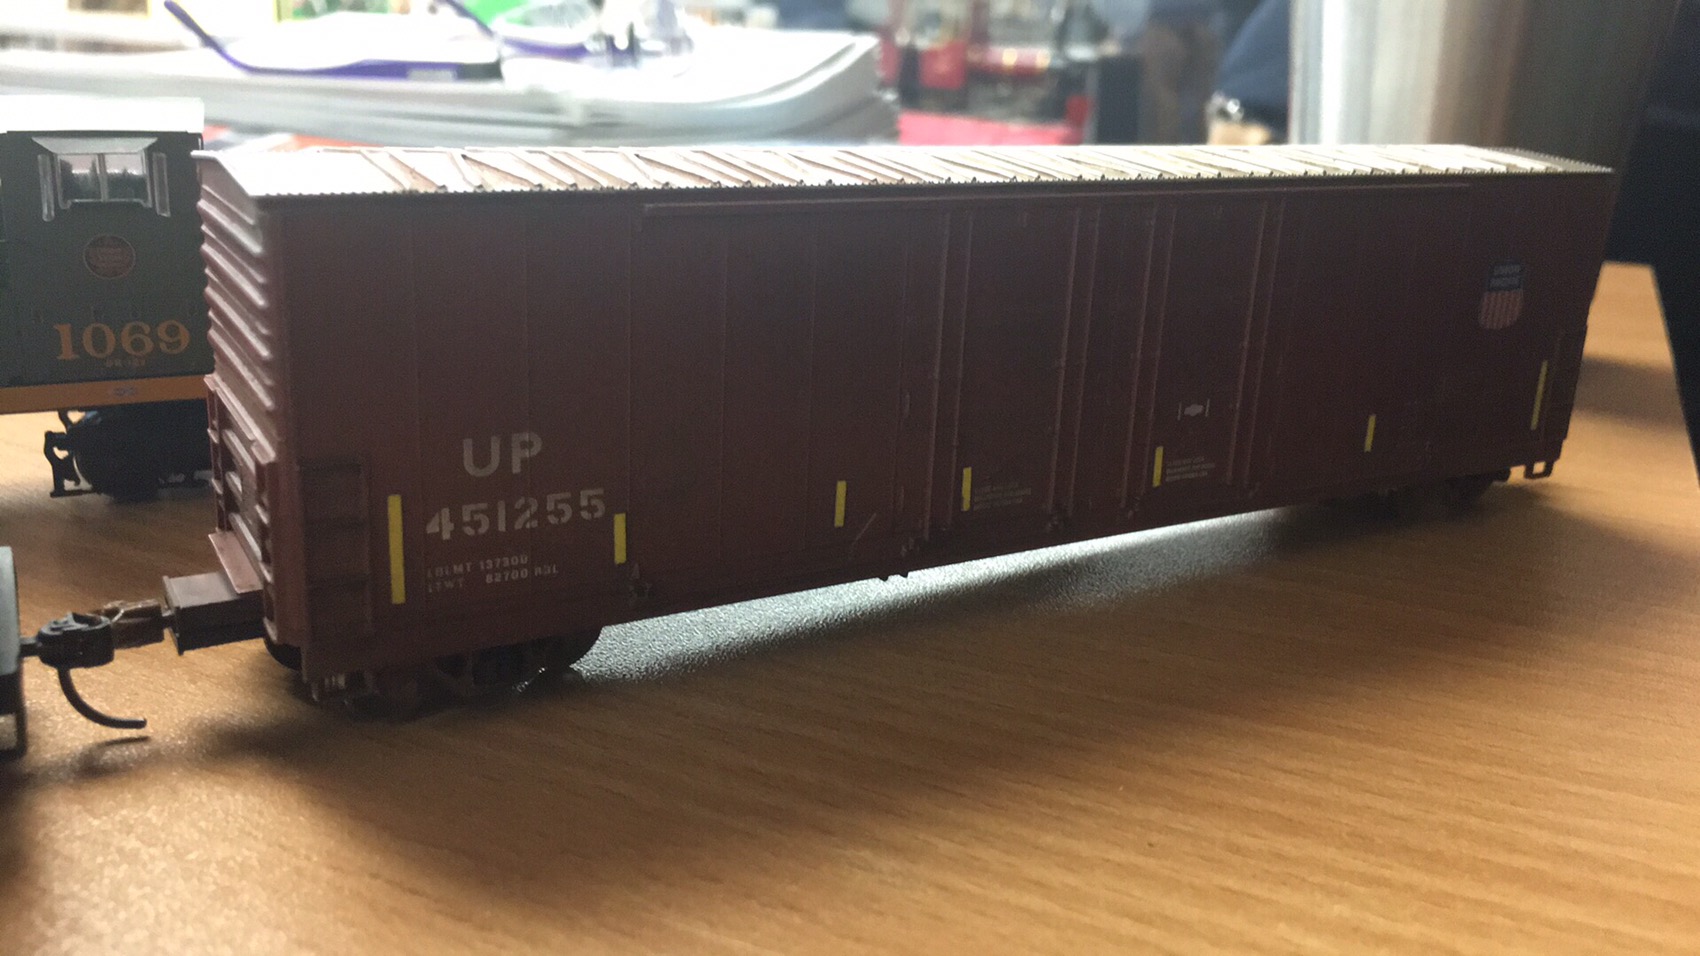
Product Announcements: It is important if you want to model something based on the prototype and do it right you need to look at what you have available to you in terms of rolling stock. Structures you can scratchbuild but painting a loco in WSOR or CN scheme’s erm no thank you not in N scale!  So Atlas have announced both the G38-2 and the GP39-2 in WSOR livery, Scaletrains.com are going to produce the CN Gevo and looking at the samples of all three they are going to be excellent models in N scale and importantly with DCC/Sound installed 🙂

I also by way of a long story own some N scale rolling stock and a CN GP38-2 which is used by CN for the local.

Add the Gevo’s to the other CN locos on the market and we now have out of the box all the locos I need to make this model a reality.

So its game on!

The Plan

So we have 3ft x 6ft to fit the key components of Ackerville in, now despite being the Mid West we are lucky here that we have a perfect storm! we have two Hwy bridges to mask the entry to staging at either end of the scene! How awesome is that, its a the first thing you look for when your building a small layout how can I box this scene in and there is nothing better than two hwy overpasses.

So here is a Google earth Image of that we are looking to scale to 6ftx3ft. You can see Hwy 164 in the bottom right where the photographs above were shot, you can also see Slinger Road to the left crossing both main lines befor they head under Hwy 60.

ackerville.jpg

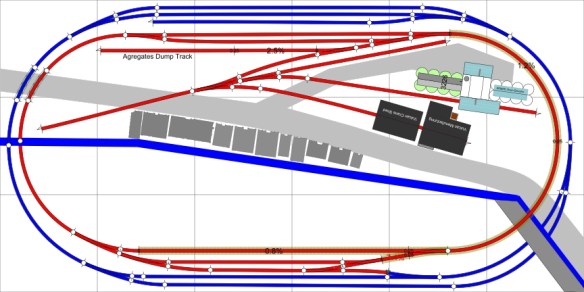
Its going to need alot of compression but I will post a trackplan when I draft one out. As its going to be a full sceniced layout I am seeing a centre backdrop and so I will need some kind of scenic staging yard on the other side of the layout so I will now need more research for another location where the WSOR and the CN meeting elsewhere in Wisconsin.
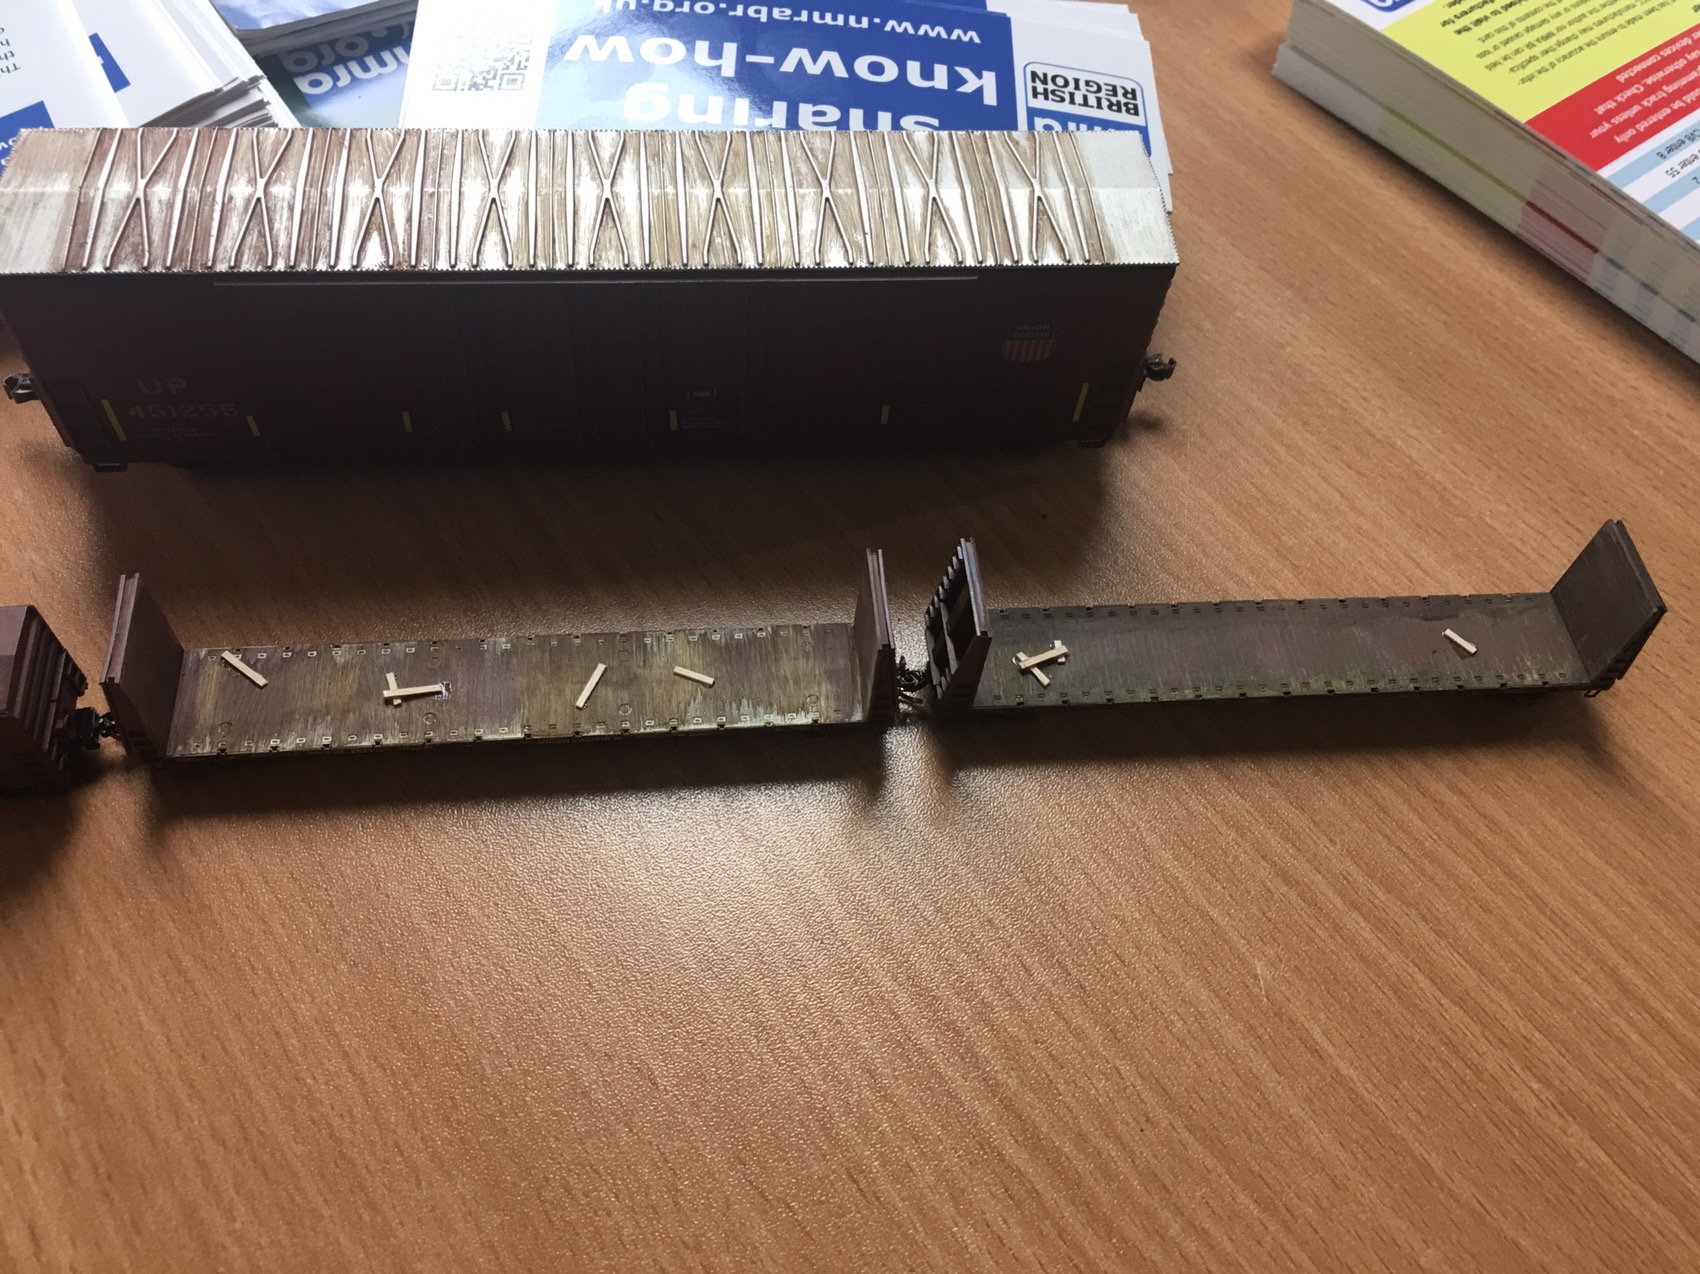
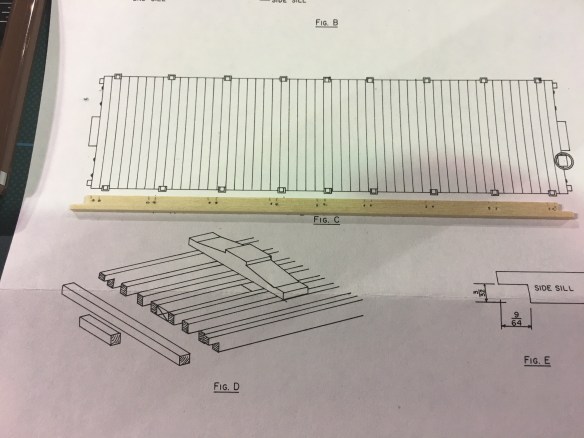
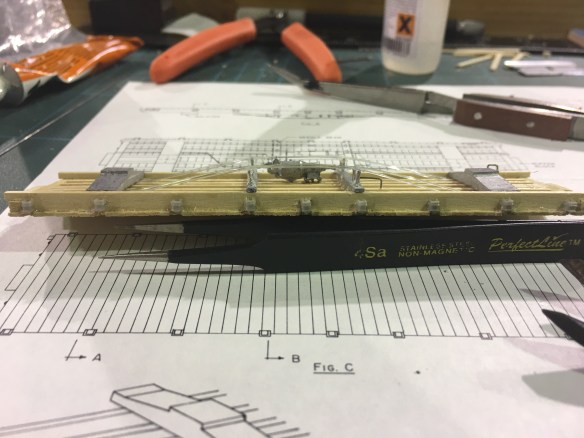
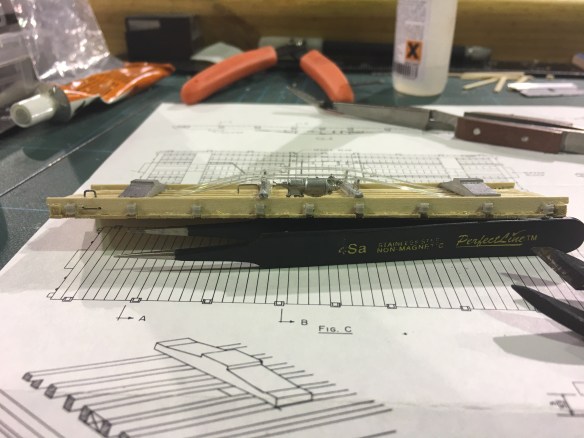
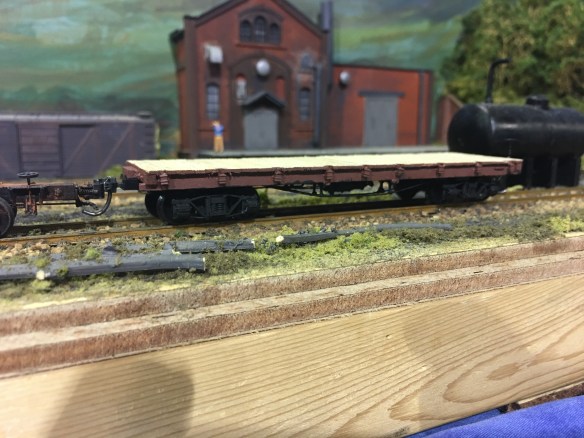
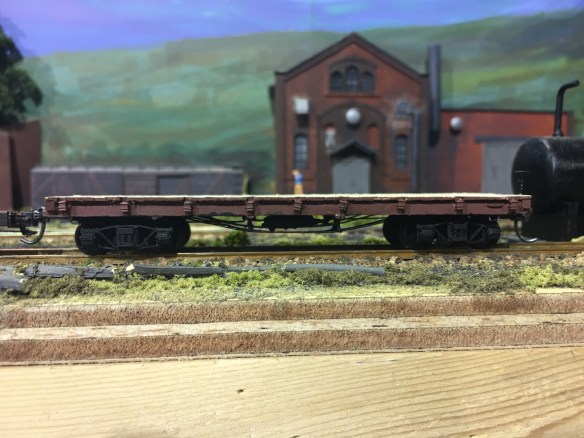
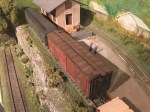
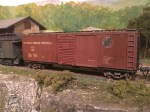
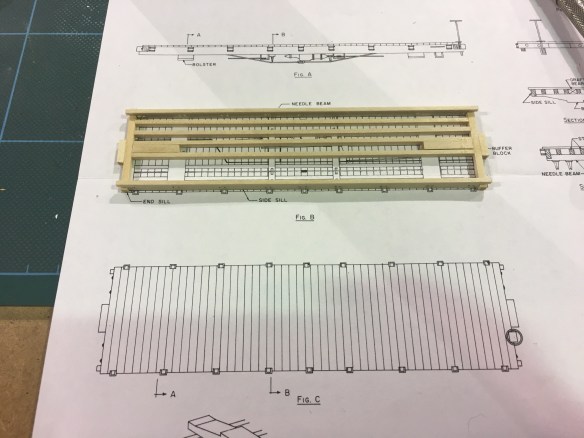
 

NMRA Convention 2017 – Diary – Day 2

The NMRA Special Forces

So after Day 1 being really quite action packed lets see what can happen during Day 2, I had been busy on the NMRABR facebook page of which I am one of several admins, posting about the event so i was going to be out early anyway but starting Modelling with the Masters at 7:30am and running back to back till 10pm these MMR’s are tough! Like the special forces of the NMRA that they are, they just don’t stop.

Modelling with the Masters – Building a Plastic Structure & Painting with Acrylics and Pan Pastles

So whats did I have instore today well it all started with a clinic on building and painting a plastic structure kit led by Fred Headon the NMRA Canada Director so for this blog entry we will use our U’s and S’s in the correct places.

So the chosen kit is a City Classics house, for this clinic we didn’t have a built sample for me to grab a photo of finished structure from their website.

So as with Day 1 I can’t give too much away here but, the clinic starts with the kit and then the MMR’s follow you through each step of the construction process. there are lots of helpful tips from the MMR’s in the room.

So ready for part two we have all the part primed and ready for painting.

Modelling with the Masters – Building Structures with Styrene

Jim Gore MMR, took the lead in the afternoon session with scratchbuilding in Styrene a great clinic that took a step by step approach to a subject that fills most modellers with fear and dread. So what are we trying to produce well here we go prepare to be scared just a little bit… ok I lie alot, here are Jim’s efforts.


So what do you start with, will Jim provided a sheet of .020″ styrene and a sheet of .040″ Clapboard Styrene with some trim sections and also some angle section for trim and stength. There was also comprehesive instructions, a bag of windows and doors and some simulated tar paper for the roof and lamp & stack detail.

This clinic involves alot of measuring, marking and learning to cut straight i can do the measuring thing but tbh cutting straight lines in styrene is a challenge. But if you take your time and make light cuts it turns out you can cut lets say straighter. The top tip I learned today was drill the corners of windows and doors as this stops the knife blade and helps you get nice square openings, ok thats the theory but it does help.

So here are my photos from this really fun little clinic.

NMRA Social Media

I have done the Social Media for the British Region of the NMRA for about 6 months and throughout the NMRA 2017 convention in Orlando I have been trying to put out updates on what has been happening. Just before walking into the PM MWTM clinics I bumped into Christina Ganzer the NMRA Marketing Consultant who was getting her hands dirty with probably the most scary project she could attempt but hats off to her she did a great job. Christina was a great classmate and it was a good opportunity to turn the social media lense onto someone who is in a hidden role for most of her time.

Other Photos from other activities at the convention


NMRA 2017 Convention – Diary – Day 1

Have you been to a National Convention before… no me neither but I have been to two regional conventions now and whilst they are awesome I wanted to come and check out the ultimate Model Railroad week.

So what about the venue, well in 2017 the convention is in Orlando, Florida on International Drive, you can’t get more going on in one small space unless it was in Las Vegas and I don’t think anyone could afford that. So theres lots to do and lots for familys to do, but what about the train part of this.

Well when I registered I was given a bag, yes a sholder bag no less, full of information about the local area, future events and the most important part of the bag was the convention timetable.

IMG_7044[1]

So i must have seen 90% of people who have clearly been here before and know the drill, studying the timetable and reading the changes. Highlighters came out but for those of us not quite as prepared the organisers supplied a pen. So i started marking off what i was planning to attend, basically from Sunday through Saturday the programme is packed with none stop clinics, workshops, tours, socials and much much more. The week is going to be topped off with the National Train Show which takes place from Friday until Sunday.

Clinics

So at 1:30pm the clinics started, I decided more because I knew nothing about them at all to attend the ardunio clinic, the very very basics and thankfully it was exactly what it said on the tin. Thanks to Tom Gordon, for a clinic aimed firmly at those of us with no clue what an Ardunio was or that there were so many types and so many different bits of hardware, thankfully he saved us from the challenge of Coding, but there i a clinic on that later in the week.


Modelling with the Masters – Scenery by the Sqft

I have to thank Kathy Millat for recommending these clinics to me, I have done scenery before of course but there are always new tips and tricks we can get from working on a project together. So the first of these clinics was led by Peter Youngblood MMR. This two part clinic on scenery should result in something that looks like this.

IMG_7055

So that is what we are aiming for and this is what you start with:

IMG_7054

Now i can’t describe step by step how I worked through the steps to construct the scene shown above but I took a series of photographs below that show how I got from a pile of bits to the end of the first build session.


We finished this clinic at 11pm so that really was the end of Day 1.