Its a requirement of the AP Master Car Builders Certificate that you must build at least one item of passenger stock, that can be a passenger car, baggage/mail or express car. This can be scratch built or a detailed craftsman kit, after a year long search for a craftsman passenger car kit in the UK, I hadn’t found a suitable kit. I was grateful therefore to David Gunn MMR 240 who gave me a Labelle 50′ baggage car kit when I was lucky enough to visit his superb layout in Nova Scotia, Canada.
Labelle have a great how to guide on their website that shows what is involved in building one of these great classics click here
So where to start? well first thing you should always do before you build a kit is read the plans & instructions. With the Labelle kit you get extensive scale drawings and written instructions. Start by identifying all the parts, you might need a rule or digital calipers as some parts in the same profile but varying sizes.
Here are the instructions included in the kit.
The first stage of construction is to add the planking to the car sides. Included in the kit are the pre milled car sides and scribed planking pieces that need to be cut to length and cemented to the sides, being careful not to waste any planking material as its needed for the doors and floors at the end of the cars. I used masking tape to keep the planking square until the glue sets, then trimmed the over hang at the bottom of the car.


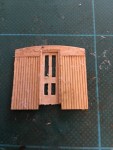
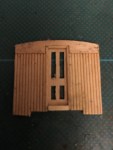
Once the sides are compelte set aside and start to work on the passenger car ends. Again these start with a flat milled end piece that stripwood is added to build into 4D passenger car end. As this is a baggage car there is only a solid door in the car ends, passenger cars have a pair of windows in the car end walls either side of the door.
-
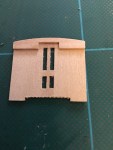
- Step 1
-
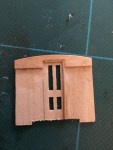
- 2 Adding the door frame
-

- 3 completed frame
-
- 4 planking detail
-
- 5 door sill
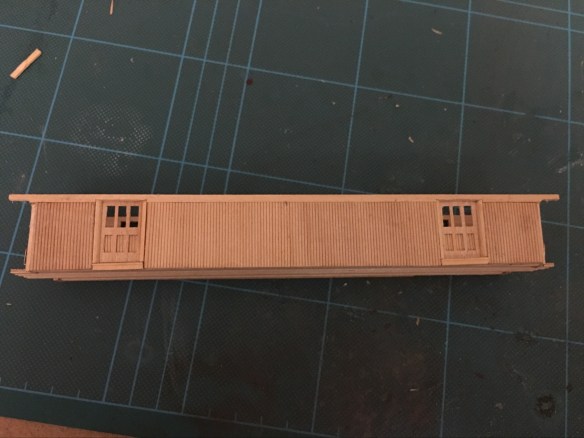
After completing the other end I had 2 sides and 2 ends so it was time to assemble the body of the passenger car to the car floor. Once the four sides are attached to the floor and each other the car body is completed with a section of 1/16th 1/4 round on each of the four corners.


Its now time to add the baggage doors and this is done by adding planking details to the bottom of the doors and then adding 1/4 round door edges before finally finishing the doors with door sill.
its now time to start building the end rails, these are a white metal casting that fit into a moulded wood component that needs to be drilled for the stations to then be slotted in. At this point its also important to add the scribed plank detail to the vestibule floors.


And so on to the roof, I am not going to lie this whole part of the project terrified my, I am no woodworker and sanding the ends of the roof round is a one shot process. If you order your kit from Labelle you can have them round the roof ends for you for $14 (website checked 7/2017), if you are as bad a wood work as I am then its well worth the extra dollars. So lets look at the process, the first thing I needed to do was to add the window detail within the roof. This is done by adding the supplied roof length strip of wood with cut out windows, this is secured to the inside of both sides of the roof, this gives rigidity so do this before sanding the roof ends. Next using lengths of strip wood from the outside of the rood add the window frame detail.


So now the the really scary part, sanding the ends of the roof. The kit instructions call for making a template from cardstock and then using this as a guide when sanding well. I didn’t have any card stock to hand so I used the included scale drawing and marked the points on the roof where the roof curve starts and ends. Then using a sanding block and some 150 grit sand paper I started to remove the material from the roof ends, I finished the ends using 600 grit sand paper.
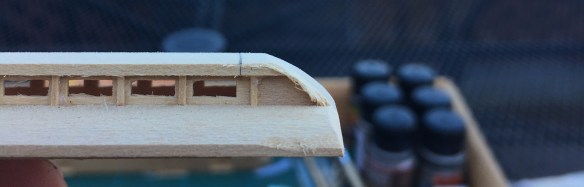
Once i as happy with the roof end it was time to make sure that I replaced the trim that had been removed from the edge of the roof during the sanding process. I used some supplied 1/8 x 3/8 strip wood which i cut to length and glued to the end of the roof, this was then sanded to match the roof end profile.


I now mated the roof with the body to see what I had before starting on the under frame, this allowed me to better line up the body and roof with the supplied scale drawing.


So now back to hand rails the baggage doors each needed a vertical hand rail on the door frame of each door. These were made from .15″ brass wire supplied in the kit.


Now it was time to start on the essential parts of the car that people usually cannot see. the under frame, I first added the bolsters, before adding queen posts, truss rods, steps brake details and finally the trucks. The trucks were becoming a real headache for me and had actually stopped work on the project for a number of weeks, until I found a second hand Roundhouse 50′ business car kit for £6 at a local train show. Once suitably modified they were perfect for this model.


With all the under frame now completed I added the hand rails to the ends of the cars and also added the steps. The step castings needed a lot of cleaning up and also cutting to fit the under frame but once fitted the car is very close to being completed.


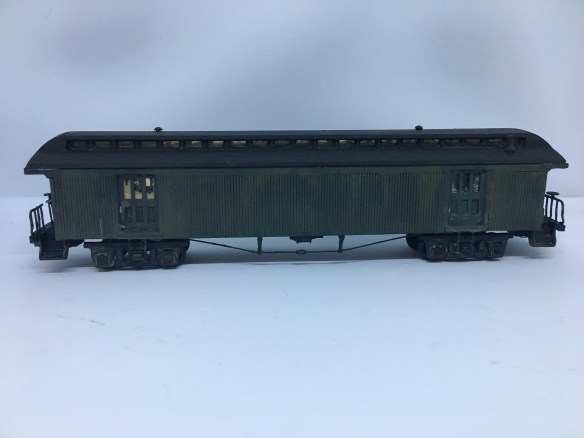
With the roof back on the check fitting i then added the number boards to the roof ends, the stove pipe and kadee couplers. The passenger car was ready for a trip to the paint shops.
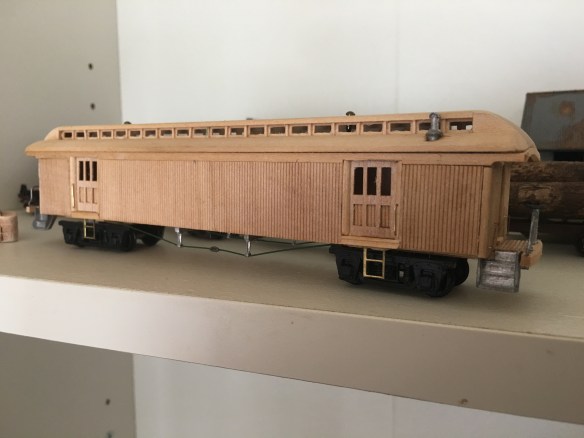
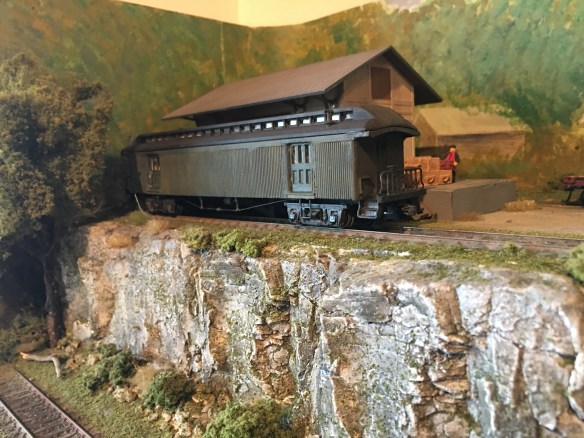
I used Revell Aqua acrylic paints for the body of the passenger car and used Tamiya flat back for the underframe and roof. The car was then weathered using various shades of AK streaking grime to give that back woods weathered look. A hint of rust was added to hand rails and the stove pipe. To complete the model I added the glazing, some weight and tacked the roof in place with 4 small spots of CA in case I need to remove it later.